by bungalow101 | Dec 20, 2022 | Doing it the right way
 It’s not easy to stay healthy when restoring an old house. Increased demands on your time, your finances, the toxins in the materials you will demo & install, & the stress of making constant decisions, facing too many surprises mean that to stay strong, you need to maybe spruce up your lifestyle choices to compensate. And maybe you have to do this without no kitchen!
We already know that I think I’m everybody’s mother, but hear me out because I know some stuff. I learned it from my mother who learned it from her mother who, yep, learned it from her mother. I hail from a long line of totally badass women!
I also tend to be a bit of a natural health geek. As stated, I come by it honorably, but I also just tend to be a problem solver with a great deal of curiosity & a little help from my friend Dr. Google. In addition, I enjoy helping people so I have made it my business to learn things that I feel will benefit others. (Little boasting here- I got 35 lbs. off my formerly chubby hubby & got his 70 year old blood work looking like that of a 20 year old.)
PIGS & OLD HOUSES
 My grandmother, Sarah Emmeline Martz was a farmer’s wife who cooked for her family every day & tossed the slop to the pigs. During one season of household sniffles she noticed how healthy the oinksters were, compared to her own family, & considered what was in that slop. What she noticed was that she was giving the piggies the outsides of the food- the peels, the parts that grew in closest contact with the soil of her garden. Being a farmer’s wife, she knew where the nourishment for plants came from- the soil- & wondered if maybe she was throwing out the most nutritious part of her family’s food.
Decades later, my mother considered it a criminal act to use a peeling device. During my childhood I heard daily, “That’s where the nutrition is!” And tell us once again the story of Sarah Emmaline & the pigs.
Foods are the building blocks of our bodies whatever health problems we are experiencing or wanting to stave off are generally caused by inadequate nutrition & can be solved with making sure that we get sufficient nutrition. Recent scientific discoveries in labs all over the world as well as clinical trials have supported this belief and explained why it is true. It’s not just moms!
SO, HOW DOES FOOD SUPPORT LIFE?
 The answer is in the beneficial tiny living beings – microorganisms- that live in and on our bodies, especially our guts. Each one of us harbors a unique set, our own community of microorganisms- our microbiota- microscopic life. Our own, personal microbiota, our own group of microorganisms differs from that of any other person as much as our own fingerprints do. The effects of our microbiota on our bodies, are diverse & profound. I am going to concentrate on the microbiota living in our guts to address the subject of how to stay healthy when restoring an old house.
I have a YouTube playlist that has a great deal of information on this subject as well as many tips on how you can stay healthy when restoring your old house. I have attempted to include only videos that provide an introduction to the subject, but some of them may use medical term that yu have never encountered. If this is the case & you’d like to learn more about the subject, contact me & I will send you the glossary of terms that I created for myself when I was doing my own study on gut health. I am just a student myself, but I think that I have made it all the way to second grade!
HOW MICROBES HELP US STAY HEALTHY WHEN RESTORING AN OLD HOUSE
Here are some of the relationships that have been found between us & these microorganisms:
- Mental soundness- in addition to increasing of energy for working, taking care of our families & running a construction crew, microorganisms directly affect mood. The gut is described as being the “second brain” & the imbalance of microorganisms is directly correlated to such things as insomnia, anxiety, depression & our reaction to that $14,000 bid.
- Balancing hormones- These microbes control the endocrine system, and support or inhibit hormonal harmony, including estrogen, insulin & thyroid. This is especially important as we age, approaching menopause & beyond, when our endocrine system is especially taxed. The endocrine & the nervous systems work together to keep us sharp & jolly.
- Increase energy levels- By helping us absorb & utilize nutrients & to get rid of toxins, energy levels improve, allowing us successfully take on challenges such as getting that $14,000 bid to rebuild the chimney.
- Immune system- microorganisms help our bodies fight off disease by defending us from pathogenic (disease causing) organisms as well as allergens. They are the super women of the immune system.The demo process involves exposing & propelling allergens & pathogens into the air YOU BREATHE. Dust, mold, insect & animal droppings- it’s all there. (And don’t forget that PPE. You’re living on a jobsite.)
- Reduce yeast & urinary tract infections. The good bacteria once again save the day by preventing disease causing bacteria from adhering to the bladder wall. I hate to be indelicate, but for those times the only bathroom bathroom is being reno’d…And incidentally-
- Weight control- Scientists in labs have created obese mice from normal sized mice by giving them microorganisms (tiny living organisms) from obese humans, & have created lean mice by giving them microorganisms from skinny folks.
- Research has shown that a proper balance of microorganisms in the gut contributes to weight loss. What’s in your gut determines how you will process calories & how you will store them.
- The heart – Having a healthy gut allows cholesterol to be excreted by the bowel instead of accumulating at high levels in the bloodstream.You can see that these are some active critters, helping you to stay healthy when dealing with the rigors of renovation! I have a YouTube playlist that has a great deal of information on this subject as well as many tips on how you can stay healthy when restoring your old house.

STAY IN THE BUNGALOW KNOW!!!
Sign up for our newsletter & receive our FREE E-book, 7 VITAL Things to Do Before You Hire a Contractor.
by bungalow101 | Dec 18, 2022 | Kitchens
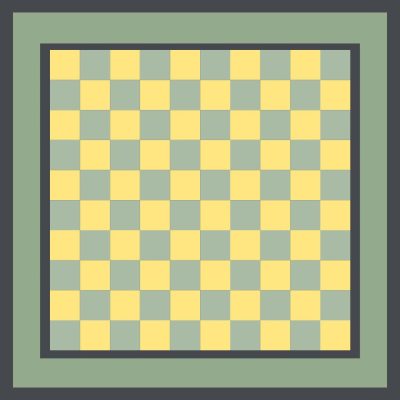
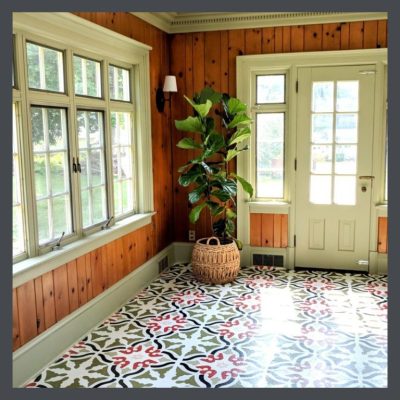
 The reason I’m even proposing the weird idea of painting a bungalow linoleum floor is because lino wears out. Through decades of footsteps in some of the highest traffic areas of the house, roller skates & doggy toenails, abrasion can annihilate the printed pattern leaving you with a rough, gray surface. Even worse, age can uncover sections of the jute or burlap base, & even one layer down, the mastic that glued it to the subsurface. Adding to the delight are the ineradicable stains of unknown origin. (A whole chicken maybe? They are dang slippery.)
Sadly, the lino patterns you see in Jane Powell’s book, LINOLEUM, are no longer manufactured. Twenty-five years ago, you could pay a ridiculous amount of money for a roll of new old stock but the supply of this too went the way of the dinosaur. I used to visit Linoleum City in Los Angeles to drool over their old lino collection. No mo’.
You may have a floor that is just suffering in a more highly trafficked area, but have some pattern left in other parts of the floor. Should this be the case, you can just touch up the rough areas with acrylic paint to match the existing pattern, & clean & wax your whole floor.
But, at a certain point, a lino floor is over. O-V-E-R. The pattern on mine was entirely gone. It was just a sea of dirty gray. While I relentlessly advocate for preserving historic materials, a kitchen floor needs to be cleanable & even with a good scrubbing followed by waxing, (I tried it, fingers crossed that I might at least get some improvement. Nah. Still gray, rough & grotty as heck.) mine was nasty. There was nothing left to coax back into utility, let alone beauty.
So what’s a lino loving bungalow girl to do?
MY BUNGALOW LINOLEUM FLOOR SOLUTION
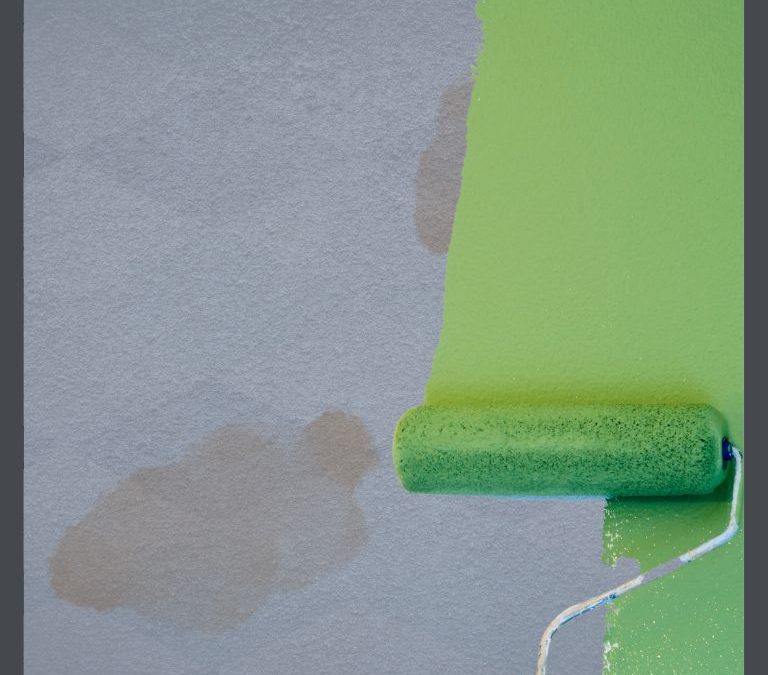
 In 1980, I had noticed that any paint I got on the very old & worn (& hideous & impossible to clean) lino floor in my rented bungalow, was too stubborn to remove, I thought, “Gee, I could paint this puppy!”
And I did.
It was very inexpensive to do (a prime consideration, for a vintage clothing store proprietress) & a piece of cake. It was also a very fun project because it quickly changed something scary & germy to something lovely & safe.
The finished product looked great, was very easy to clean with my duster & my sponge mop, held up beautifully & looked perfect with the faux lino floor cloth I had made. I felt like if I were to drop a piece of food on it, or my cat were to cough up a big hairball, they would no longer become permanent, rotting parts of the floor! (Euwh!)
THE MANY CAVEATS ON PAINTING A BUNGALOW LINOLEUM FLOOR
 Even though I had done this process successfully, material formulas have changed radically in the past 40 years (bad) due to environmental concerns (good). Additionally, having painted no design to my 80’s floor, I had ended up with a very flat paint surface. (I used a stenciled canvas floor cloth to make a faux lino rug to fancy it up.) And, I was married to a chemistry major who had sanded & coated 1,000+ floors & was using perfectly calibrated, state-of-art equipment. I’m thinkin’ that maybe you don’t have someone living in your home with these qualifications, nor this equipment (though I’m sure he has his own fine equipment.) So, I wanted to check out these aspects with Earl, my tech guy at Ben Moore, for advice on the painting of a bungalow’s linoleum floor. Earl immediately said, “Don’t do it.”
I’m a flooring professional so I lack the dewy optimism of the inexperienced. I have seen floors peel, scratch, bubble, pretty much perform tragically in multiple ways, so I always err on the side of caution when dealing with any new material or process. I read everything the manufacturer says in their tech materials. I follow that with a question- filled call that usually gets me transferred from customer service to the tech guys. This is why I love Earl. He’s a tech guy who works the customer service phones. A jewel!
Here’s why he said this & also why the article doesn’t just end right here.
IT’S ALL ABOUT THE BOND
 You are about to become a paint expert. This will serve you well as an old house owner because this is not the only time that you will be dealing with applying paint. And if you want to know more, you can go here.
Adhesion is always an issue, especially in high-traffic areas. My husband chemically stripped the floor & then scuff sanded the very old linoleum in our bungalow kitchen to remove any materials that might have been applied to it, such as my freshly applied wax (Oops!) & also any cleaning materials that might have left a residue, in order to prep for painting. He then, using 180 grit paper, sanded off any dirt that was ground into the surface & give it some “tooth.”
Tooth is desired when you wish to create a mechanical (as opposed to chemical) interlocking/bonding of materials, i.e., the paint & lino marriage. So, you scuff the lino to create tiny cavities (tooth) on its surface to increase the contact area. The wet paint you apply then displaces any air between the paint itself & the lino & the 2 lock together. I definitely had a tooth advantage with my old lino because it was OLD, & hadn’t been smooth for decades.
A mechanical bond is not as strong as a chemical bond & herein lies the fragility of your floor.
Let’s also talk about chemical bonding when painting your bungalow linoleum floor, because you’re going to be forming those bonds too when you paint it.
THE 3 COMPONENTS OF PAINT & WHY YOU NEED TO KNOW
Most paints have 3 main components called the pigment, the binder, and the solvent.
The pigment is the color chemical in a paint. Binders are incorporated to glue the pigment particles to each another, & also to make the particles stick to the surface you’re painting. Solvents, not surprisingly, dissolve stuff. This material makes the pigment & binder into a thinner & less viscous (more easily flowing) liquid so that it will spread evenly. For the purpose of ease on your own self & ease on our fragile environment, I am going to suggest the use of water-based paints, in which the solvent is water.
A couple more concepts you need to understand are drying & curing. If your room is well-ventilated, your paint will feel dry to the touch within minutes after application. However, it is dry only on its surface. Curing, the evaporation of all the water (binder) in the paint can take days. The 2 types of bonds determine the steps that you will do as you cruise through your painting process.
 If you apply a second coat on when your first is just dry to the touch- not cured- you will get a chemical bond between the 2 coats. As the water (binder) evaporates, the like chemicals of the pigment & the binder will be attracted to each other & form what could be considered a single coat. It’s a very strong bond.
It’s why your nail polish peels down to the nail, instead of peeling in single layers.
What this means is if your weekend project goes into the next weekend, your paint will be too dry to form this chemical bond with the next coat you apply, so, you are going to need to give the original coat some “tooth” in order for your next coat to adhere with a mechanical bond. That mechanical bond is achieved with a bit of scuffing, so that you aren’t going in on top of such a smooth surface.
This is a kitchen, the most heavily trafficked room in your house, & yeah, you need to do it right so that it will take the wear. If you take all the right steps when you apply the materials the first time, you are much less likely to have problems later on.
WHY I’M CONTINUING ON DESPITE BEN MOORE’S ADVICE & A TON OF CAVEATS
A. My advice is for real linoleum only.
B. If you want to paint a new lino floor, that you will install to paint, realize that it is risky. It’s not an inexpensive material, & the labor to install it is pretty pricey too. Most importantly, new lino is made with a coating that repels, well, anything you wouldn’t want to stick to. For you, I’m am recommending that instead you choose cool patterns in cut linoleum that are fitted together like a puzzle to make your overall design. You can see an example of what can be done here.
C. If your floor is old & funky as mine was, prepping it thoroughly to create a proper bond, you can improve its look & functionality greatly. How long will it last? Who knows?
D. I’m assuming that you are performing all the testing that you need to on existing materials for asbestos & lead, & mitigating as needed. Let’s talk about asbestos. In this article by Bob Vila he talks about asbestos in linoleum. Give it a read before you start.
E. For every product that you are using, you’re studying your Safety Data Sheets & using correct PPE correctly.
SO HERE’S HOW TO PAINT YOUR BUNGALOW’S LINOLEUM FLOOR
 0. Mend any boo-boo’s. I am not going to try to teach you to do this because I have never mended a floor. I am going to suggest some links of pages that look like they might know what they’re talking about.
Wisconsin Historical Society
They tell you a brief history of the development of lino & give you instructions of fixing problems. This is not the only method, so here’s another one.
Porter’s Environment & Cleaning Services
This one addresses rips & tears.
ehow
This one is about how to tack down curling edges.
Week&
In this one you learn how to patch whole areas that are missing.
1. Choose your pattern & your colors. Think about coordinating your floor with your curtains. If you are going to stencil your curtains, or even if you’re not & you’re looking for pattern ideas, head on over to my article on window treatments where you will find links to vendors of lovely A & C stencils. You can use my article on choosing paint colors if you need any help. The reason I say this is because your stencil colors are more limited while a trip to Ben Moore will yield any custom color that you could possibly desire.
2. Jane Powell’s LINOLEUM has some amazing vintage patterns in it, for inspiration, or just to out-&-out copy them. You can use a simple graphics program, building it layer by layer & employing their graph feature to transfer it to real life
3. Zip on over to WELCOME TO REALITY DAYDREAM where Beth has it all figured out. I am not about to re-invent any wheels! She says that the paint on her floors is holding up well 4 years after she wrote the article, so she must know something!
TIP: Should you not be convinced of the utter coolness of lino, watch these videos.
STAY IN THE BUNGALOW KNOW!!!
Sign up for our newsletter & receive our FREE E-book, 7 VITAL Things to Do Before You Hire a Contractor.
by bungalow101 | Dec 10, 2022 | Preservation groups, The History
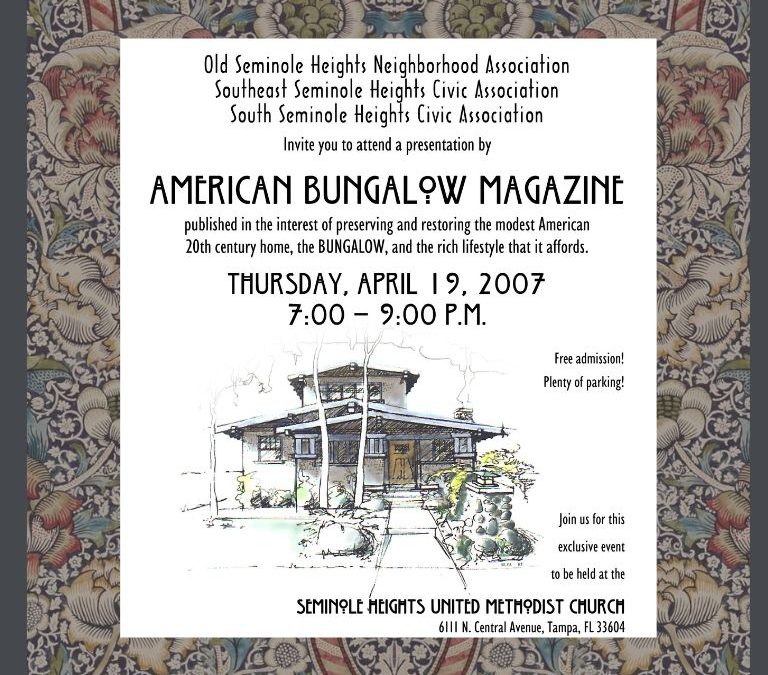
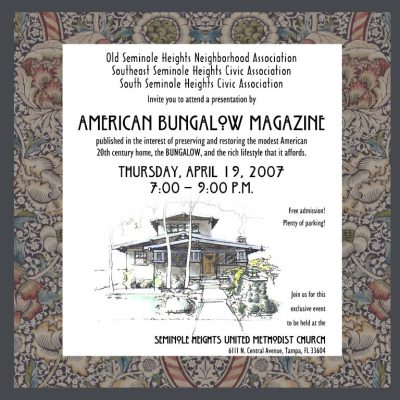 What seems like a lifetime ago, with a great amount of help from my friends in the 3 areas that make up the bungalow neighborhood of Seminole Heights, in Tampa, Florida, I produced an American Bungalow Magazine event. I had coaxed, cajoled, pleaded with the editor to have genius photographer, Alex Vertikoff come to Central Florida to shoot our houses. I coordinated with 4 other neighborhoods in Tampa, St. Petersburg & Lakeland to make it worth their while to drive all the way across the country. Publisher John Brinkmann came to speak to us at a wonderful event in our historic church.
I had been a devotee of American Bungalow for a number of years. They had attended our first home tour in Eagle Rock & published a beautiful article on the Hanson Puthuff house, displayed on the poster to the left.
In my Tampa neighborhood, I enjoyed the privilege of being the magazine distributor. Every quarter the magazines would arrive in a big box, & I would peddle them around the neighborhood at events & meetings & deliver to people’s homes when requested. It was a great way to meet folks, educate Tampa on historic houses & support the valuable work of the magazine.
 The neighborhoods pitched in, volunteering their bungalows for the project. I recruited writers for all the articles & each author (or group of authors) gathered material & researched their areas.
My neighborhood, Seminole Heights produced some beautiful houses & the authors encouraged a woman who had lived in the neighborhood in the early years to tell her story- A Place to Grow Up. Her sweet childhood voice & photos brought those times to life. I am lucky enough to have another story from her to tell you here, Childhood Pets in My Bungalow Neighborhood.
The article tells the story of how the neighborhood association began- a response to the threatened destruction of many bungalows along one of our central corridors. By the time I arrived 25 years later, it was a powerful force for preservation & revitalization. When I say, “Do something about it,” I have seen firsthand what can be done by a group of committed citizens.
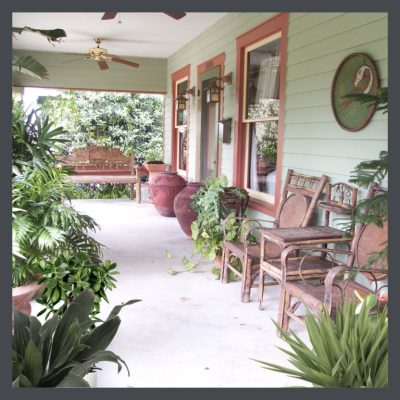
The neatest part about the article occurred when the editor sent me a proof & there was my front porch in a 2-page color spread opening a piece in my favorite magazine, American Bungalow! There were a couple shots of my living room too, but they were pretty small. Finally, at the age of 60 my dream of being a centerfold was realized! And it was one that I could show my mother!
AMERICAN BUNGALOW MAGAZINE VISITS A HISTORIC FARMHOUSE IN YBOR CITY
 In the center of Tampa is a farm with a bungalow farmhouse, built by Sicilian immigrants, Salvatore & Vittoria Giunta, who arrived in Tampa in 1907. Peasant farmers, they hoped for a better life for themselves & their children in American. Work was plentiful in Ybor City in the cigar factories & farms & they worked at a variety of jobs, saving money until they could buy land. Self-sufficient, they raised heirloom vegetables & herbs with which they fed their family & sold the surplus to supplement their income. At one time, this area, now residential was dubbed “the breadbasket of Ybor,” providing food for up to 10,000 cigar factory workers. After time they purchased more land & in 1924, the house was built just in time for the family to enjoy their Christmas together. The farm up to this day, almost 100 years later, is still being worked by the two granddaughters, who live in the old farmhouse.
Though the farm is a prime piece of property in a very desirable location the sisters stand firm against offers from developers & in 2020, City Council agreed with their request to designate the farm a historic landmark offering some protection against future development. Please watch this beautiful video to learn more about the history of the family & the farm & best of all, to meet the sisters.
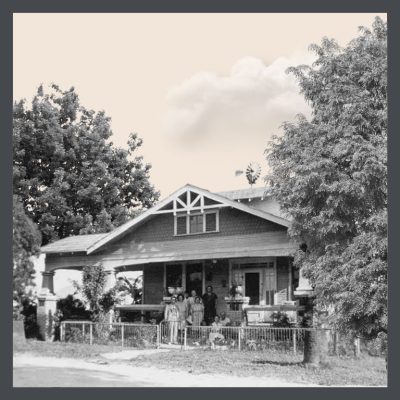 Make no mistake about it. This is a farmhouse. The floors are not glossy quartersawn oak but are covered with linoleum & the usual Stickley pieces that you see pictured in American Bungalow are not in evidence. I spent 2 days helping the sisters stage the house for the shoot (No, Alex didn’t know about know this!) I pulled all the family antiques- a charming deco armoire, an old tricycle, a child’s chair, from the bedrooms & arranged them in the family gathering room off the kitchen. A century ago. their father had made a wooden boat to sail down the flooded Tampa streets, & I pulled it from a closet & had a shelf built for it to be mounted over a quilt-covered chair in the corner.
In the kitchen sits a “Nana cabinet,” a traditional Sicilian piece in which were displayed the china, glassware & collectables of the grandmother of the house. This one was built by her son of recycled materials—wood slats from apple crates, curved glass sides from a discarded retail display case & the best part- it is topped with a decorative crown from an old circus wagon offered by a friend who just didn’t think that the cabinet looked complete.
The pieces were just stacked in the cabinet, with no attempt to display them. We spent several hours removing the items, carefully placing them on the kitchen table. I returned them one by one, showing each one to full advantage. These pieces hold the memories of family dinners of 3 generations & deserved to be elegantly celebrated.
The sisters are not artists. They are revered teachers, beloved daughters, dutiful sisters & aunts & hard-working farmers. They were astonished at how I managed to honor their family by displaying their heirlooms & photographs artfully.
It was one of the most wonderful experiences of my life.
The morning after John’s event in my neighborhood of Seminole Heights, he & I went for breakfast at the farm. John toured the house & admired the fields, lush with produce whose seeds were brought from Sicily 100 years before. He played fetch with the farm dog & chatted with the chickens. He was honored to have met the Giunta sisters & honored them in return with a beautiful article in the magazine.
THE AMERICAN BUNGALOW MAGAZINE PHILOSOPHY
“…it’s not about how big you live, it’s about how genuine you live. That’s what the magazine stands for.” – John Brinkmann, American Bungalow Magazine
I was thrilled to be able to provide him with the opportunity to visit a family that had lived so genuinely in their farmhouse bungalow for 3 generations.
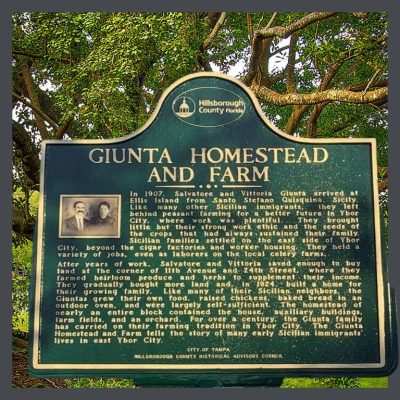 The plaque installed by the County reads:
In 1907, Salvatore and Vittoria Giunta arrived at Ellis Island from Santo Stefano, Qisquina, Sicily. Like many other Sicilian immigrants, they left behind peasant farming for a better future in Ybor City where work was plentiful. They brought little but their strong work ethic and the seeds of the crops that had always sustained their family. Sicilian families settled on the east side of Ybor beyond the cigar factories and worker housing. They held a variety of jobs, even as laborers on the local celery farms.
After years of work, Salvatore and Vittoria saved enough to buy land at the corner of 11th Avenue and 24th Street, where they farmed their heirloom produce and herbs to supplement their income. They gradually bought more land, and in 1924, built a home for their growing family. Like many of their Sicilian neighbors, the Giuntas grew their own food, raised chickens, baked bread in an outdoor oven, and were largely self-sufficient. The homestead of nearly an entire block contained the house, auxiliary buildings, farm fields and a orchard. For over a century the Giunta family has carried on their farming tradition in Ybor City. The Giunta homestead and farm tells the story of many Sicilian immigrants’ live in Ybor City.
TIP: READ MORE ABOUT MY WILD PRESERVATION LIFE HERE.
 STAY IN THE BUNGALOW KNOW!!!
Sign up for our newsletter & receive our FREE E-book, 7 VITAL Things to Do Before You Hire a Contractor.

by bungalow101 | Dec 9, 2022 | Doing it the right way
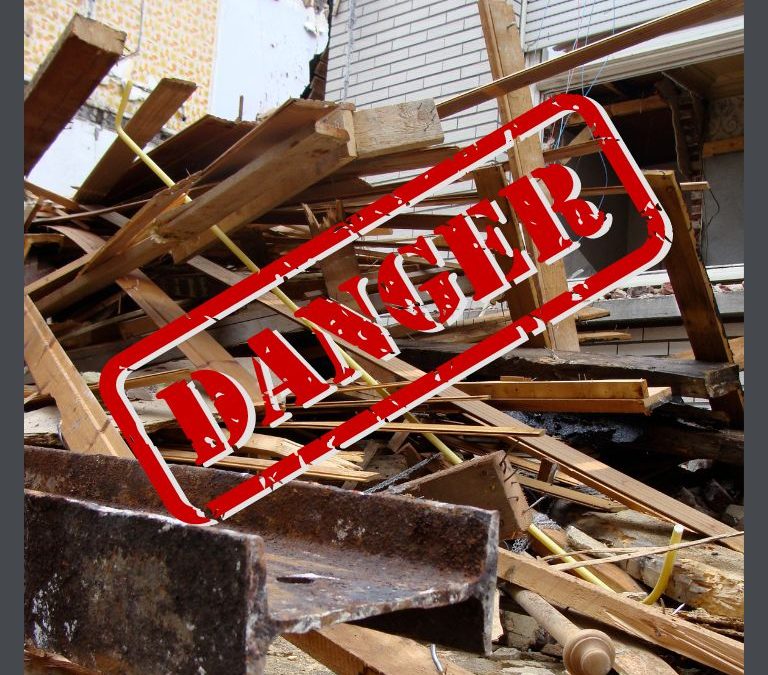
 The dangers of restoring an old house can be considerable, but with proper planning can be minimized. Let’s take a look at the actions required.
A contractor has been hired to begin the restoration of your home. You have discussed your staying in the house while the work is being performed & you have figured out how to do it despite the inconveniences. But what about the dangers to which you might be exposed?
The fact of it is that you will be living in a jobsite, in the middle of sawdust, paint, solvents & other fumes. Some of these materials may not give you any warning signs of their danger- such as a bad odor or immediate irritation, so it’s a vital to understand the hazards to yourself, your family & to your pets (whom we know are family but I just want to mention them because they live close to the floor & they lick themselves.)
Fortunately, by law, all the dangerous materials that will be used in the restoration of your old house, have detailed, written safety information about them. These materials should be named in the bids you receive from contractors, & your contractor should be happy to provide you with copies of the safety information, but if he balks, (uh, not a good sign) you can get them directly from the manufacturer online.
SAFETY DATA SHEETS & THE DANGERS OF RESTORING AN OLD HOUSE
 OSHA (Occupational Safety & Health Administration) is a U.S. federal body whose mission is to “assure safe & healthy working conditions for working men & women by setting & enforcing standards & by providing training, outreach, education, & assistance.”
Their Hazard Communication Standard requires that each manufacturer, distributor, or importer provide Safety Data Sheets (SDS’s) for each hazardous material to users & workers to explain information on these hazards, clearly & thoroughly. The Standard requires that the information be presented in a consistent, user-friendly format.
Previous regulations did not mandate this standard & manufacturers did not use safety materials that were consistent one to the next. For example, some manufacturers labeled the most dangerous materials as a 1, others did the complete opposite, labeling the most dangerous as a 5. And, the data was not organized in a consistent fashion so you had to search the contents for the information that you needed each time. Some of these sheets contain multiple pages so you can see that these inconsistencies would not be helpful in an emergency situation!
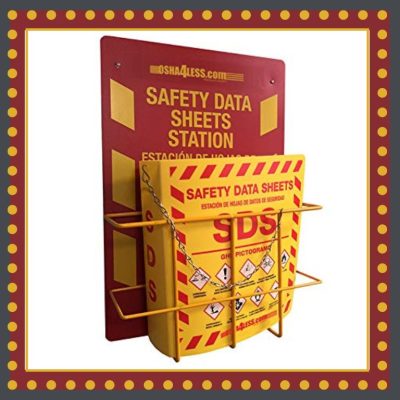 SDS’s tell users, both workers & homeowners, the properties of each chemical, what the hazards of the product are to the individual & to the environment. They let you know how to use the product safely, what will happen if the recommendations are not followed, & how to recognize symptoms of exposure. Very importantly, they lay out the steps of what to do if emergencies should occur.
Your contractor is required by law to keep these in the workplace & to train his workers on them so that they will know how to handle these hazardous materials to keep themselves & others safe. Fortunately, there are safety companies that create safety meetings that can be done in the field every week. Each one is a sheet of paper with the information on it that each person reads & signs off. Easy peasy.
This is the minimum safety training that a professional company performs in order to reduce the amount of dangers inherent in restoring old houses, for their employees & for you.
I do not recommend the hiring of any contractor or tradesperson who has a casual attitude, or who is ignorant of the importance of Safety Data Sheets.
THE SDS SECTIONS- FROM THE TOP
Lists the specific materials & names its intended use. It also provides you with the contact information for the supplier.
- Provides warning of the hazards of the material.
- Lists the all ingredients of the product.
- Describes the first aid treatment that would be given by an untrained person in case of exposure.
- Provides instructions for fighting a fire caused by the chemical.
- Gives instructions on dealing with accidental spills, leaks or releases in order to minimize harm to persons or property.
- All data about safe handling & storage.
- Lays out exposure limits with solutions for minimizing such exposure.
- Identifies physical & chemical properties associated with the product.
- Describes the various actions of the chemical constituents under various conditions.
- Explains the toxic & health damaging properties of the material.
- Describes the product’s environmental impact.
- Proper disposal & safe handling of materials & containers.
- Proper shipping.
- States the safety, health & environmental regulations that apply to the products.
- Dates of when the sheet was created or edited.
These sheets may be short & sweet but they also may be many pages long. Studying them is not an entertaining or amusing task, but it’s one to not overlook when you wish to mitigate or avoid the dangers in restoring your old house.
GLOBALLY HARMONIZED SYSTEM
The Globally Harmonized System (GHS) is an international system of hazard communication which provides a standard system to format safety data sheets & to label hazardous elements in pictograms.
Caveat: Updates are constantly being issued. All I’m trying to do is let you know that there are are things on which you need to be informed. Use Google to stay updated & fully informed. This page is only to wake you up, not fully educate you.
PICTOGRAMS: a pictorial symbol for a word or phrase.

Hazard pictograms are used to warn us about the presence of a hazardous (to people &/or the environment) chemical. These pictograms appear in the shape of a diamond with a bright red border & a white background. Any single chemical could have one or more than one of these warning images.
If you should like to read more about SDS’s, Google OSHA Safety Data Sheets. They change the links quite often & I can’t keep up!
SORRY, THERE’S MORE
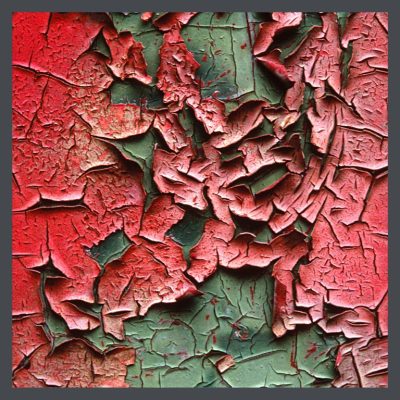
 The SDS’s are about only the new materials that are being used. There’s also the issue of the old materials coming out. Amongst these is our old buddy, lead. I’m not a fan as I have expressed loudly in this article.
There’s an abundance of other materials & pathogens to pay attention to during demo. This is a good article to prepare you for what you are very likely to encounter. I’d also like to send you to my YouTube playlist, SAFETY FIRST, which is an introduction to personal protective equipment.
The first one by the little animated woman with the cute English accent makes a good point. The equipment that is need is not task oriented. It must keep you safe in the environment.
Disclaimer: There is a great deal more information on construction safety than what you see in this article & in these videos. This is merely an introduction to the topic. I am not a safety professional. I’m just a woman who has suffered the ill effects of being around toxic materials & I don’t want you to experience the same.
THE REWARDS OF RESTORING AN OLD HOUSE (DESPITE THE DANGERS!)
The rewards are huge. You will be saving a piece of history that is beautiful & tells a story & you will contribute to that story. You will learn & teach your children problem solving skills, design skills, communication & cooperation skills, prevailing over horrible surprises skills, budgeting skills & give them the opportunity to apply the things that they are learning in school. Studying the SDS’s themselves & watching the videos is a great way to orient them to their physical environment & stretch those science chops. It’s also a good opportunity to teach them that there are dangers in the environment that can be overcome with knowledge & planning. A great lesson to learn early!
STAY IN THE BUNGALOW KNOW!!!
Sign up for our newsletter & receive our FREE E-book, 7 VITAL Things to Do Before You Hire a Contractor.
by bungalow101 | Dec 6, 2022 | Random Musings
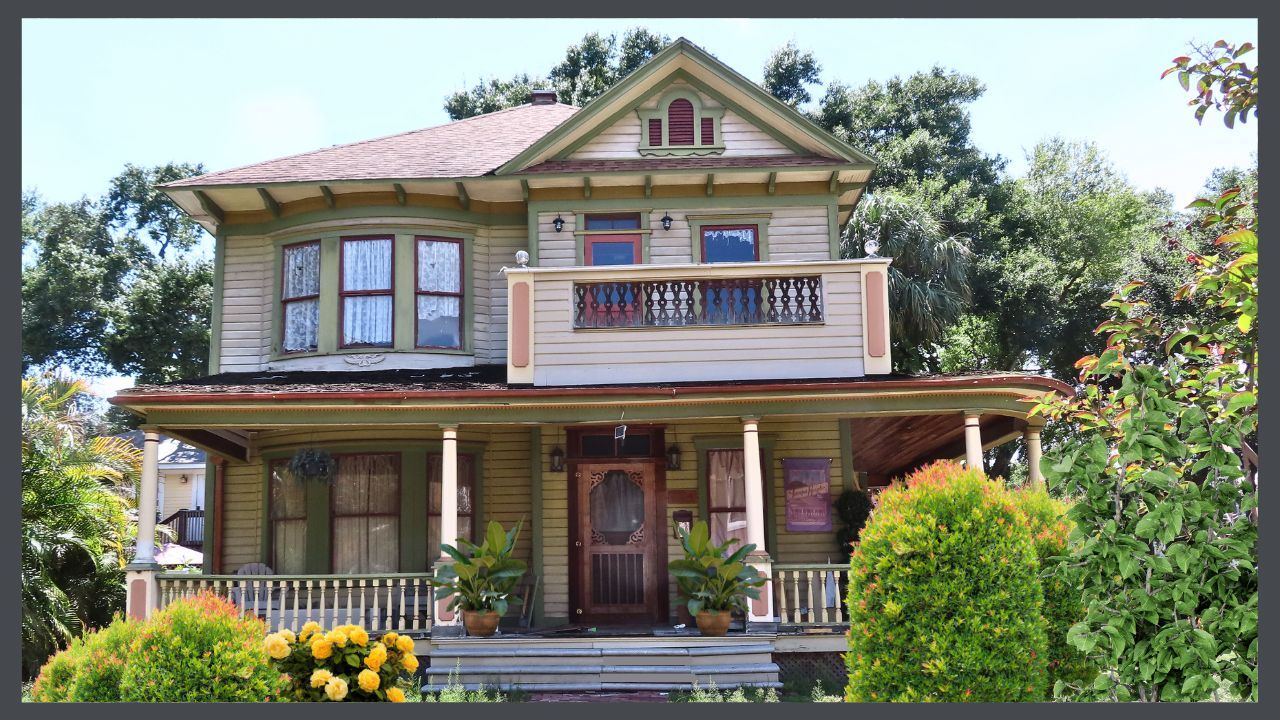
 Long ago, when feebly attempting to restore a Folk Victorian, I discovered that the biggest challenge of restoring an old house is battle fatigue. It’s extremely easy to get disheartened. I know I’m not your mother (Disclaimer: I think I’m everybody’s mother.) but I restored this miserable Folk Victorian & learned some great lessons. I had to, in order to survive! I also had to keep going so that I would lose only $50,000 instead of $250,000.
I started the restoration with a more experienced partner who thought it would be a great project & when it turned out not to be, of course bailed on me. And, not surprisingly, my contractor was a complete bozo who bailed on me too-a blessing in the end.
To make things even more crazy, soon after I purchased the property, the Recession hit hard so my wood flooring company lost over $30,000 that quarter as we feverishly slaved12 hours a day to keep jobs coming in & our guys’ families fed. And every dollar I put into the restoration, working on it in my non-existent spare time, turned into 50 cents. Kind of like black magic. The really awful kind of magic that turns fluffy little kittens into poisonous bufo toads before your very eyes.
WHY DID I TAKE ON THIS CHALLENGING OLD HOUSE RESTORATION?
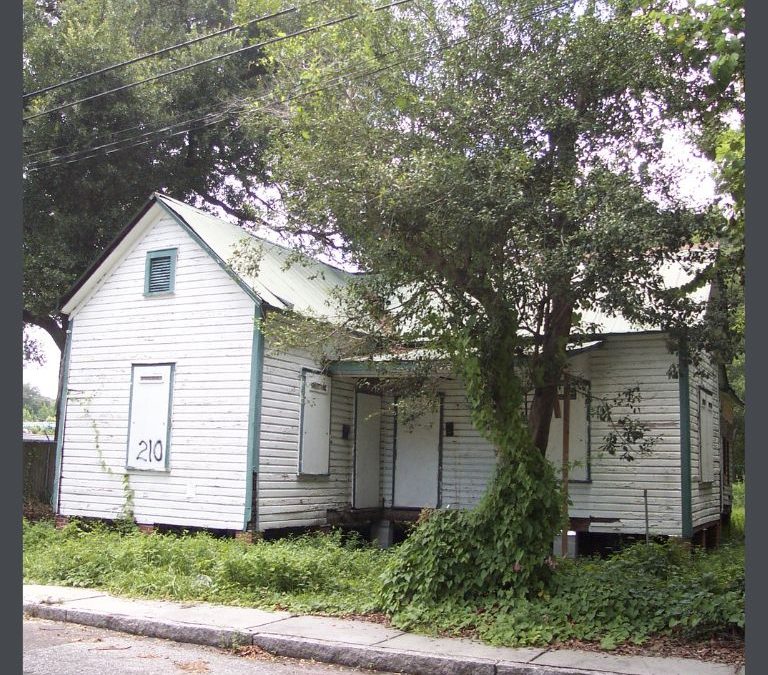
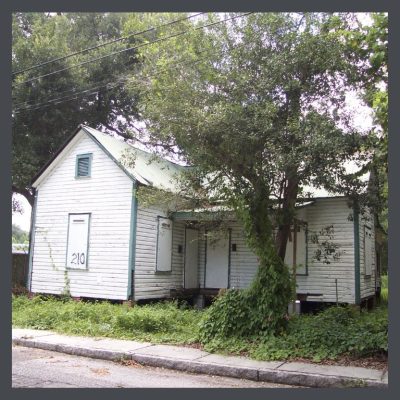
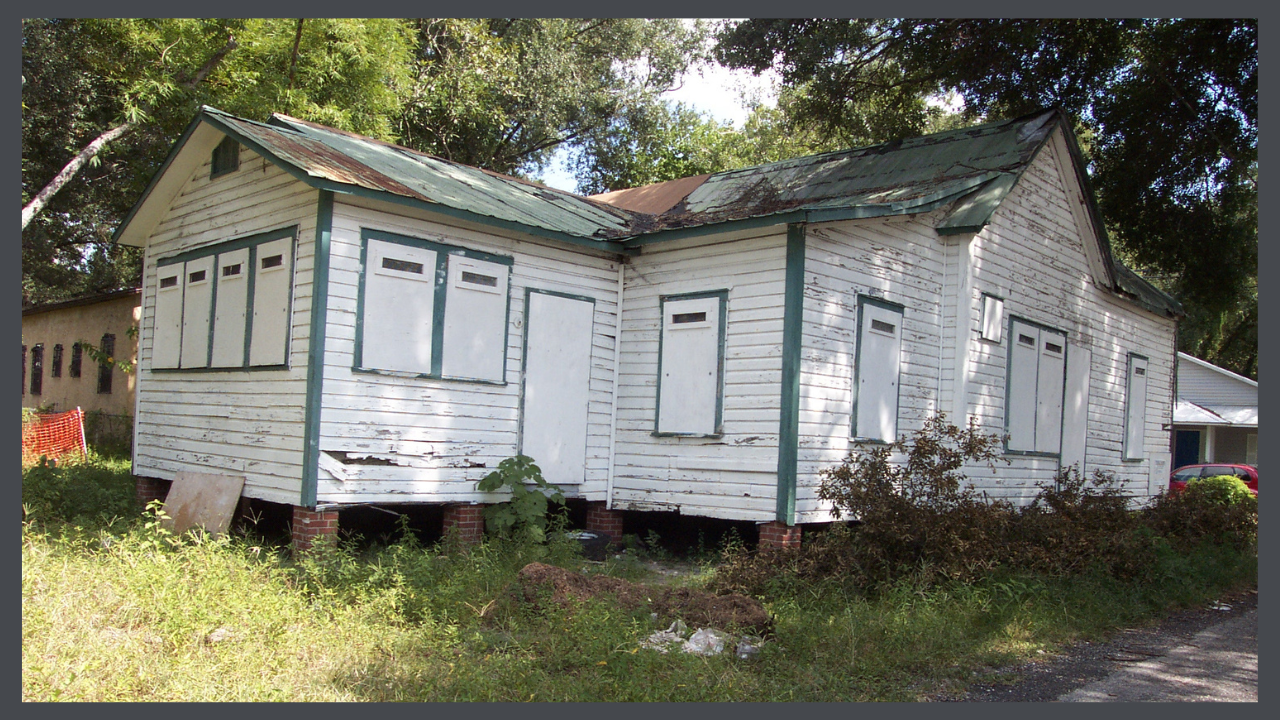
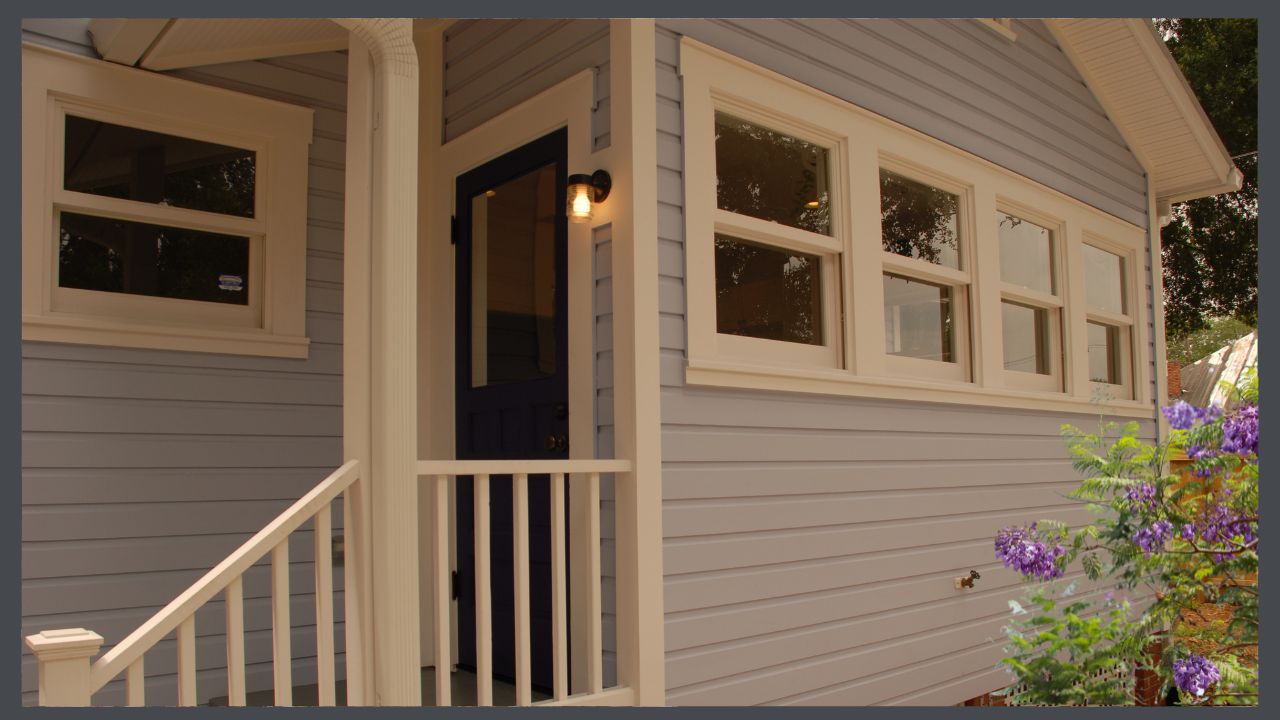
The wonderful neighborhood in which the house was located, Tampa Heights has a rich & colorful history as Tampa’s first suburb & boasts a large historic district. Most of the houses are lovely Victorians, bungalows, some Med-Rev’s with a smattering of Urban Renewal (Boo! Hiss!) infill. After decades of neglect & resultant blight, it has an active neighborhood association & I was eager to contribute to its revitalization. Additionally, I’d also never put my hands on a Victorian & was looking forward to dolling it up with periwinkle paint & gingerbread. However, the house was in bad shape & the challenge of restoring the old house was ridiculous. Yet, I continued on with the delusion that someday I would have a living room & a kitchen, looking out on the back yard, (which of course was nothing but a patch of tall weeds) like these folks had.
JUST HOW BAD WAS IT?
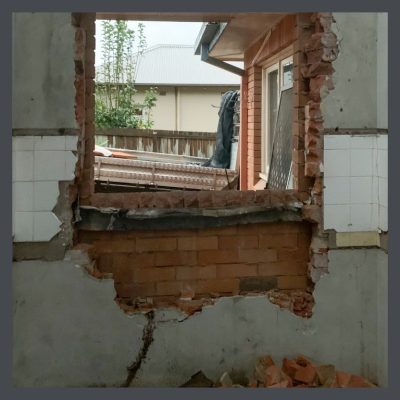
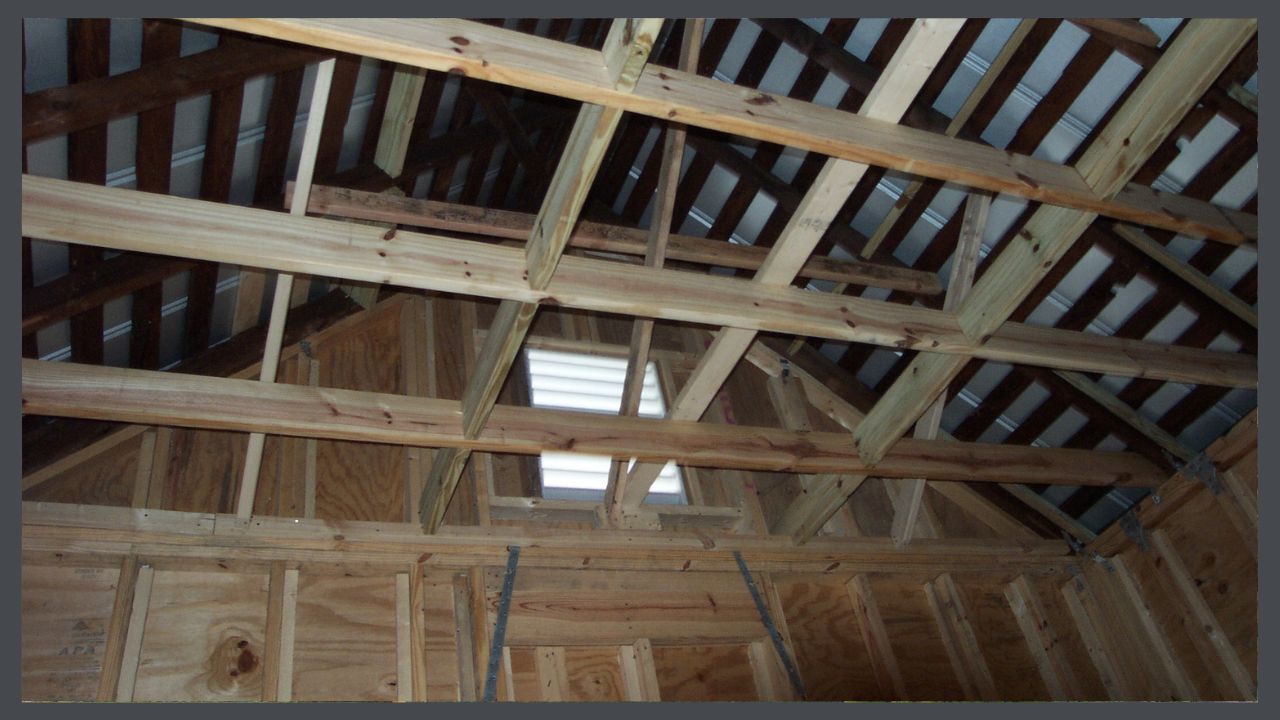
Here in Florida we joke that the only thing keeping an old house standing is the termites holding hands. Well, that was pretty much the story here. I ended up saving only a tiny amount of the original structure. Everything we touched just turned to dust. Pretty much every piece of lumber had to be replaced-walls, ceiling, floors, windows-everything.
STEPS TO BEAT THE AWESOME CHALLENGE OF RESTORING AN OLD HOUSE
So what did I do in order to keep my wits sufficiently intact to get through this awful mess?
0. After much weepin’ & awailin’, I reassessed the amount of time, money & attention that the project would actually take. This was a hard one because the original estimation of effort, etc., was about 1/5 of what the situation was.
1. I made a list of the tasks that needed to be done in sequence. Each step that looked scary, I broke down into bite size bits. If they still looked scary. I chopped them up more. This is the important part. The chopping.
2. I evaluated my resources, determining what I needed for each of my steps & wrote a plan for securing items/people/skills that I didn’t have. My contractor was a scumbag who showed up some days but not others & left the jobsite such a mess I got cited by the City & had to buy many materials twice. Hey! This is Florida! If the termites don’t get it, the moisture & the heat will. And Code Enforcement’s riding right behind!

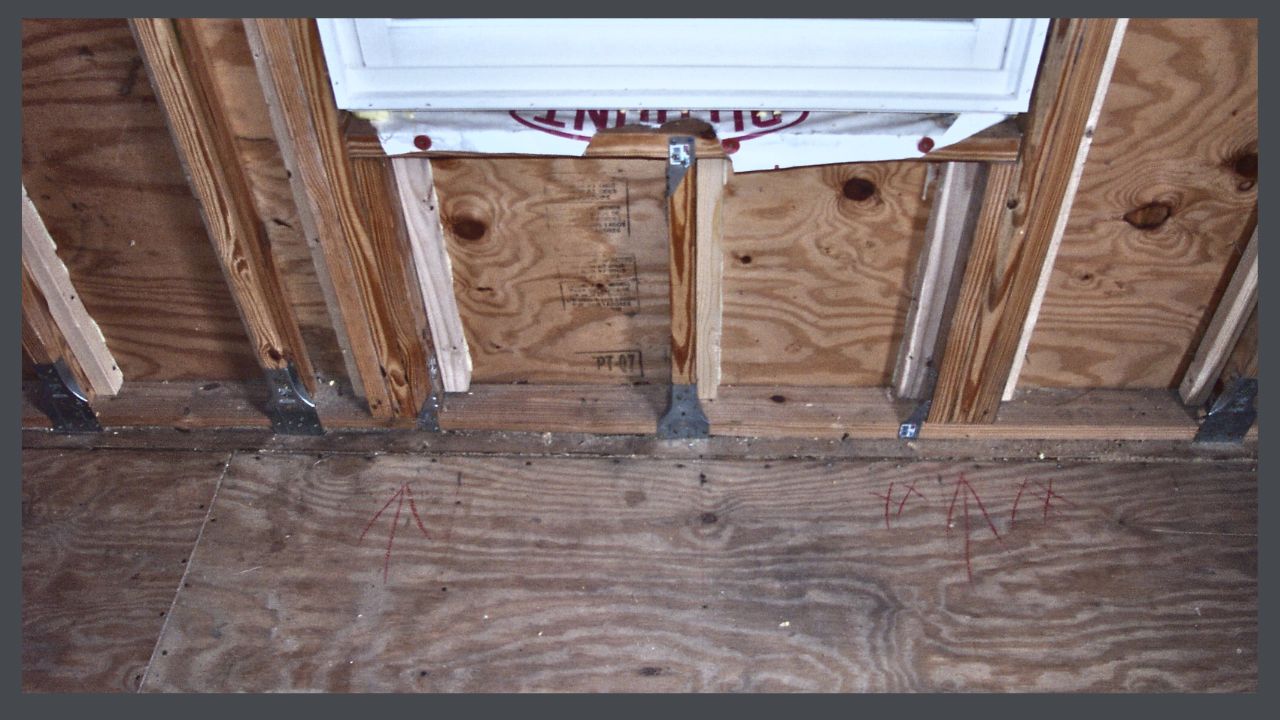
There was still a ridiculous amount of work to do, including going backward because we had missed some framing inspections. Here in tropical storm country they take those hurricane clips seriously!
3. Once I was aware of what was in front of me, I focused on purpose. I have been a dedicated & vocal preservationist my whole life. My mother, born in 1919, taught me about the times in which she grew up & about her mother’s life on the farm. I loved those stories & when I grew up expressed this love by preserving the built environment where these lives were lived.
As a neighborhood activist for many years, I know the power of neighborhoods. I had been connected with the neighborhood association from pretty much the first moment I arrived in Tampa Bay. The first house on which I put in an offer was just around the corner. I knew & loved many folks in the area who had put blood, sweat, tears, time, $$$ & heart into revitalizing this terrific remnant of Old Tampa.
4. I took really good care of myself. My inclination when I get stressed is to head for the ice cream & potato chips. I chose veggies & protein instead & religiously took my supplements. I went on at least one walk every day & did my yoga stretches. This point is very important because if you fail to maintain your health, it becomes more difficult to perceive, to think, to make good choices & to maintain your jolly disposition.
The challenge of restoring an old house can make you old. Time & money, the main buzzkills in life are being stretched to the max. Whatever you thought it would cost, you’re going to 3X it. You’re going to sleep less, worry more & even with your PPE, you’re going to be in contact with some grisly stuff.
Yeah, I do think I’m your mama, so watch these videos on health & nutrition. I am so not kidding here.
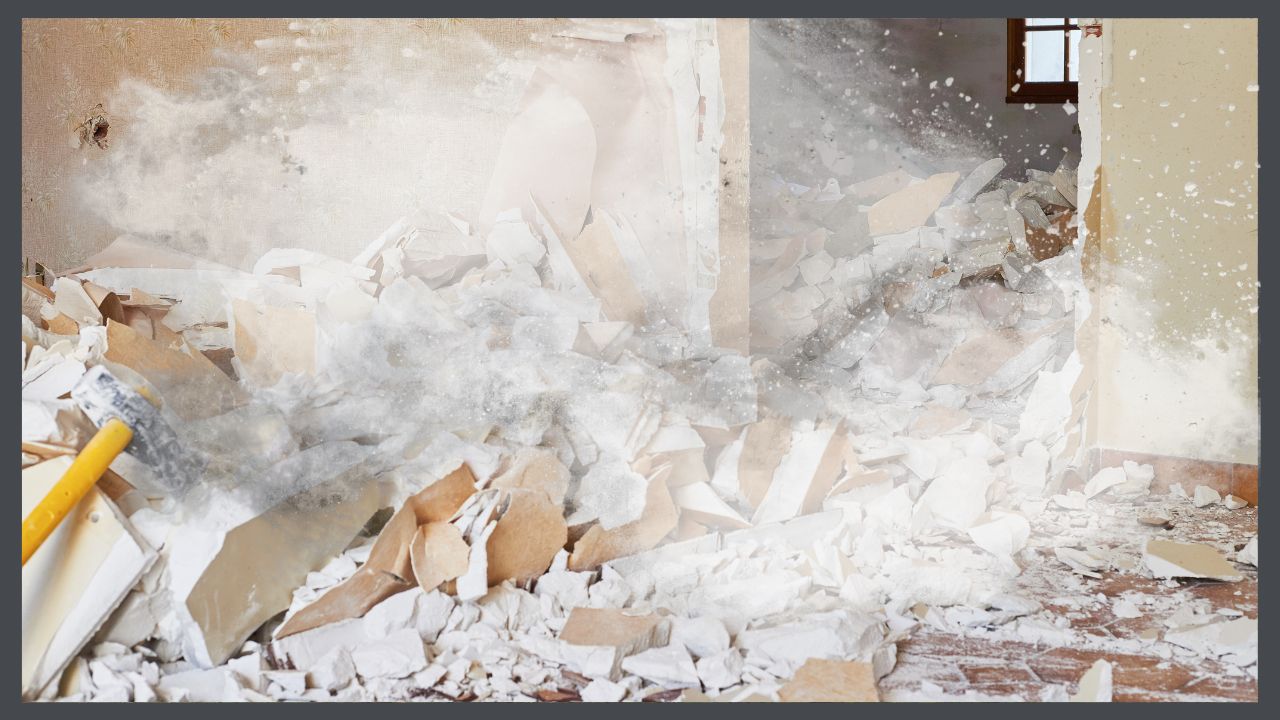
5. Part of my staying healthy was making sure that I did not expose myself to construction debris. My first walk through of the house resulted in a sinus infection that lasted 8 weeks. I got myself a nice stock of N95 masks & made sure I wore one any time I went in after that. I learned this lesson doubly hard when one day, I stopped by, maskless & decided to just peek in. At that very moment, a wall came crashing down like nuclear blast of mold & plaster dust. And probably cockroach detritus. I was filthy from head to toe. I went home, totally grossed out by the clothes I had been wearing & jumped in the shower. A second 8 weeks of painful nose. I expanded my mask policy to include peeking in.
This is a group of videos about the importance of wearing the correct PPE. It applies any time you are on a jobsite. Whether or not you are performing the work, you are in a potentially unsafe environment.
I kept 1 through 5 going because without those I was doomed. It is too easy to become discouraged during an old house restoration & allow those things to slip. Too busy, just a few potato chips today- I’ll be better tomorrow. Nope! I held firm making sure my special treats gave me the nutrition I need to withstand the stress of running a project 37 levels about my knowledge base. I focused on one task at a time, completed it & moved on to the next. I love check marks & I accumulated them like a miser with his gold.
6. I celebrated every win & tossed the failures out the window. (I had quite a pile!) I stoked that purpose by cruising the internet for gingerbread choices & pictures of restored Folk Victorians to keep me looking forward. Finally, it was time to face the last challenge of restoring an old house- go outside in the Florida August heat, humidity & mosquitos to plant the garden. We’d wait until the sun went down when it was marginally cooler, put on our bug repellent (Mine was olive oil with crushed garlic which didn’t smell too great but made my skin quite lovely.) pick up our handyman, don our headlamps, & work on the dark gardens for an hour. Any longer was unbearable.
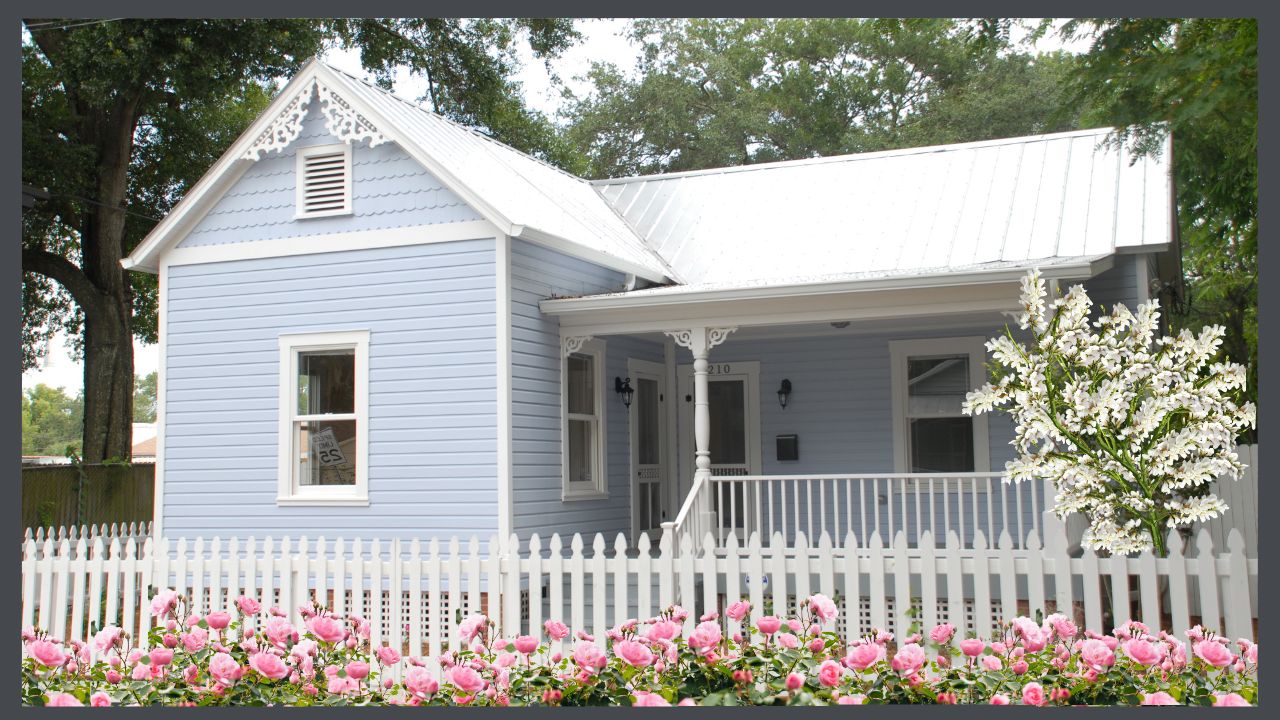
And then one day, it was complete & I received my certificate of occupancy & the newly restored house was added to the inventory of contributing structures in the historic district! A few months later, I was awarded a banner from our local preservation advocacy organization for my “outstanding historic preservation project.” My beautiful little periwinkle with plum doors, Folk Victorian!
TIP: Another good one to read before you plunk down your hard-earned cash is HAVING A SUCCESSFUL BUNGALOW RESTORATION, Part 1.
STAY IN THE BUNGALOW KNOW!!!
Sign up for our newsletter & receive our FREE E-book, 7 VITAL Things to Do Before You Hire a Contractor.