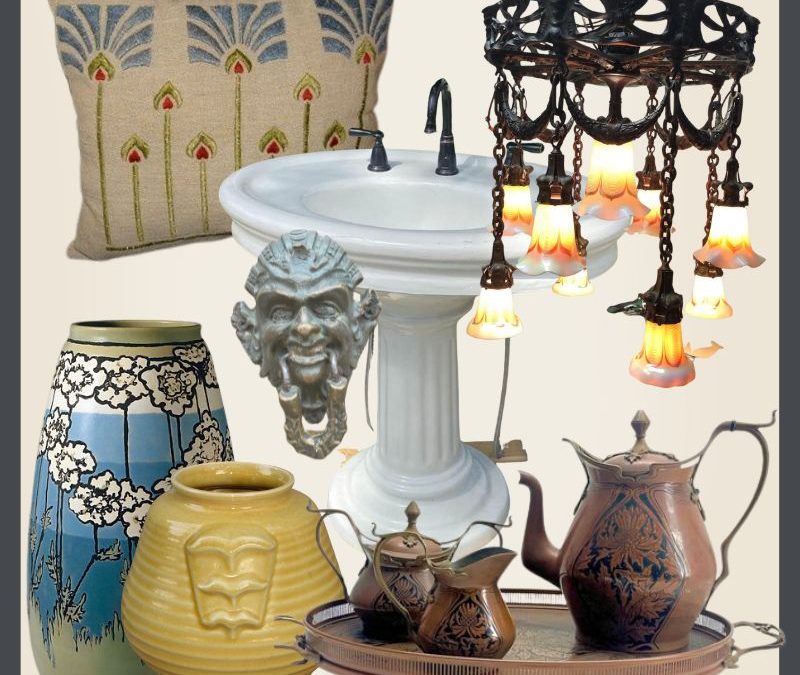
This article points you to bungalow resources, designed to enhance the wonderful features of your bungalow. Shopping for & owning these beautiful pieces is one of the most enjoyable things about stewarding your home.
The hardware, lighting & decorative items of the Arts & Crafts Movement are cheerful & brilliantly beautiful. Period kitchens & baths will pay homage to the past owners & are just good design sense. In your decorating, leaping about the decades is visually disturbing (Jane Powell called it “cognitive dissonance.”) & can confuse the flow of the interior. But, the goods you need to create a period atmosphere, are not always easy to find.
I am still building my resources list. I considered whether I wanted to wait until it is complete to post it, but you may be desperately looking now, so take a look at what’s here & keep coming back, It is growing daily. (Or at least weekly.)
I’ll also mention that many of the items you might need can be found on the resale market in your local area. Facebook Marketplace is growing daily & Craigslist seems to be hanging in there too. Of course the odd piece can still be discovered at a yard or estate sale but, you have to have more patience than I do & get up with the worms.
The caveat here is that I have no clue as to who any of the folks are that are selling on any of these group pages. You must perform your own due diligence regarding every aspect of the offered item- value, condition, authenticity, etc.
MY CURATED RESOURCE LISTS
ARCHITECTURAL SALVAGE
From hardware to plumbing fixtures to stained glass & furniture, salvage dealers are finding it all for you. My list is about ready to grow so check back. I have gotten some great recommendations from the followers but I need to add them & I type sl-o-o-ow.
HARDWARE
Functional & beautiful, another signature craft of the Movement.
RESTORATION CLASSES
Where you can learn new skills for DIY, or gain knowledge to help you in overseeing the work done by tradesfolk.
TILE
Molded from earth, tile is both strong & versatile. It is one of the core design elements of any home.
WINDOW COVERINGS
A necessary element, window coverings compliment your other design elements, giving your privacy & protection from the sun & the cold.
MORE RESOURCES ONLINE
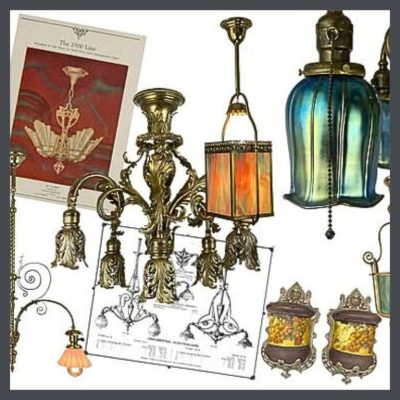
Additionally, there are many pages & groups on Facebook that are dedicated to antique items of the period as well as goods by modern A&C masters. As a bonus, they offer wonderful information on the period. Below is a list of these groups who allow buying & selling. Some pages do not. They exist only for giving & receiving information, & for fellowship. It’s not a bad idea to join these too, but that’s not today’s topic.These are digital communities of Arts & Crafts Revival Artisans & Revival aficionados, sharing work of current craftsman, or promoting various events such as fairs, sales, & websites. In other words, you can buy & sell on these pages.
In the Arts & Crafts Style
This group is for the sharing and enjoyment of the Arts & Crafts era of the late 1890s to the 1920s, as well as its contemporary counterparts. Selling/trading items, sharing real estate ads for Arts & Crafts style homes are very much acceptable in this group.
Arts and Crafts Furnishings of Mission Oak, Stickley, and Limbert
The second group is geared toward beginners & intermediate collectors of the Arts & Crafts Movement & the items we live with in our homes. Focus is primarily furniture of the period, along with decorative objects, both period & reproductions of quality.
Some of the individual resource pages below, list Facebook groups specializing in those specific iitems.
Meanwhile, keep reading my blog & loving your bungalow. There is more to come! I am forever searching for more vendors of bungalow enhancing items so-
STAY IN THE BUNGALOW KNOW!!!
Sign up for our newsletter & receive our FREE E-book, 7 VITAL Things to Do Before You Hire a Contractor.
Most of my playlists have only 3 or 4 videos. But, I love old bungalow kitchens & this includes bungalow kitchen videos so I never pass up the opportunity to watch one & do not wish to deprive you. When I go to house museums, I always head for the kitchen & hang around there until my husband makes me leave. On the few occasions that I was required to be on a tour, I have managed to break away from the main group & find my own way to the kitchen. I have been reprimanded by security guards more than once but I don’t care! I guess I’m an unapologetic kitchen rebel. Been called worse!
My blog articles about kitchens favor authentic restorations or reproductions. My mentor, Jane Powell wrote the definitive book on the subject, BUNGALOW KITCHENS & I strongly urge you to read it & enjoy its lush photography.
SO LET’S LOOK AT SOME BUNGALOW KITCHENS VIDEOS, SHALL WE!
1920s Kitchen: A Look Back, Rice County (1:54)
Power96Radio
This kitchen is described as being a country kitchen so it has the look of an earlier period. The wallpaper is wonderful!
1920s style kitchen design (2:20)
Антон Шишко
A mixture of wonderful old, cool restored & newly created kitchens in a variety of degrees of authenticity, with some annoying music playing in the background.
Family Uses 100-Year-Old Stove: ‘It’s Like a Miracle’ (1:05)
Our little Nest
A charming couple with their old stove.
55 Indoor Antique Gas Stove Ideas (4:57)
Empowerment
Some interesting images of a number of great stoves from many decades.
Historic Kitchens from the 1920s and 30’s are not what you think. (8:21)
Brent Hull
A look at technology in early homes.
The AWESOME History of Kitchens- Historic Kitchens revealed. (11:58)
Brent Hull
The evolution of the kitchen.
Historic House Tour: 70 years of kitchen innovations all in 1 place. CRAZY! (14:22)
Brent Hull
A kitchen that has original wood cabinets, decorative parlor cabinets, 1940’s plywood cabinets, 1950’s steel cabinets, and a 1970’s electric range. Oh, my!
It is made from flax. My favorite fabric, made from the same plant, Linum usitatissimun, is linen, cool & elegant. And expensive. I’m always a fan of expensive.
Another ingredient of lino, pine resin takes me back to my six year old self, a tiny desert cowgirl, visiting Northern Arizona for the first time. After a life of looking at nothing but sand & cactus, the miles of tall pine forest I saw out of the windows of our car, were so, so green & so beautiful. The smell of the pine trees was enchanting. We pulled over at a rest stop & amidst all this towering wonder appeared a speckled fawn. Little girl heaven!
I grew up walking on linoleum, its smooth, clean coolness a welcome relief to my tender feet after running barefoot outside in the blazing sun. But it was Jane Powell’s book, LINOLEUM, that tipped me over the edge!
Lino can be passed over because, being made of natural materials, it costs more than vinyl, but the 2 products in no way compare as far as quality. For wet, high traffic areas, it cannot be surpassed in utility, healthfullness or charm. If you should be unfamiliar with the material, you’ll enjoy learning about it from these videos. If you’re a fan of old linoleum, you’ll find them entertaining & you might even learn a little bit.
Linoleum flooring is cool, actually (6:34)
Vox
Well, yeah!
Forbo Flooring Systems – Making linoleum is like cooking with natural ingredients (4:23)
Forbo Flooring Systems
The art of making Marmoleum. A fun & informative video!
Preserving 100-Year-Old Linoleum! (0:45)
Tenement Museum
Watch conservators cleaning & moving a 9’x12’ linoleum carpet.
See my other great collections of bungalow videos here!
STAY IN THE BUNGALOW KNOW!!!
Sign up for our newsletter & receive our FREE E-book, 7 VITAL Things to Do Before You Hire a Contractor.
These videos are mentioned in my post, BUNGALOW TOASTERS which I encourage you to read. It includes a video of this little gem, dubbed a “Sweetheart” toaster, being used.
At the risk of becoming very hungry, I encourage you to also watch the magic of the videos of folks as they lovingly use their old toasters. This is a variety of toasters & even a toaster collector with a sense of humor!
One of my favorites is of a full restoration of a poor toaster that looks like it was used hard by a family of 10 & then abandoned when they got an updated model. A talented man meticulously dismantles it, revives each tiny part & lovingly puts it back together again.
I also offer you my Pinterest page of old toasters. I have quite an array!
THE VIDEOS- Antique Toasters
Antique Toastmaster Toaster 1A5 Demo “Automatic Pop-Up Type Toaster” Bachelor Model 1 Single Slice (:50)
Laura’s Last Ditch Vintage Kitchenwares
Would you like your toast medium or well-done?
Toaster Collector (2:55)
Texas Country Reporter
He started with his mother’s toaster & 300 toasters later, he eats jam for breakfast every day.
I adore old appliances & the antique toaster may be at the top of my list. I come by it honestly, being the granddaughter of a West Virginia baker. My grandfather decided to enter the business because he figured that it would be economically stable. People would always eat bread. It was a correct decision that benefited our family for several generations.
When I was a child growing up in Arizona, there was bread on the table every meal, never bought off the shelf, always purchased from the family bakery that had a stand at our neighborhood grocery.
Then I went to school & discovered Wonder Bread, served in our cafeteria. I was astonished & confused. You could squish it up in a ball like Play-Doh! I was accustomed to bread with body. You had to work a little to eat it.
My mother was appalled at this version of bread. In no way did she consider it the best nor even think of it as real bread.
The specialty of my family’s bakery was salt rising bread. An Appalachian invention, I cannot but wonder if the recipe made its way from Sara Emmeline, my great-grandmother on the farm, to my grandmother, Gordie Elsie who left the farm as a young girl to become a woman of culture, to the bakery of her new husband. My cousin, whose father took over the bakery from my grandfather & who worked there for many years tells me that, “It was not a big seller unfortunately. Most of it was sold in the outlying small towns, mainly mining communities or communities with lots of old timers that come out of the West Virginia hollows on a Saturday morning to do their shopping in towns like Grant Town, or Fairview or Hundred. Fine folks with discerning tastes.”
Not to be found in Arizona, my mother dreamed of salt rising & was sent loaves of it by the family. This humble bread, born of poverty & necessity, became a luxury for my mother because of its scarcity. Yeastless, it was very dense & chewy, like the most well-known sourdough & like its San Francisco counterpart, made exquisite, crunchy toast. We argued over who would get the heels.
LET’S BEGIN AT THE BEGINNING OF THE TALE OF THE ANTIQUE TOASTER
And jump around. I try to write chronologically, but cultural history is not always chronological. Different locations & classes changed their practices at differing times. I hope that you can follow along as I move from 1950 to 2000 B.C. to 1850 to 1910, then back to 1905, in my attempt to tell the tale of the antique toaster.
So here goes….
We have been eating grains since we were hunter/gathers. We learned to cook them, making gruel, which was easier to digest than the raw seeds, but rather messy. Then we discovered that baking grains into bread was a great deal handier. It grew mold more slowly. You could tote it around & it was tidy. You could eat it with your hands.
Bread is mostly sugars & starches making it the perfect candidate for caramelizing. Our affinity for crunch is hardwired into our species, as is our love of fat, so it’s not surprising that avocado toast is the food darling of the decade.
So, the obvious next next step was toasting the bread which made it even easier to digest. You could melt stuff on it. It was warm & comforting & it packed a nice caramelized crunch.
THE TOASTER AS PART OF OUR CHANGING CULTURE
When we’re talking about bungalow toasters (That’s kinda what we do here, you know. We talk about bungalows.) we’re talking about pre-electricity for most of the original homeowners.
The earliest toasters, from the 1800’s, were forks made of iron with long handles so that you could stand back from the flames of the open fire. By the 1850’s, they began making the holders in a lighter metal & featured a mesh grill so that you could see the bread browning as it toasted.
With the decline of domestic help, as woman left working as maids to labor in the factories, appliances designed to ease the workload of the lady of the house became a necessity. Fortunately, the domestic technology was developing that could support this cultural change. For a more in-depth understanding of this glimpse into LIFE & TIMES, read this article.
In 1905, the first filament, Nichrome, a non-magnetic alloy of nickel & chromium was discovered that could repeatedly generate heat to toast bread.
G.E. patented the first electric toaster, the D-12, for use in the home in 1909. It has four heating elements with the wire wrapped around forms made of heat-resistant mica. It sat on a porcelain base to insulate the table under it. As an option, you could get the base with a floral design. The toast was held in place by an exposed wire frame. Of course, it toasted only one side of the bread, giving you ample opportunity to burn your fingers!
However, electricity was not common in homes until the 1920’s. By 1925, only half the homes in America had electrical power & these were in larger metropolitan communities. It wasn’t until 1936, with FDR’s Rural Electrification Act, that millions of Americans, living outside of cities had access to electricity.
(Let’s do the Time Warp Again!) However, the Hare House, which was built in 1910, was lit by gas & most likely had a wood burning stove so Grace did not use the D-12 to make Alfred’s toast. One option was to use a cast iron skillet. She might have also used a tin contraption that sat on her wood burning stove. This flimsy piece of vented metal held the pieces of bread that you cut from the loaf & offered your fingers no protection against its heat. Tin rusts very easily when exposed to moisture so I can’t imagine that these lasted very long. I had one in my collection for my dreamed of restoration of the Hare House kitchen. I considered trying it out but it was too awful!
In 1913, the Coleman Electric Stove Company made a toaster that automatically turned the bread, saving fingers.
In 1914, Lloyd & Hazel Copeman, of the Copeman Electric Stove Company, were issued five patents for ways to “turn the toast” in their “automatic” toasters.
In 1919, the year that my mother was born, Charles Strite, a Minnesota mechanic invented the pop-up toaster, the Toastmaster, with both springs & a timer, for restaurant use. He later improved his design & sold it to the general public. You could even twist a little peg to set the toaster for the degree of toasting! Check out my toast videos to hear the timer loudly clicking away at differing speeds, depending on how dark you wanted your toast to be.
Around this time, manufacturers began adding a case to the units as a safety feature. With this newfangled toaster, Mom no longer had to be asphyxiated in the kitchen by smoke from burning toast, when she was preparing supper for the family.
A commonly voiced cliché in our baker family was, “The best thing since sliced bread!” In 1928, a bread slicing machine was invented & by 1930, The Continental Baking Company, which made that bread that fascinated me so as a child, Wonder Bread, began selling sliced bread which greatly increased the popularity of toasters. At the same time, assembly line production & easy credit made it possible for ordinary Americans to purchase many of these new consumer goods. A toaster on every table!
WON’T YOU BE MY SWEETHEART OF AN ANTIQUE TOASTER
A favorite toaster has been dubbed the “Sweetheart” because of its heart shape face, pendant “earrings” & its delicate, ornate casing. This Landers Frary & Clark toaster (Universal Model E9410, patented in 1929) was designed to attract the American housewife & was promoted as being an appealing addition to her kitchen decor. One of my readers remembers it fondly from his grandmother’s house, where, no, the children were allowed to watch, but not allowed to touch it.
Rather than march all the various styles of toasters across the page, I think I’d rather invite you to my Pinterest page where you can just gorge on pictures of them & also other small appliances. As one of my readers commented, “This is where the good stuff is!”
To see a variety of antique toasters in action, visit my YouTube playlist, ANTIQUE TOASTERS.
STAY IN THE BUNGALOW KNOW!!!
Sign up for our newsletter & receive our FREE E-book, 7 VITAL Things to Do Before You Hire a Contractor.
In this internet age, there is very little that you can’t find on YouTube so I have put together a list of old house restoration videos, arranged by skill/trade/interest for you to view. Whether you plan to do a project yourself, or hire a professional tradesperson, it is wise to know about bungalow, their history, their features. It’s also a good way to educate the people that you hire who might be looking to improve their knowledge & would be willing to watch these old house restoration videos to expand their skills.
The people who have made these videos are at the tops of their fields. They are experienced & skilled not only in their areas but also are good communicators & have stellar reputations for their abilities to teach others. They are also very nice people so their videos are pleasant & easy to watch. In fact, I watch them when I’ve had a bad day just to chill!
I’m not going to describe the videos individually because most of the titles explain the content. Just click & find out!
ARCHITECTURAL SALVAGE VIDEOS
The terrible tragedy is that old buildings will be demolished, by the short-sighted, by the greedy & the ignorant. We are fortunate that there are people who come in & save the beautiful bits & pieces & offer them to us. Even if you are not involved in a project for which you might need their wares, a visit makes an interesting field, or even a road trip!
Architectural Salvage tour- TREASURE HUNT! Finding clues from the past. (10:20)
Brent Hull
Southern Accents and the Journey of Architectural Salvage (2:48)
This is Alabama
BUT WAIT, THERE’S MORE!
I have curated a wonderful playlist of helpful & entertaining videos for your viewing pleasure. Bring out the popcorn & learn about everything from wood window repair to the history of the bungalow to how to take care of yourself when you dealing with the physical & mental challenges of restoring an old house.
Also you can check out my article on architectural salvage which links to some great resources.
STAY IN THE BUNGALOW KNOW!!!
Sign up for our newsletter & receive our FREE E-book, 7 VITAL Things to Do Before You Hire a Contractor.
 This article points you to bungalow resources, designed to enhance the wonderful features of your bungalow. Shopping for & owning these beautiful pieces is one of the most enjoyable things about stewarding your home.
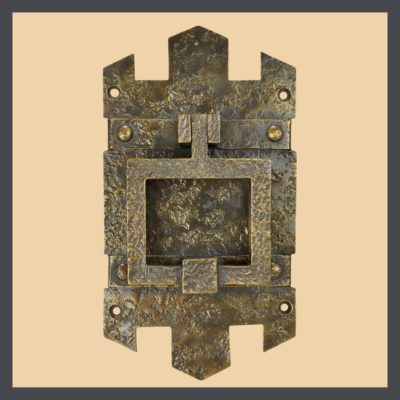
 Additionally, there are many pages & groups on Facebook that are dedicated to antique items of the period as well as goods by modern A&C masters. As a bonus, they offer wonderful information on the period. Below is a list of these groups who allow buying & selling. Some pages do not. They exist only for giving & receiving information, & for fellowship. It’s not a bad idea to join these too, but that’s not today’s topic.These are digital communities of Arts & Crafts Revival Artisans & Revival aficionados, sharing work of current craftsman, or promoting various events such as fairs, sales, & websites. In other words, you can buy & sell on these pages.
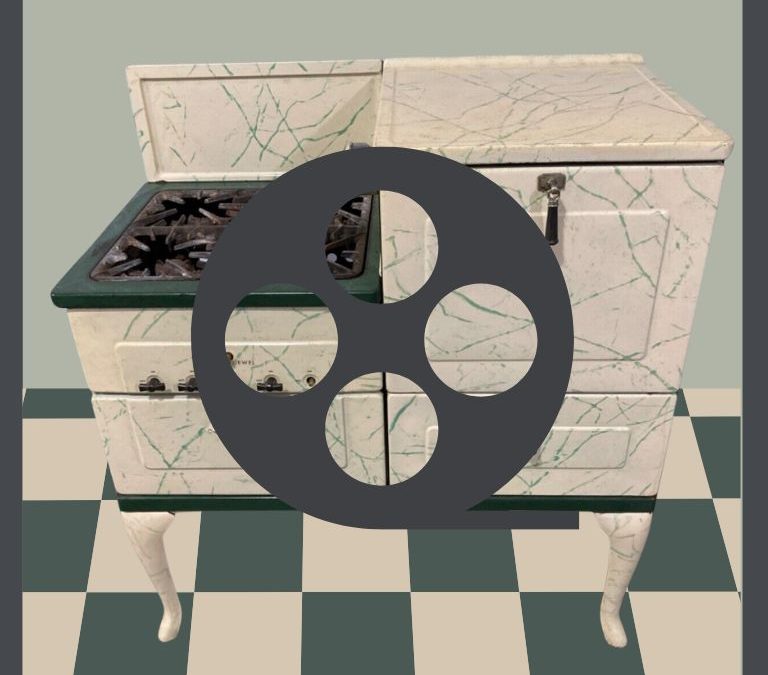
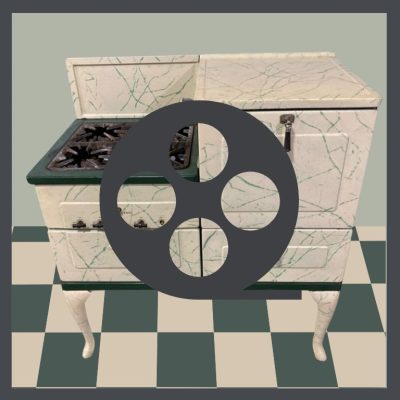 Most of my playlists have only 3 or 4 videos. But, I love old bungalow kitchens & this includes bungalow kitchen videos so I never pass up the opportunity to watch one & do not wish to deprive you. When I go to house museums, I always head for the kitchen & hang around there until my husband makes me leave. On the few occasions that I was required to be on a tour, I have managed to break away from the main group & find my own way to the kitchen. I have been reprimanded by security guards more than once but I don’t care! I guess I’m an unapologetic kitchen rebel. Been called worse!
 What’s not to love about historic linoleum?
 These videos are mentioned in my post,
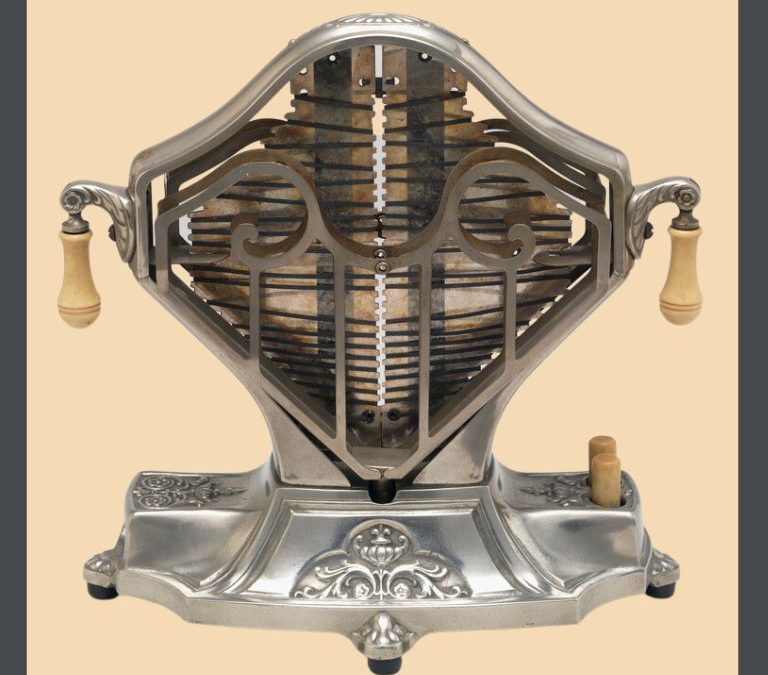
 I adore old appliances & the antique toaster may be at the top of my list. I come by it honestly, being the granddaughter of a West Virginia baker. My grandfather decided to enter the business because he figured that it would be economically stable. People would always eat bread. It was a correct decision that benefited our family for several generations.
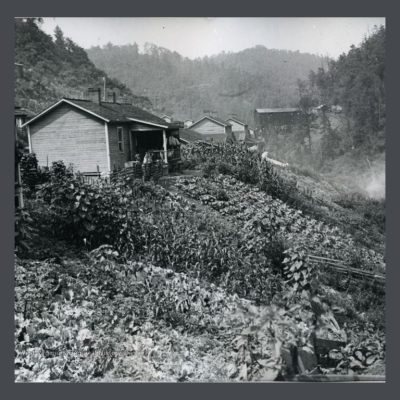 The specialty of my family’s bakery was salt rising bread. An Appalachian invention, I cannot but wonder if the recipe made its way from Sara Emmeline, my great-grandmother on the farm, to my grandmother, Gordie Elsie who left the farm as a young girl to become a woman of culture, to the bakery of her new husband. My cousin, whose father took over the bakery from my grandfather & who worked there for many years tells me that, “It was not a big seller unfortunately. Most of it was sold in the outlying small towns, mainly mining communities or communities with lots of old timers that come out of the West Virginia hollows on a Saturday morning to do their shopping in towns like Grant Town, or Fairview or Hundred. Fine folks with discerning tastes.”
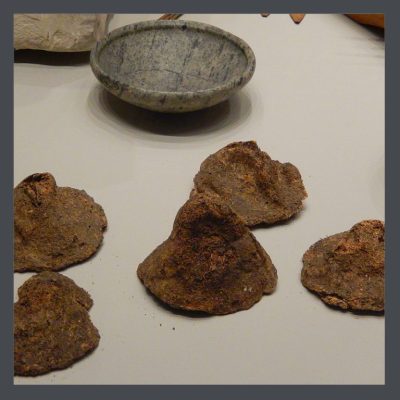 We have been eating grains since we were hunter/gathers. We learned to cook them, making gruel, which was easier to digest than the raw seeds, but rather messy. Then we discovered that baking grains into bread was a great deal handier. It grew mold more slowly. You could tote it around & it was tidy. You could eat it with your hands.
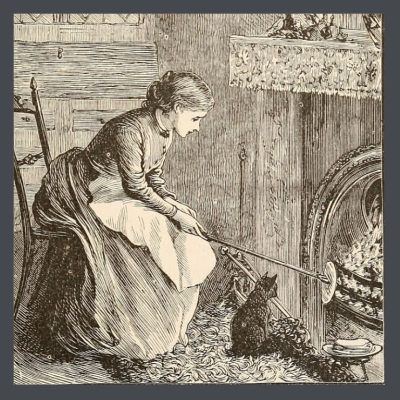 When we’re talking about bungalow toasters (That’s kinda what we do here, you know. We talk about bungalows.) we’re talking about pre-electricity for most of the original homeowners.
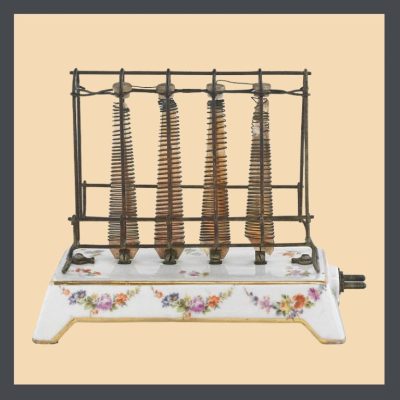 In 1905, the first filament, Nichrome, a non-magnetic alloy of nickel & chromium was discovered that could repeatedly generate heat to toast bread.
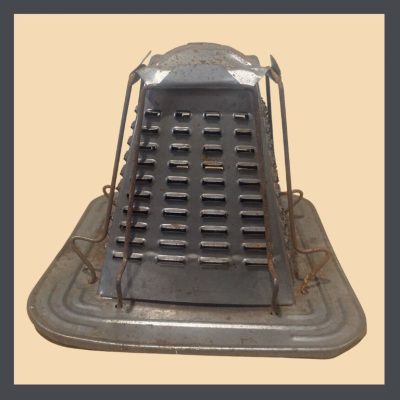 (Let’s do the Time Warp Again!) However, the
 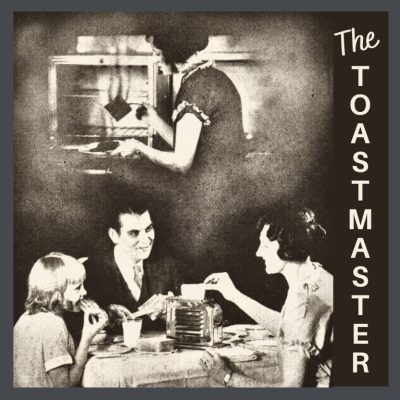 In 1919, the year that my mother was born, Charles Strite, a Minnesota mechanic invented the pop-up toaster, the Toastmaster, with both springs & a timer, for restaurant use. He later improved his design & sold it to the general public. You could even twist a little peg to set the toaster for the degree of toasting! Check out my
 In this internet age, there is very little that you can’t find on YouTube so I have put together a list of old house restoration videos, arranged by skill/trade/interest for you to view. Whether you plan to do a project yourself, or hire a professional tradesperson, it is wise to know about bungalow, their history, their features. It’s also a good way to educate the people that you hire who might be looking to improve their knowledge & would be willing to watch these old house restoration videos to expand their skills.