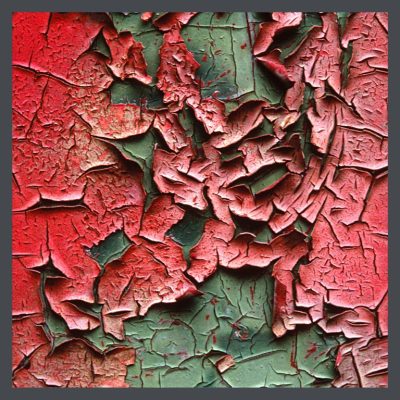
 The reason I’m even proposing the weird idea of painting a bungalow linoleum floor is because lino wears out. Through decades of footsteps in some of the highest traffic areas of the house, roller skates & doggy toenails, abrasion can annihilate the printed pattern leaving you with a rough, gray surface. Even worse, age can uncover sections of the jute or burlap base, & even one layer down, the mastic that glued it to the subsurface. Adding to the delight are the ineradicable stains of unknown origin. (A whole chicken maybe? They are dang slippery.)
Sadly, the lino patterns you see in Jane Powell’s book, LINOLEUM, are no longer manufactured. Twenty-five years ago, you could pay a ridiculous amount of money for a roll of new old stock but the supply of this too went the way of the dinosaur. I used to visit Linoleum City in Los Angeles to drool over their old lino collection. No mo’.
You may have a floor that is just suffering in a more highly trafficked area, but have some pattern left in other parts of the floor. Should this be the case, you can just touch up the rough areas with acrylic paint to match the existing pattern, & clean & wax your whole floor.
But, at a certain point, a lino floor is over. O-V-E-R. The pattern on mine was entirely gone. It was just a sea of dirty gray. While I relentlessly advocate for preserving historic materials, a kitchen floor needs to be cleanable & even with a good scrubbing followed by waxing, (I tried it, fingers crossed that I might at least get some improvement. Nah. Still gray, rough & grotty as heck.) mine was nasty. There was nothing left to coax back into utility, let alone beauty.
So what’s a lino loving bungalow girl to do?
MY BUNGALOW LINOLEUM FLOOR SOLUTION
 In 1980, I had noticed that any paint I got on the very old & worn (& hideous & impossible to clean) lino floor in my rented bungalow, was too stubborn to remove, I thought, “Gee, I could paint this puppy!”
And I did.
It was very inexpensive to do (a prime consideration, for a vintage clothing store proprietress) & a piece of cake. It was also a very fun project because it quickly changed something scary & germy to something lovely & safe.
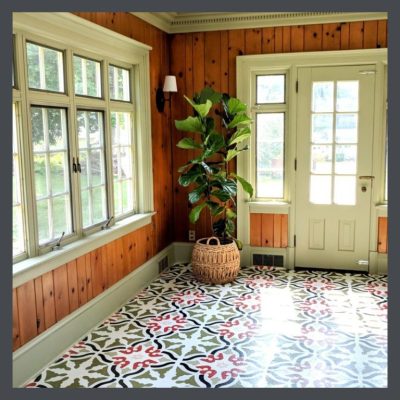
The finished product looked great, was very easy to clean with my duster & my sponge mop, held up beautifully & looked perfect with the faux lino floor cloth I had made. I felt like if I were to drop a piece of food on it, or my cat were to cough up a big hairball, they would no longer become permanent, rotting parts of the floor! (Euwh!)
THE MANY CAVEATS ON PAINTING A BUNGALOW LINOLEUM FLOOR
 Even though I had done this process successfully, material formulas have changed radically in the past 40 years (bad) due to environmental concerns (good). Additionally, having painted no design to my 80’s floor, I had ended up with a very flat paint surface. (I used a stenciled canvas floor cloth to make a faux lino rug to fancy it up.) And, I was married to a chemistry major who had sanded & coated 1,000+ floors & was using perfectly calibrated, state-of-art equipment. I’m thinkin’ that maybe you don’t have someone living in your home with these qualifications, nor this equipment (though I’m sure he has his own fine equipment.) So, I wanted to check out these aspects with Earl, my tech guy at Ben Moore, for advice on the painting of a bungalow’s linoleum floor. Earl immediately said, “Don’t do it.”
I’m a flooring professional so I lack the dewy optimism of the inexperienced. I have seen floors peel, scratch, bubble, pretty much perform tragically in multiple ways, so I always err on the side of caution when dealing with any new material or process. I read everything the manufacturer says in their tech materials. I follow that with a question- filled call that usually gets me transferred from customer service to the tech guys. This is why I love Earl. He’s a tech guy who works the customer service phones. A jewel!
Here’s why he said this & also why the article doesn’t just end right here.
IT’S ALL ABOUT THE BOND
 You are about to become a paint expert. This will serve you well as an old house owner because this is not the only time that you will be dealing with applying paint. And if you want to know more, you can go here.
Adhesion is always an issue, especially in high-traffic areas. My husband chemically stripped the floor & then scuff sanded the very old linoleum in our bungalow kitchen to remove any materials that might have been applied to it, such as my freshly applied wax (Oops!) & also any cleaning materials that might have left a residue, in order to prep for painting. He then, using 180 grit paper, sanded off any dirt that was ground into the surface & give it some “tooth.”
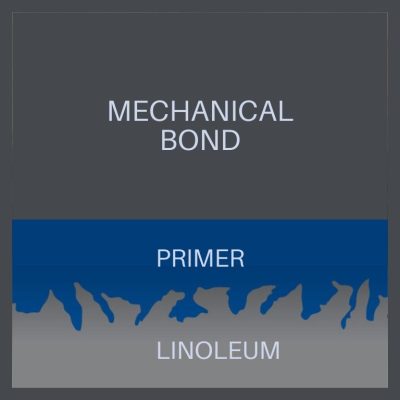
Tooth is desired when you wish to create a mechanical (as opposed to chemical) interlocking/bonding of materials, i.e., the paint & lino marriage. So, you scuff the lino to create tiny cavities (tooth) on its surface to increase the contact area. The wet paint you apply then displaces any air between the paint itself & the lino & the 2 lock together. I definitely had a tooth advantage with my old lino because it was OLD, & hadn’t been smooth for decades.
A mechanical bond is not as strong as a chemical bond & herein lies the fragility of your floor.
Let’s also talk about chemical bonding when painting your bungalow linoleum floor, because you’re going to be forming those bonds too when you paint it.
THE 3 COMPONENTS OF PAINT & WHY YOU NEED TO KNOW
Most paints have 3 main components called the pigment, the binder, and the solvent.
The pigment is the color chemical in a paint. Binders are incorporated to glue the pigment particles to each another, & also to make the particles stick to the surface you’re painting. Solvents, not surprisingly, dissolve stuff. This material makes the pigment & binder into a thinner & less viscous (more easily flowing) liquid so that it will spread evenly. For the purpose of ease on your own self & ease on our fragile environment, I am going to suggest the use of water-based paints, in which the solvent is water.
A couple more concepts you need to understand are drying & curing. If your room is well-ventilated, your paint will feel dry to the touch within minutes after application. However, it is dry only on its surface. Curing, the evaporation of all the water (binder) in the paint can take days. The 2 types of bonds determine the steps that you will do as you cruise through your painting process.
 If you apply a second coat on when your first is just dry to the touch- not cured- you will get a chemical bond between the 2 coats. As the water (binder) evaporates, the like chemicals of the pigment & the binder will be attracted to each other & form what could be considered a single coat. It’s a very strong bond.
It’s why your nail polish peels down to the nail, instead of peeling in single layers.
What this means is if your weekend project goes into the next weekend, your paint will be too dry to form this chemical bond with the next coat you apply, so, you are going to need to give the original coat some “tooth” in order for your next coat to adhere with a mechanical bond. That mechanical bond is achieved with a bit of scuffing, so that you aren’t going in on top of such a smooth surface.
This is a kitchen, the most heavily trafficked room in your house, & yeah, you need to do it right so that it will take the wear. If you take all the right steps when you apply the materials the first time, you are much less likely to have problems later on.
WHY I’M CONTINUING ON DESPITE BEN MOORE’S ADVICE & A TON OF CAVEATS
A. My advice is for real linoleum only.
B. If you want to paint a new lino floor, that you will install to paint, realize that it is risky. It’s not an inexpensive material, & the labor to install it is pretty pricey too. Most importantly, new lino is made with a coating that repels, well, anything you wouldn’t want to stick to. For you, I’m am recommending that instead you choose cool patterns in cut linoleum that are fitted together like a puzzle to make your overall design. You can see an example of what can be done here.
C. If your floor is old & funky as mine was, prepping it thoroughly to create a proper bond, you can improve its look & functionality greatly. How long will it last? Who knows?
D. I’m assuming that you are performing all the testing that you need to on existing materials for asbestos & lead, & mitigating as needed. Let’s talk about asbestos. In this article by Bob Vila he talks about asbestos in linoleum. Give it a read before you start.
E. For every product that you are using, you’re studying your Safety Data Sheets & using correct PPE correctly.
SO HERE’S HOW TO PAINT YOUR BUNGALOW’S LINOLEUM FLOOR
 0. Mend any boo-boo’s. I am not going to try to teach you to do this because I have never mended a floor. I am going to suggest some links of pages that look like they might know what they’re talking about.
Wisconsin Historical Society
They tell you a brief history of the development of lino & give you instructions of fixing problems. This is not the only method, so here’s another one.
Porter’s Environment & Cleaning Services
This one addresses rips & tears.
ehow
This one is about how to tack down curling edges.
Week&
In this one you learn how to patch whole areas that are missing.
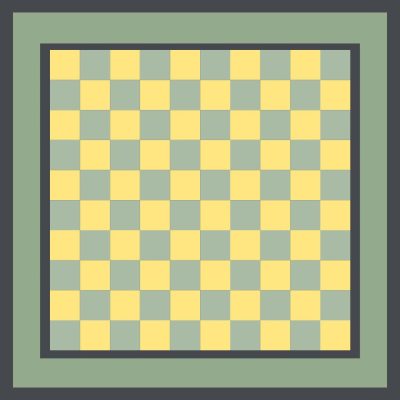
1. Choose your pattern & your colors. Think about coordinating your floor with your curtains. If you are going to stencil your curtains, or even if you’re not & you’re looking for pattern ideas, head on over to my article on window treatments where you will find links to vendors of lovely A & C stencils. You can use my article on choosing paint colors if you need any help. The reason I say this is because your stencil colors are more limited while a trip to Ben Moore will yield any custom color that you could possibly desire.
2. Jane Powell’s LINOLEUM has some amazing vintage patterns in it, for inspiration, or just to out-&-out copy them. You can use a simple graphics program, building it layer by layer & employing their graph feature to transfer it to real life
3. Zip on over to WELCOME TO REALITY DAYDREAM where Beth has it all figured out. I am not about to re-invent any wheels! She says that the paint on her floors is holding up well 4 years after she wrote the article, so she must know something!
TIP: Should you not be convinced of the utter coolness of lino, watch these videos.

STAY IN THE BUNGALOW KNOW!!!
Sign up for our newsletter & receive our FREE E-book, 7 VITAL Things to Do Before You Hire a Contractor.

0 Comments