by bungalow101 | Jun 16, 2022 | Doing it the right way, The History
by Jane Powell, author & Linda Svendsen, photographer
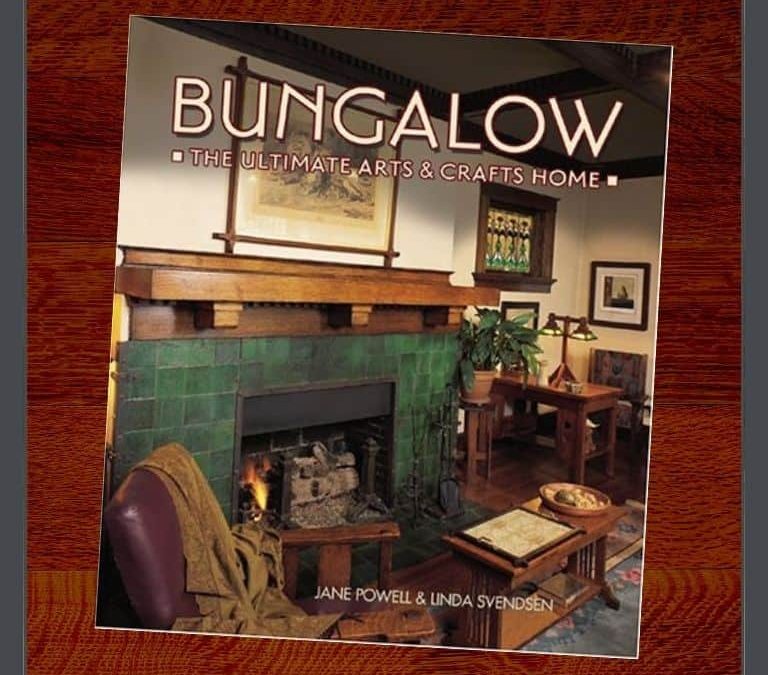
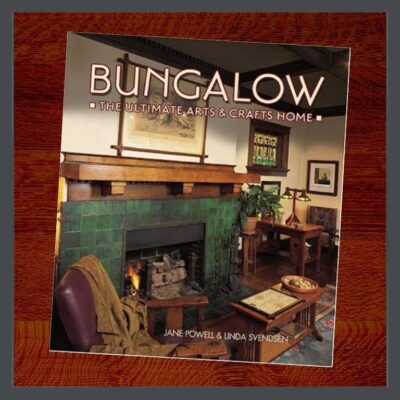 This book, BUNGALOW: THE ULTIMATE ARTS & CRAFTS HOME, was Jane’s most impressive work & it is majestic, with 285 large, glossy pages. She referred to it as “The Big Book of Bungalows” & I’m not certain that she was enthralled with the publisher’s final choice of title.
Hewn & Hammered’s review of the book opined, “The book is written with humor and warmth, never taking its subject matter too seriously, which is a welcome alternative to many other books in the genre that treat these buildings as museum exhibits before their original purpose (and, in most cases, only purpose) as homes.”
A quote from an Amazon reader: “This is my first contact with Powell/Svendsen’s books, and while it is indeed coffee table size (it needs to be large to accommodate the beautiful photography) it is so charming and readable that, without so intending, I READ it (in one sitting, yet). We have several other books of gorgeous bungalows, many with the same houses as subjects, with accompanying commentary equivalent to dry stale cornflakes; this one is crumpets and cream. Like others documenting bungalow style architecture, this book is not intended as a construction or instruction manual, but as inspiration. For admirers of bungalow style and for those seeking a picture to replace the thousand words BUNGALOW: THE ULTIMATE ARTS & CRAFTS HOME is an easy choice.”
While her other books are much more instructional, there is much factual information to be gained from reading this book. Jane is an amusing teacher so you don’t notice at all that you are sitting in class.
FOREWORD TO BUNGALOW: THE ULTIMATE ARTS & CRAFTS HOME
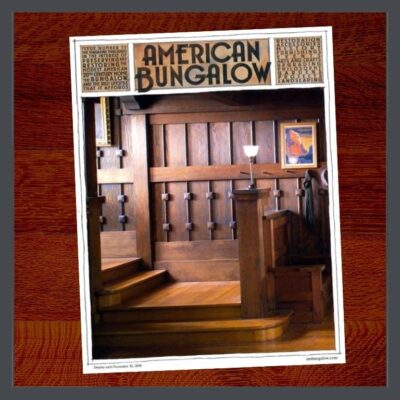 Jane introduces the book with some beautiful shots of bungalows by Linda Svendsen, including the impressive staircase of Jane’s bungamansion, the Sunset House in Oakland. Walking up these stairs, so sexy that they made the cover of American Bungalow, photographed by Alex Vertikoff, is an awesome experience. I wish this word had not been appropriated to mean, “like, totally cool” because the huge Doug Fir staircase is truly, “extremely impressive or daunting; inspiring great admiration, apprehension, or fear.” The workmanship is masterful, the dark wood lovely, & when you walk up these stairs, you are cocooned in the world of the wealthy 100 years ago. (Jane mentions, the builder was the owner of a lumber company so he got the wood wholesale, but still.)
As Jane says about it, “… this book deals with the philosophy, history, & influences that led to the bungalow as we know it in North America. Don’t worry, it’s not very scholarly. Most it’s a celebration of bungalows & everything on them & in them, & the Arts & Crafts movement they represent. I think that you will enjoy the ride.”
And by “ride” she meant a purple PT Cruiser. Mine was red.
CHAPTER ONE: THE COLOR OF WIND
 This chapter addresses, what is a bungalow? Well, it originated in India, & ended up in California inspired by a socialist design movement in Britain in the late 1800’s. Explaining that architecture isn’t simple, she answers this question by encouraging us to “Think outside the chicken” -by reading her book & viewing the images, we will just come to KNOW. It worked for me & whenever I feel wobbly, I come back to this book to get straightened out.
Going Native
A full description of the original bangala & the modifications made by the Europeans.
Getting Away From It All
The Industrial Revolution in Britain brought nostalgia for an idealized agrarian past.
The Seeds of Change
The Arts & Crafts Movement sprouts from the reverence for nature & ideas about design, & social & political reform.
CHAPTER TWO: IN FULL FLOWER
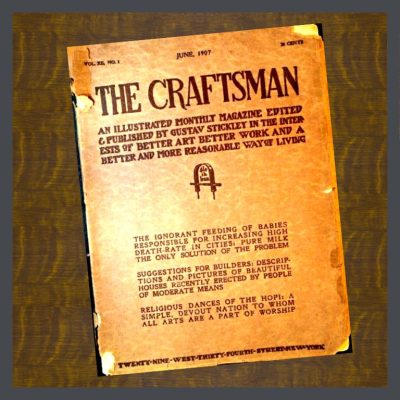
We learn about William Morris, the father of the Arts & Crafts Movement. There is a lovely quote about Morris which describes his many artistic passions & ends with, ..”& then he’ll do I don’t know what, but every minute will be alive.”
In my world, there is no greater compliment.
Pages of beautiful photos bring the copy to life as you learn to “Think outside the chicken” & begin to understand the soul of the bungalow.
Art for Art’s Sake
In this section Jane describes the Aesthetic Movement, which paralleled the A & C Movement, had the same roots & the same folks involved, but lacked the political & social philosophies of the latter.
I must admit to a great attraction to this design style. I see so much of the Arts & Crafts philosophy in the Aesthetic Movement & I really like their take on it. I especially like how its contrast of intricate small patterns inspired by nature complements the chunkier, more simple design of Arts & Crafts sharing the same inspiration.
In the Hare House, my Aesthetic collection adorned the dining room plate rails. In Tampa, I re-created the original divider shelves to display them.
The Bohemian Life
Jane is still in England, writing about the bungalows at the seaside that have acquired a bohemian reputation, representing a more simple life.
She stresses the fact that most of the Arts & Crafts houses were not bungalows, but looked to medieval designs for inspiration. It took Stickley to bring Arts& Crafts to America for it to assume it’s, uh, American form.
CHAPTER THREE: SMILING LAWNS & TASTEFUL COTTAGES
The Centennial Exhibition, held in 1876 spurred motivation for developing art & architecture that display American pride, though many bungalows clearly show European & Asian influence & you will see many images of this.
Global Inspiration, Indigenous Style
With the log cabin as inspiration, the bungalow was often more rustic. Jane continues on to describe the American flavor &unique local features found in bungalows across the country- with more of Linda’s lush photos.
CHAPTER FOUR: POPCORN & CAPITALISM
 Ah! California, where the bungalow reached its full potential. She visits Northern & Southern California & it is here where we see my house in Eagle Rock.
The Ideal Home
In this section she writes more about plan books & other publications as well as kit houses. The building boom of the 20’s was spurred by the street car, then the automobile.
Freedom of Assembly
More pre-cut buildings from a greater number of companies continued the bungalow boom. I must stress again that the images tell much of the story! You are seriously missing out by not having this book! Clinker bricks, limestone columns green-stained shingles & granite piers, Oh my!!!!!!!
Icon & Irony
More amazing photos & a look at how the A & C Revival has outlasted the original Movement. Hey, I’m glad that Stickley is getting the admiration & recognition that he did not receive in his later years. And while it’s on my mind, let me suggest that you watch this incredible documentary Gustav Stickley: American Craftsman.
CHAPTER FIVE: ON THE STREET
 This is the longest chapter of BUNGALOW: THE ULTIMATE ARTS & CRAFTS HOME & I don’t want to wear you out, so I’ll cover it in one section.
The porch, part of the Arts & Crafts ideal of the melding of nature with the indoors. The entry welcomes guests to enter & sit before the hearth. We see some beautiful fireplaces here of tile & of brick in various patterns. She goes to on talk about dining rooms showing an abundance of beautiful built-ins & rich wainscoting, including mine, the Hare House, on page 202. I had received the Roseville candleholders as a gift from the president of my neighborhood association who had fought valiantly with me against Walgreens. Being a bunny maniac, I paired it with the faux Roseville bunny vase which contains the most beautiful flower arrangement that I had ever done. In the heat of getting ready for the shoot, I had neglected to put water in the vase & the flowers barely made it through the day!
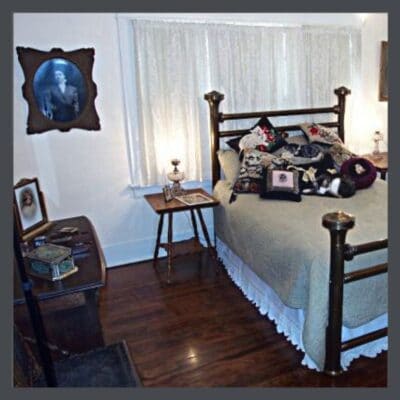
She has a couple chunky sections on kitchens & baths, though her Kitchens & Bathrooms book cover the subject more fully. The section on bedrooms has a full-page spread of my bedroom on page 238, despite Jane’s grousing about the room’s Victorianess. The man who built my house, the Reverend Alfred Hare was known as a church leader who would leave each congregation with a fully paid mortgage for their building, so I couldn’t really see him as a man who would fork out good money to replace a perfectly good brass bed. (And Jane herself was a great fan of the backstory.)
In the photo you can see my collection of embroidered cat pillows, (with my little Bukhai whose sweet story you can read here, snoozing on the soft comfie bed) my grandmother’s picture on the wall, my mother & uncle’s pictures on the dresser & my grandmother’s confection tin in which she kept her clean hankies. And the hankies were in there too!
After I moved to Florida, a new friend, whom I had met at an event I had produced for Jane, was getting the tour of my Tampa bungalow. When we entered my bedroom she became very confused saying, “It’s déjà vu. I have been in this room before. It’s déjà vu!” I feared that we were going to need to bring out the smelling salts! It took me a moment to realize that she had seen the original room in the book which she had purchased at the event. Being a kitty fan, she had loved & remembered the cat pillows.
CHAPTER SIX: STEWARDSHIP
Here’s where Jane & I shared a soul. And, I guess it’s why I want you to read her books. So, read ‘em, & also head on over to the section on my blog, PRESERVATION GROUPS. It is a work in progress & you are so-o-o welcome to let me know about others to add.
Jane’s rallying cry was, “DO SOMETHING ABOUT IT!” & as a staunch preservationist, I stand with her on this.
CHAPTER SEVEN: THE IMPORTANCE OF BEAUTY
This chapter is Jane’s Random Musings.
Q. What did the Buddhist say to the hot dog vendor?
A. “Make me one with everything.”
BUNGALOW: THE ULTIMATE ARTS & CRAFTS HOME-IT’S ALL ABOUT MOI
 The Big Book, (Jane’s name for it) AKA, BUNGALOW: THE ULTIMATE ARTS & CRAFTS HOME, is my favorite because it contains so many images of the house I lovingly restored & left behind in California after my crushing defeat in my fight to save a neighborhood building. Jane & Linda & I spent the day shooting which was fun & exhausting. I waited with great anticipation for the book to be published so I could see my house as well as the other houses in the neighborhood which Jane & Linda had shot several months earlier- dodging the Halloween decorations that had adorned many facades. I was pleased to see my house so well represented & amused by some of the accompanying copy.
The exterior of my house is pictured on page 107, with another from my neighborhood. The Arts & Crafts clubhouse of the Woman’s Club to which I belonged is on page 100. The sisters of the man who built my house raised the money to erect the clubhouse by performing the skits & songs that they wrote. 100 years later I had the privilege of walking in a fashion show to raise money to restore & preserve that same building.
My sunroom is pictured on page 161 with a Moroccan table which was recently pitched after out attempt to rid it of termites. (I live in Florida now! If you have any clue as to how I might be able to get another one of these, Please let me know.) My living room is on page 181. I sold the couch & matching chair when we left Eagle Rock because it was painfully uncomfortable. We had to take it apart to get it out the door & there was a dead, fossilized rat in it. That wasn’t in any of the books!
To buy this book, you’re going to have to search for it in the various on-line booksellers. KITCHENS is available in Kindle but the rest can require some sleuthing. My fingers are crossed that the rest will be Kindled soon.
READ ALL JANE’S BOOKS ABOUT BUNGALOWS!
 BUNGALOW KITCHENS
Restoring the heart of the home.
BUNGALOW BATHROOMS
Everything you need to know to restore or create a beautiful & functional bungalow bathroom.
BUNGALOW DETAILS: EXTERIOR
What makes a bungalow.
BUNGALOW DETAILS: INTERIOR
Your inspiration for a beautiful home.
& last but not least
LINOLEUM
It’s not vinyl!

STAY IN THE BUNGALOW KNOW!!!
Sign up for our newsletter & receive our FREE E-book, 7 VITAL Things to Do Before You Hire a Contractor.
by bungalow101 | Jun 15, 2022 | Doors & windows, Other areas
 The subject of bungalow window coverings & the resources where they can be found is much debated, but is actually pretty simple. Nobody wants to cover their beautiful window moldings, but blocking the sun is generally desired & blocking passing eyeballs is highly recommended!
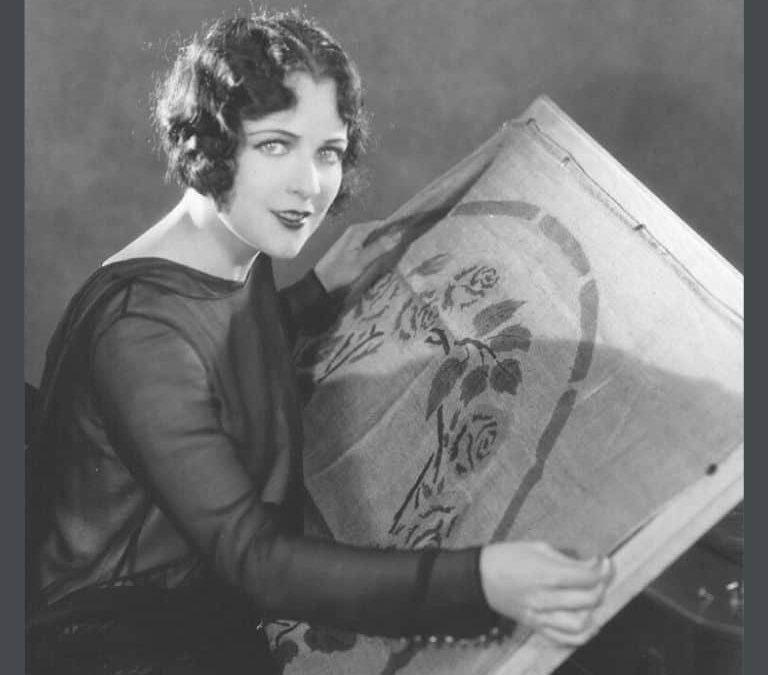
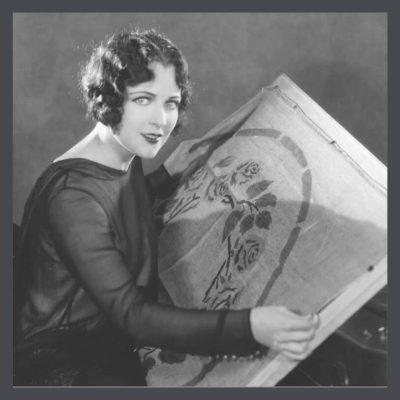
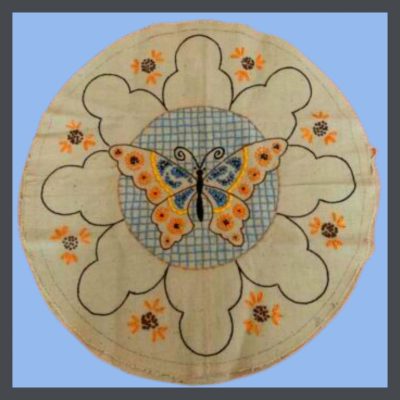
Jane Powell used to joke that the Revival has lo-o-ong out-lasted the original Arts & Crafts Movement. Well, yeah, but it has brought us some amazing craftspeople & I must admit that my favorites are those working in textiles. In the right hands, a bit of fabric, a snip of thread or a bit of paint can create astonishing window art.
Textile art is something that you can learn to do yourself. When I was a hippy, way back in the early 70’s, I loved to embroider, learning from books & the artistry of my friends. You can tote your work around with you & no one ever seemed to mind that I’d pick it up mid-conversation. (Of course, we were pretty mellow those days.)
I have included here textile artists, all well-known for their work, who offer window treatments. They also offer complimentary items such as pillows, table runners & upholstery covers. Of course it is not mandatory to have adornment on your curtains because the beautiful fabric & even the lovely hem work will enhance any room in which you use them.
Several of these artists offer stencil & embroidery patterns, & I’ll be including links to others who deal in only those goods, so if you want to create your own embellishment, you can do so. I would love to see what you make, so please send me images of your homes with your lovely new blinds!!
Hardware is also a tricky issue so I have included harware sources below. I’m a bit of a hardware addict, & when I needed to replace some of the hardware in the Hare House, I formed a friendship with my hardware specialist & 20 years & 3 houses years later, we get together when she visits her sister in St. Pete. We can spend hours on the phone talking hardware & I have been nagging her to write a book on doorknobs.
HERE ARE YOUR BUNGALOW WINDOW COVERINGS RESOURCES!
 Ann Wallace For Prairie Textiles/melton Workroom
Ann carries a full line of custom made window treatments-curtains, Roman shades, roller shades- in a variety of appropriate fabrics. She offers either stenciling or embroidery & will help you to choose the best combinations. She has a lovely collection of embroidery choices to best complement your home.
If you want to stencil your own designs, she has the stencils, brushes & the paints. I have always lovely thistles- even once named a kitty Thistle! And, she has all the hardware that you would need to install your wonderful new window treatments. She’ll also make you pillows, runners & bedspreads to match or complement!
 Arts & Crafts Period Textiles
From The Workshop Of Diane Ayers
In addition to her custom, hand-made wares, Diane features antique textiles also which combine beautifully with newly made pieces & can serve as great inspiration. She also carries antique books about the Arts & Crafts period, most on the topic of design.
Diane’s website takes you step-by-step through planning your order, being with lifestyle requirements. She continues with fabric descriptions & choices, embellishment offerings & discusses the need for lining. You can also purchase beautiful & appropriate fabric from her to make your own curtains.
She has some great information & clear illustrations to demonstrate mounting choices & shows mounting hardware in her catalogue.
 From The Studio Of Natalie Richards
Natalie is a Roycroft Renaissance Artisan. This designation is awarded only to those who demonstrate high quality hand-craftsmanship, excellence in design, continuing artistic growth & originality of expression.
On her site, she provides an explanation of the different curtain types/choices that exist. She also describes many fabric types. It’s a good, basic lesson.
Natalie offers curtains in a great assortment of fabrics with a number of finishes. She also has embroidered & stenciled pillows & embroidered table runners as well as kits for these items. In addition, you can purchase fabric from her as well as embroidery supplies.
Morris & Co.
This British company recreates William Morris’ designs in beautiful fabric, wallpaper & paint, in lush colors to complement a more formal home. When I chose fabric for the Hare house, I was not aware of this resource. I liked the fabric I chose, but I would have been much happier with the patterns I saw in my books about Morris.
Unfortunately, their products cannot be purchased online, so you’ll need to use their search feature to locate a retailer near you. Howver, what could be bad about visiting these lush colors & patterns?
Morris’ designs represent the philosophical & aesthetic inspiration for your bungalow. Even if they are not appropriate in your more casual, American Craftsman home, they are an important part of its history with their interpretations being expressed in every feature.
 Cooper Lace
Cooper Lace offers 100% cotton, Scottish-woven sheers & sidelights in a variety of Arts & Crafts patterns. My favorite, of course, because it enhanced the windows of the Hare House, is their Voysey, The Stag, but there are several others which would complement your bungalow, giving you varying degrees of light penetration & privacy. The image is of the Ginkgo Leaf, a revered & oft-repeated image in the Movement.
Alameda Shade Shop
Pull-down blinds are what you want to have in your bedroom. They can be used alone, with a valence, behind lace or other open-weave fabrics.
While there are a great number of Victorians on their site, they do offer a plain hem with a ring pull, in cotton. (Just waiting for you to add your own flair with a custom, stenciled design!) Their room darkening, fire retardant, washable blind is offered in 3 neutral tones. Each blind is custom made to your specifications. They even offer laminations, using your own fabric and which they apply to their blackout fabrics.
If you are in the San Francisco Bay area, they can offer you more choices in their gallery.
 Zwick Window Shade Company
Founded in 1930, Zwick is in its third generation as a family business, manufacturing handmade custom shades in their Chicago workshop.
Each shade is made to your exact specifications. They’ll re-cycle your old rollers to use them for your new shades & give you a discount! From their Build Your Custom Window Shade feature, you can choose the mundane details such as measurements & also the more entertaining ones such as fabric, trim & pulls. And, they include mounting hardware.
BUNGALOW WINDOWS-STENCILS
There are many books available that provide stencil patterns & ideas for patterns should you choose to create your own, as well as vendors that feature ready-cut ones.
 Trimbelle River Studio & Design
Vintage stenciling from the Arts & Crafts Movement
Trimbelle River is a complete resource for stencils. They provide a large & beautiful variety of designs- floral, geometric, very large, as well as supplies such as brushes.
These wonderful folks have partnered with Northeast Contemporary Services, Inc. a group of adults with intellectual and developmental disabilities & promote their stenciled items. You can sign up to be notified for their sales via Trimbelle River’s website.
BUNGALOW WINDOW COVERINGS RESOURCES- HARDWARE
 Rejuvenation Hardware
Rejuvenation offers single mounting sets & also rings in several finishes. They also have metal tiebacks that you can mount to hold back your curtains. These are handy because you’re not going to want to use ornate fabric tie-backs on the simple window dressings.
 Historic Houseparts
This vendor offers- well-everything! In addition to my vintage appliance addiction, I am mesmerized by old hardware & promise you will get lost in this site. That’s why I sent you directly to the curtain hardware section. I’m trying to help.
They carry single & double mounts, rods & a beautiful assortment of glass tie-backs.
I have many textile images on my Pinterest page so you can see the work of these very skillful fabric artists & others.
STAY IN THE BUNGALOW KNOW!!!
Sign up for our newsletter & receive our FREE E-book, 7 VITAL Things to Do Before You Hire a Contractor.
by bungalow101 | Jun 14, 2022 | Wood floors
by Dennis Prieur, a guy who has seen hundreds of historic bungalow subfloors as well as those in other styles of other historic houses, 40 year veteran of the wood flooring industry. A Popular speaker at Historic Homes Workshop he has supported me in my preservation activities from writing the checks to drying the tears & celebrating the victories. An all around wonderful person.
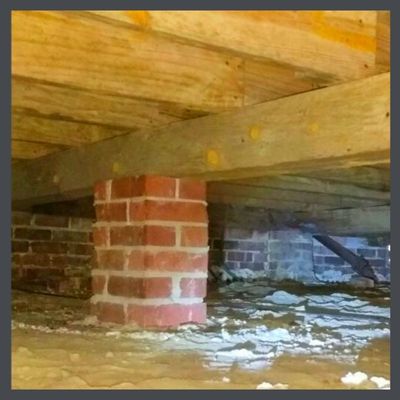
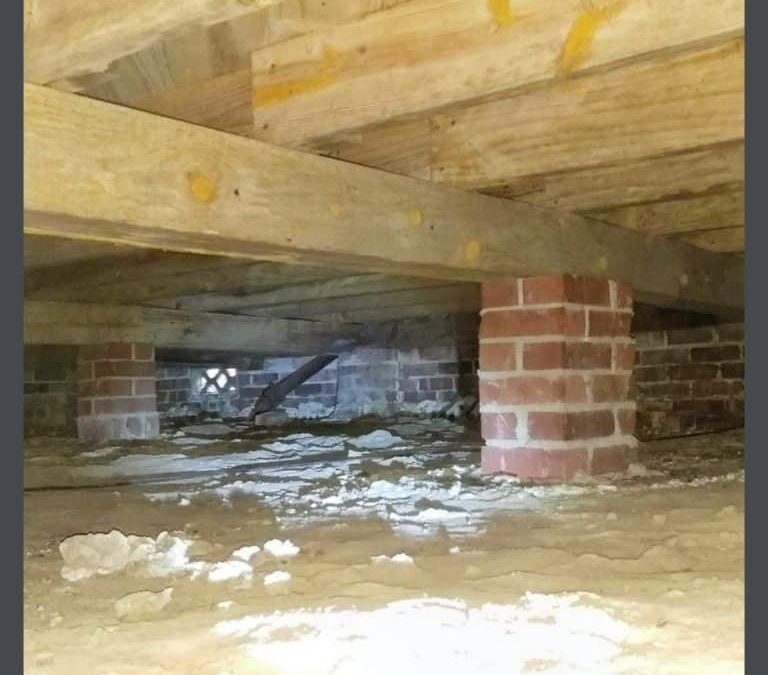
Let’s go from the bottom up. Your house is built over a crawlspace. You have a series of masonry piers lifting your bungalow off the ground. On top of those you have sill beams which are “timber-sized” rough lumber: 3” X 6”, 3” X 8”, or 4” X 6”, 4” X 8”, and on top of those you have the flooring joists which span the open space, between the beams. All together, they carry the weight of your house, your furniture, your bathtub & appliances, your family, your grand piano, your 200 lb. mastiff & your weight set.
Over that, maybe your historic bungalow has a subfloor and maybe it doesn’t. A cost-cutting measure by builders, more modest homes tend to lack subfloors while the grander bungalows generally have them. So, your floors may be installed directly over those joists. You may notice that you can see the ground through the cracks in your floor. That’s a big clue that you have no subfloor!
If you are willing to go under your house with a flashlight, you will find out quickly. The floorboards you see under the house will be running the same direction as those that you see inside the home, because they are the same boards.
CHARACTERISTICS OF A HISTORIC BUNGALOW SUBFLOOR
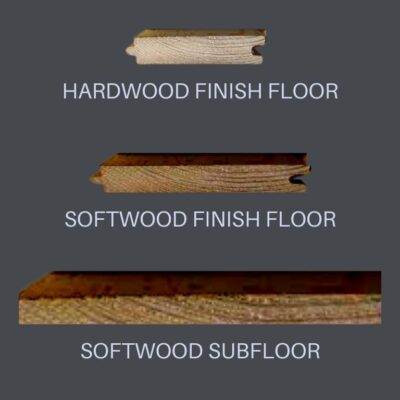
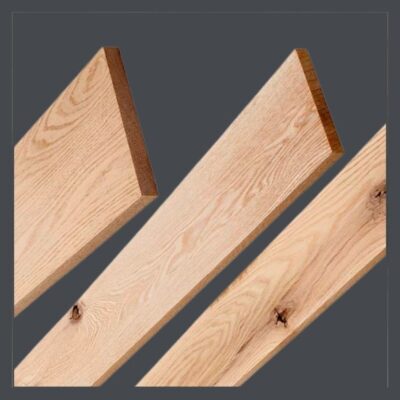 Subfloors are made of ¾” boards, between 5”- & 8”, usually installed diagonally to provide further support. They are of a lower quality/grade wood which could have a great number of knots & other blemishes that make it less aesthetically desirable. This is a great article about grading wood from the National Wood Flooring Association. In the West, sub-floors are generally Douglas Fir or possibly Redwood and in the East, indigenous Pines, all of which are softwoods.
Subfloors boards are not tongue and groove. They were laid side-by-side and top-nailed to the joists normally with gaps of at least ¼” between each board. This means that if they have gaps, (which they probably do) you are going to have a breezy floor and you will see the heads of those nails.
In earlier floors, this is how the main floors were constructed. Often, houses were built from the trees growing on the property. Then in 1852, a machine called the side-matcher was invented which allowed tongues and grooves to be cut into the sides of the boards so that they could be installed closely together. This invention provided the added benefit of allowing nails to be put in at the sides so that they didn’t show on the top.
What this means is that, sure, you can finish your historic bungalow subfloor as a real, finish floor, but it is a low grade wood & won’t have the beautiful graining of the finish woods & will show more knots & other imperfections. It probably will have more gaps, & you’re going to have to deal with the nail heads. So what can you do if your historic bungalow wood floor is only a subfloor? Well, you can put in linoleum or tile over it if it’s a kitchen, laundry or bathroom area, or you could always paint it. If you choose to put wood over it, that subfloor will provide you with a stable substrate and keep your toesies warm!
I want to mention one, relatively rare, subfloor issue I have seen quite a few times as a hardwood flooring contractor. Sometimes a bungalow was built with softwood tongue and groove finish floors, usually Douglas Fir or Heart Pine. Then, as an upgrade, thinner hardwood flooring was installed over these softwood tongue and groove floors. In California this hardwood was usually ⅜” thick by 2” wide, and in Florida where I worked later, ½” thick by 2” wide. All homes where I have seen this done had the original softwood tongue and groove floors laid directly over the joists, making the softwood tongue and groove flooring into a subfloor, with the addition of the hardwood layer.
WIDTHS AND THICKNESSES OF ORIGINAL TONGUE & GROOVE FLOORS
 This is based on my 40 years’ experience in seeing and restoring both hardwood and softwood floors. I will add, as a caveat, that flooring sizes and thicknesses prior to about 1935 varied extensively by geographical area. Species used for the finished wood floor also varied, both by area and by cost of the home being built. I am not personally familiar with historic wood floors in New England or the Midwest. I have been told by Midwest contractors, that older homes often had local hardwoods used for their finished floors, since softwood was less available in these states with native hardwood forests. Narrow wood floors, usually ¾” thick and 2¼” wide become the fashion after the invention of the side-matcher in 1885. Prior to this, and also prior to the advent of steam-powered, then electrified sawmills, most homes had wide plank floors, usually at least 1” thick, nailed over the floor joists without a subfloor. These wide plank floors were subject to shrinkage, and developed gaps between the boards. Home builders and home buyers wanted these new-fangled, narrow tongue and groove floors, to differentiate their homes from what had been built before.
SOFTWOOD BUNGALOW FLOORS
Softwood tongue and groove floors were generally ¾” thick by 3¼” wide. Since softwood floors were all locally milled in the states where the homes were built, shipping costs were not a factor, so I have never seen a softwood floor in anything but a ¾” thickness. Milled from species indigenous to the local area, they were considered less prestigious than hardwood floors.
& THE HARDWOODS
By the 1890s, in areas I’ve worked in, the most common size for hardwood floors was ¾” thick by 2¼” wide- a full inch more narrow than softwood. Most hardwood floors were milled and then shipped from the Eastern US area. Shipping was very expensive, and boards were cut thinner to lower costs, so most homes in far-away California, had ¾” thick and later ½” thick hardwood floors, all 2” wide. However, the largest homes had the thicker ¾” by 2¼” wide floors, since cost wasn’t an issue.
Many homes in Northern California had ⁵⁄₁₆” by 2” hardwood floors milled without any T & G. This were top nailed, normally with 2 small finish nails per board every 18”-24”. I am clueless as to why this was!
MOST COMMON SPECIES USED FOR BUNGALOW FINISH FLOORS
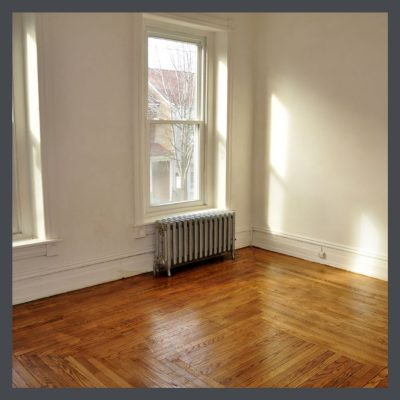 The most common hardwood flooring was White Oak, followed by Maple. Other woods, such as Honduran Mahogany, Hickory, Walnut, Birch, or Beech, were used on occasion. Very fancy homes often had White Oak floors with inlaid multi-species borders.
Douglas Fir was the predominate softwood floor in the Western US areas, and Heart Pine in the East, for both finish & subfloors. I‘ve been told that Eastern white pine was often used in New England, where it was native.
I have never seen any of these hardwoods being used as a historic bungalow (or any other period) subfloor. So, if you’re seeing these, you’re not looking at a sub-floor. It’s a finish floor. Yay!!!
TIP: IF YOU HAVE WOOD FLOORS IN YOUR HOUSE, READ ALL THE ARTICLES IN OUR FLOORING SECTION HERE.
STAY IN THE BUNGALOW KNOW!!!
Sign up for our newsletter & receive our FREE E-book, 7 VITAL Things to Do Before You Hire a Contractor.
by bungalow101 | Jun 14, 2022 | Foundations & Masonry
 Your bungalow’s foundation was the first thing to be built give or take, 100 years ago. It is still of primary importance. It bears the weight of your house & all its contents- your cast iron bathtub, your refrigerator, your bookshelf. If you live in a cold climate, it also bears the weight of winter snow, which weighs in at about 15 pounds per cubic foot.
In this article I am going to address what can adversely affect your foundation. I’m not enthusiastic about warning people about dangers without giving them solutions so I’m including what you can do to ensure that yours stays strong & level.
The ground beneath us moves often, shrinking during dryer times & expanding during wet ones, & does not move uniformly, causing damage to the supporting piers of your bungalow’s foundation.
STEPS TO TAKE TO PROTECT YOUR BUNGALOW’S FOUNDATION
1. Plant trees well away from your exterior walls. The Arbor Day Foundation recommends that you plant a medium (30’- 40’) tree at least 15’ away from a wall. A taller tree. Such as an oak, needs to be at least 20’. Most tree roots spread 2-3 times the radius of the canopy, & often reach out 5 times the radius of the tree canopy & in dry conditions, they can spread even further. As they grow, they disrupt the soil.
Some trees have more invasive roots, some that are water-seeking. Replacing a root-infested main drain pipe (which carries all the water from your house to the city connection or to your septic tank) typically requires excavation, which makes a mess in your yard & can be hideously expensive. Trees with invasive roots may need a minimum distance of 25 to 50’. Slow-growing trees generally have less destructive roots than those that grow quickly. Before you plant a tree, find out about how its root system will behave.
2. Take a deep breath!
Your foundation needs to breath. If water gets underneath your house, it must be able to dry out. A non-vented crawl-space is dangerous to your foundation & your floors. Read this article on how you can help it get some much needed air.
3. Remove dead trees, stumps & root systems from areas near the house. They attract termites & your bungalow, depending on wood beams to support it doesn’t need to be weakened by the gnawing of termites.
 4. Install gutters. They channel rainwater from your roof to downspouts & keep your beds from getting washed out. But here’s the trick, you need to install gutter extenders or your gutter will pour all that water right onto your foundation. You need at least 8’ extenders to take that water away. This is most important if you live in a wet area, like I do in Florida, or during the rainy season even in a dryer climate. You can move the ends of the extenders around so that no one area is getting too much water, or, you can choose plants far from your house that would appreciate the extra soaking. I attached several together & put them on my bananas. My neighbors stopped answering their doors when I’d show up with yet more banana bread! You can get extenders at any big box hardware store, or even on Amazon. They are cheap, very easy to install & remove & take up little space in storage. Honest, you need them.
5. Be alert for leaks. If you suddenly find yourself with an unusually high water bill one month, get suspicious. Leakage can occur in any pipes, your water heater, your ice maker in your refrigerator- a biggy. In my 45 years in the wood flooring business, this was our most common repair.
6. Drainage lines can leak & create problems with you bungalow’s foundation too. We owned a house in which it was discovered that the shower was not hooked up to the sewage system. All the water drained under the house! We’d had the house “inspected” but this was not noticed & had been going on for decades.
Do not overlook the draining of your HVAC’s condensate lines. Under the indoor unit of your HVAC system, there sits a large metal pan. When you run your air conditioner, water collected from the air in the form of condensation will drip out of the unit & flow into the drain pan. From the collection pan, it flows into the drain line & then through a pipe & out your bungalow. You need to make sure that the drain line is not clogged or the pan will overflow, & you need to have that pipe long enough so that the water is not running out close to your house.
7. How is the grading around your house? Does water run away from or toward the foundation? Hopefully this was included in your inspection, but it can be overlooked. Notice where the water runs in a heavy rain.
8. If you find that you are having problems with water sitting under your bungalow, & you determine that your grading is tipped the wrong way, you can have French drains installed to move the water away from your bungalow’s foundation.
 9. When you are doing your hardscaping or landscaping keep in mind the idea that you don’t want to build up your beds so that they are higher than the ground around your house, especially if you have raised borders that will trap rain or irrigation. You don’t want to be building little ponds around your 100 year old masonry piers! If you have raised borders, monitor your irrigation & use gutter extenders to keep heavy rain out of them.
10. Let’s talk about your irrigation system. My husband has been called to inspect homes which have developed cupped (wood) floors & found that the irrigation system was hitting the house. Even if it’s not directly hitting it, your sprinkler heads need to be pointed away from your bungalow’s foundation. It’s a good idea to inspect the system routinely to see if it has sprung any leaks that might be hitting your house or causing water to flow under the house.
11. Keep your plants away from your house. You need to be able to inspect your piers & peer underneath your house to see what’s going on every once in a while. (I never said home ownership is for sissies.)
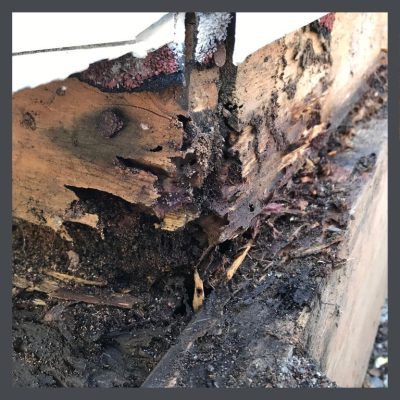 12. Protect your bungalow’s foundation from termite damage. I’m going to toss you over to a Bora-Care video to tell you about the product. Then I’d like for you to watch a video on a more toxic product Sentricon.
I use both. I had the attic & crawlspace of my bungalow sprayed with Bora-Care & then I installed Sentricon at the perimeter. I don’t know why the Sentricon video presents it as an either/or situation. They each have their place your termite arsenal.
I was lucky to have discovered a wonderful home inspector whom I could call when I had things going on with my house that looked scary. He figured out why my bedroom wall was cracking (water under the house which is how I learned about gutter extenders) & he successfully tracked a leak missed by a bunch of leak detection guys at my friend’s house.
When you own a house & especially when you own a 100 year old bungalow, you need someone who knows more than you do that you can trust. A good inspector is worth her weight in gold before you purchase & as your home changes through the years.
TIP: LEARN MORE ABOUT FOUNDATIONS FROM THE GREAT VIDEOS HERE.
STAY IN THE BUNGALOW KNOW!!!
Sign up for our newsletter & receive our FREE E-book, 7 VITAL Things to Do Before You Hire a Contractor.

by bungalow101 | Jun 13, 2022 | Landscaping
 Using native landscaping for your bungalow is eco-friendly, easier care & a beautiful complement to your house of natural materials.
“Everything made by man’s hands has a form, which must be either beautiful or ugly; beautiful if it is in accord with Nature, & helps her; ugly if it is discordant with nature.” -William Morris, considered to be the founder of the Arts & Crafts Movement.
The Movement was a reaction to the Industrial Revolution which had generated new opportunities & economic growth, but also introduced pollution on a scale not yet experienced on our planet. As well, the increased production of materials demanded that we utilize our natural resources at an unprecedented pace.
Our environment is under even greater stress today. More & more species are becoming extinct. The Monarch butterfly was recently placed on the endangered list!
So how can we plant gardens to be, “beautiful if it is in accord with Nature, and helps her.” How can we be in accord with our natural world? By considering native landscaping for your bungalow.
WHY USE NATIVE LANDSCAPING FOR YOUR BUNGALOW?
 The United States National Arboretum defines a native plant as “one that occurs naturally in a particular region, ecosystem, or habitat without direct or indirect human intervention.” And, how are they beneficial to our natural world?
The California Native Plant Society states, “These plants have coevolved with animals, fungi and microbes, to form a complex network of relationships. They are the foundation of our native ecosystems, or natural communities.”
This coevolution is the key. Evolution, in biology, is defined as the change in the characteristics of a species over several generations & may result in changes which give the individual an advantage in survival which they can then pass on to their progeny. Coevolution occurs when two species, or groups of species, evolve alongside each other, adapting to changes in the other, giving one another an advantage in survival. These changes could be caused by any source- climate, air & water quality, natural disasters such as fire, pathogens affecting any part of the group, etc. So here we have this nice little group of plants, animals, (including insects) fungi & microbes all working in harmony for the mutual survival of all, making adjustments every generation as together they fine tune their abilities to survive & multiply. It’s the ultimate in cooperation!
A prime example of this is the relationship between flowering plants & insects & birds that pollinate them. The flowering plants have developed adaptations that allow them to attract pollinators, & there is evidence that some flowering plants sweeten their nectar when they perceive the buzz of a bee. The insects and birds have also developed specialized adaptations for extracting nectar & pollen from the plants.
Flowers & their flitting pollinators were a common theme in the textiles & pottery of the Arts & Crafts Movement- bees, butterflies, birds. Life & its creations were considered precious in the Movement & the natural world with its beauty & vitality were exhaulted in their art.
IN THE FOREST, THE ULTIMATE NATIVE GARDEN
Suzanne Simard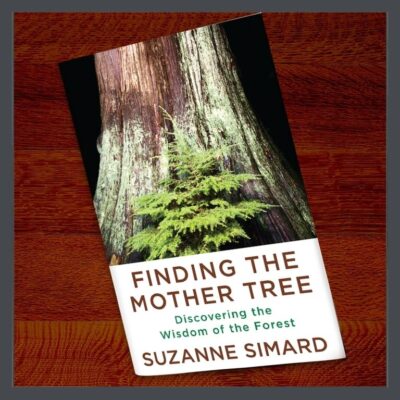 a descendant of loggers, now a professor of forest ecology at the University of British Columbia, is one of the first women in the industry & has made some monumental discoveries about the wisdom of trees. In an interview on NPR she states, “Keep in mind that all trees and all plants — except for a very small handful of plant families — have obligate relationships with these fungi. That means that they need them in order to survive and grow and produce cones and have fitness — in other words, to carry their genes to the next generations. And the fungi are dependent on the plant or the trees … because they don’t have leaves themselves [for photosynthesis]. And so they enter into this symbiosis in that they live together in the root, and they exchange these essential resources: carbohydrates from the plant for nutrients from the fungus, in this two-way exchange which is very tight, almost like a market exchange.
If you give me five bucks, I’ll give you five bucks back. It’s very, very tightly regulated between those two partners in the symbiosis. But, yes, all trees and all plants in all of our forests around the world are dependent on this relationship.”
Now look at this over a span of millions of years. Generation after generation of trees are assisted by beneficial fungi which, in turn, feed on their fallen sisters. Every generation their abilities are expanded & their bonds strengthened.
PLEASE CONSIDER NATIVE LANDSCAPING FOR YOUR BUNGALOW
 It is plain to see that life supports life. Darwin’s theory of survival of the fittest missed the important point that the fittest are the most cooperative. Cooperation is a natural activity, though we see far too many examples in which it is lacking. My grandmother was a farmer’s daughter & a rosarian, but foremost, she was a teacher. In turn I learned about trees & gardens from my mother. My brother is a Master Gardener. Gardening with your children & grandchildren provides an opportunity to teach them about living in cooperation with their fellows & with our Earth.
As a gardener, you can contribute to this circle of life by planting natives. Your climate- temperature, rainfall, seasonal changes- is already in place for it. The make-up of your soil – clay, sandy, silty, peaty, chalky or loamy- is already there. The microbes that were there 100 years ago which developed to assist the indigenous plants are disturbed but you can coax them back to health by planting the species that were at home in your area for hundreds of years, themselves evolving to support the survival of the native microbes.
Planting species indigenous to your area, utilizes all the environmental conditions to their greatest effect because they evolved under these conditions. Their pollinators will return. Your plants will like ‘em & they will thrive with little fuss from you!
Please visit Wild Ones because they can help you get started. These wonderful folks provide resources for purchasing native plants, native garden plans, webinars- pretty much anything that you might need to get started with your new adventure in native landscaping for your bungalow. You can also call your local County Extension Service for advice & if you need help in figuring out which plants would be most attractive with your color scheme, this article on color basics will help.
TIP: Learn more about the Arts & Crafts Movement HERE!
STAY IN THE BUNGALOW KNOW!!!
Sign up for our newsletter & receive our FREE E-book, 7 VITAL Things to Do Before You Hire a Contractor.