by bungalow101 | Jul 23, 2022 | Wood floors
 There are several species of wood flooring most commonly found in historic bungalows. I have seen others but the species below are the ones to consider first when you do not know what your floor is.
It is important to know the species of your bungalow wood floor because different species have different properties & should be treated differently. For example, Maple is difficult to stain while Oak takes stain readily. This article takes a look at these characteristics so that you can determine the species of wood in your house & better know how to restore your floors.
With regard to pictured below of the species of wood flooring found in historic bungalows, realize that the old growth wood that you find in your home, is often harder & darker than newly harvested wood which is what is pictured here. The hardness of the species listed below pertains to newly harvested, mostly farmed wood. And, different finishes change color differently over time, so you can get an idea of your species from the color of the images, but also you’ll need to study the grain patterns.
When I’m referring to staining properties & I state, …”stain & finish application extremely well when the proper techniques are used,” my meaning is that it’s difficult to apply stain color without a great deal of practice, following the manufacturer’s directions to the letter with regard to material preparation, temperature, material & condition of applicator, etc. You can read about different types of finishes here.
I am listing these species by order of popularity, i.e., how often I have seen them used in houses built from 1900-1930.
And, don’t forget to use the GLOSSARY!
THE HARDWOOD SPECIES FOUND IN BUNGALOWS
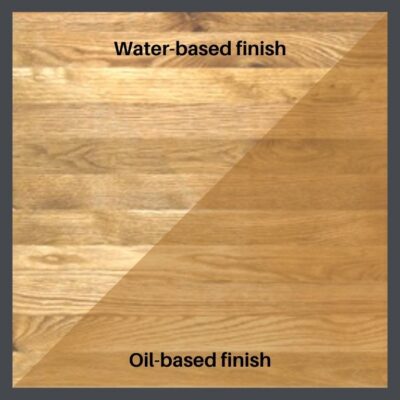 White Oak (Quercus alba)
This is the species of wood flooring most commonly found in historic bungalows in almost all parts of the country.
Color: White Oak’s heartwood is light brown; some boards may have a pinkish tint or a slight grayish cast. Its sapwood is white to cream. In this species you can see considerable variation among boards in both color & grain texture.
Grain: Open. There are several ways to cut the wood from the log, each resulting in a different grain pattern. Most old floors will have combination of grains. A closed grain wood, White Oak tends to be more resistant to water damage than is Red.
Janka Hardness: 1360
Staining & finishing: White Oak’s takes stain & finish application extremely well when the proper techniques are used. It is usually left natural in older houses which displays the grain most beautifully as well as the contrast with other species that might have been used.
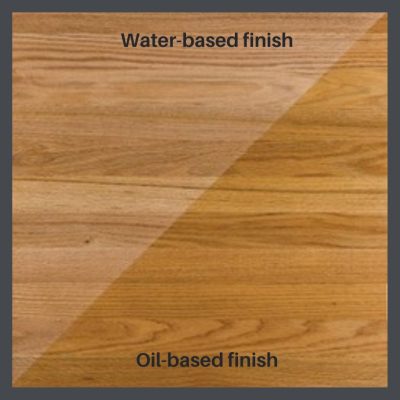 Red Oak (Quercus rubra)
White Oak was used in floors until the 1940’s at which time Red Oak predominated, so your original bungalow floor is unlikely to be Red Oak. However, we have often seen White Oak floors replaced with Red, later additions with Red & we have seen many instances of floors having been patched with the wrong Oak, even by “professionals.”
Color: Red Oak’s heartwood is a light to medium brown, commonly with a reddish cast. Paler sapwood is not always sharply demarcated from the heartwood. White oak tends to have a slightly more olive cast than that of Red, but color alone isn’t always a reliable method of determining the type of oak.
Grain: Grain is straight, with a coarse, uneven texture & large pores. As an open grain wood, Red Oak tends to be less resistant to water damage than White.
Janka Hardness: 1,290
Staining & finishing: Stains easily is but usually left natural in older houses.
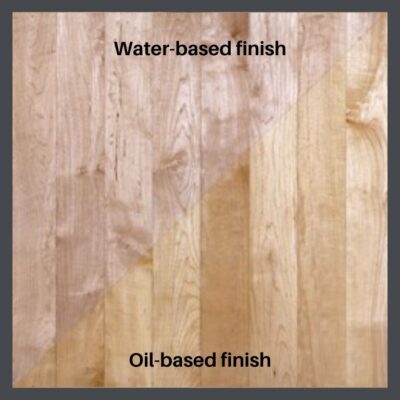 Maple (Acer saccharum)
Color: Heartwood is creamy white to light reddish brown; sapwood is pale to creamy white. Unlike most other hardwoods, the sapwood of hard maple lumber is most commonly used rather than its heartwood. Over time, even the lighter wood it can darken to brown.
Grain: Closed, subdued grain, with medium figuring and uniform texture. Occasionally shows bird’s-eye figuring. Because of its delicate garining, Maple floors are on the formal side.
Stability: Although Maple is a very hard wood, it does not have great stability, meaning that compared to other woods, it can absorb water more easily & warp.
Janka Hardness: 1,450
Staining & finishing: Very difficult to stain. Old Maple floors were never stained. They were always clear coated. I would recommend that if you like the light color of Maple, that you apply a water-based finish rather than oil. The water does not change color over time while the oil finish ambers.
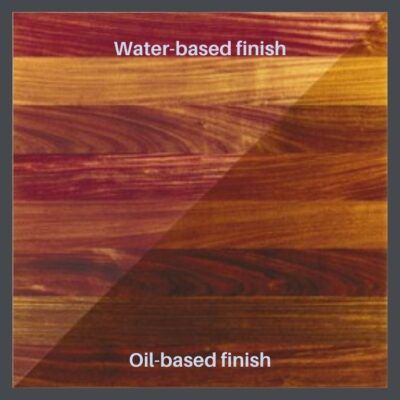 Mahogany (Swietenia macrophylla)
Color: Heartwood color can vary a fair amount, from a pale pinkish brown to a darker reddish brown, tending to darken with age. It has an amazing & beautiful 3D look that changes as you look at the wood from different angles.
Grain: Mahogany’s grain can be straight, interlocked, irregular or wavy. It’s tecture is medium & uniform, with moderate natural luster.
Staining & finishing: Stains easily but why would you want to? For centuries fine furniture makers have used it to make grand pieces & also as an accent wood. They did not stain it, but just allowed to glorious color to display.
We saw Mahogany in some of the larger, more upscale bungalows in Los Angeles. This makes sense because an imported wood must be transported from a great distance which adds to the cost. We saw none in Florida.
THE SOFT WOOD SPECIES OF FLOORING MOST COMMONLY FOUND IN HISTORIC BUNGALOWS
These two species below look very similar in color & grain. The best way to differentiate them is by the area of the country in which they are used- Doug Fir in the West & Heart Pine in the East. Both were regarded as more common in these areas to which they were indigenous, & often used in private areas, while the mosre expensive hardwoods were used in the public spaces.
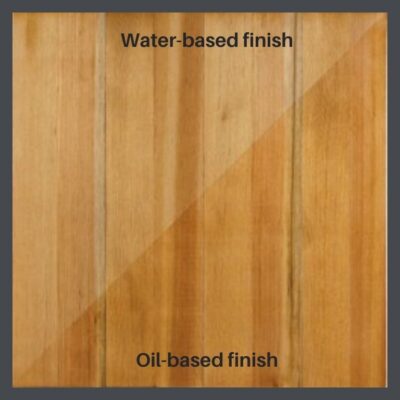 Douglas Fir (Pseudotsuga menziesii)
Color: Freshly cut Doug Fir’s heartwood is yellowish tan to light brown, while the sapwood is tan to white. Heartwood may be confused with that of Southern Yellow Pine. You can expect radical color change -getting darker & redder- upon exposure to sunlight. When you sand a Fir floor, the floor will become lightener because you are removing the oxidized layer. It will darken again for a period of decades. The sample on the left is more like what you would see after sanding than what you’re likely to see on your home.
Grain: Normally straight, with occasional wavy or spiral texture.
Janka Hardness: 660
Staining & finishing: Takes stain & finish application well when the proper techniques are used, but not as easily as Oak. It will patina to a beautiful rich color. I don’t recommend staining it.
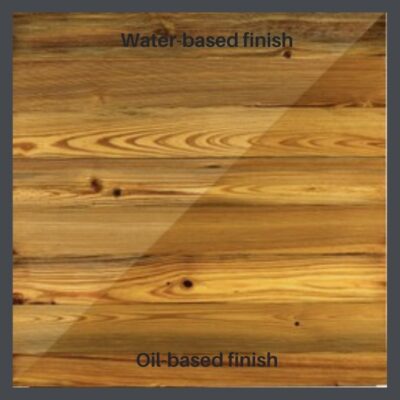 Heart Pine (Pinus palustris)
Color: Heartwood is yellow after cutting & turns deep pinkish tan to warm reddish brown quickly due to high resin content. Sapwood remains yellow, with occasional blue-black sap stain.
Pine & Fir look very similar to each other each other but Pine is more common in the East & Fir in the West.
Grain: Dense, with high figuring.
Janka Hardness: 1225
Staining & finishing: Takes stain & finish application well when the proper techniques are used, but not as easily as Oak. But please don’t stain your Heart Pine floor. It has spent 100 years developing its beautiful, rich color & even if you sand it, it will turn color again.
TIP: READ A GREAT ARTICLE ABOUT THIS WONDERFUL MATERIAL BY CAROL GOODWIN OF GOODWIN HEART PINE HERE.
 STAY IN THE BUNGALOW KNOW!!!
Sign up for our newsletter & receive our FREE E-book, 7 VITAL Things to Do Before You Hire a Contractor.

by bungalow101 | Jul 22, 2022 | Wood floors
 Use this bungalow wood floors restoration glossary when you’re ready to have the wood floors of your bungalow refinished or when you need some installed. After having dealt with myriad contractors, you have learned a great deal about each trade & realize that the next time you restore a bungalow, it will be a dang sight easier!
My purpose is to educate you sufficiently so that you will know more about this particular phase going in, instead of after it’s done & you’re wondering why it’s not exactly like you wanted it to be. I can’t make you an expert, but I can impart enough information in this wood flooring glossary so that you will understand the process before it begins, giving you better control over the final product. It starts with knowing the terminology.
So, when you get your wood floor refinishing proposal, make a nice cuppa ginger tea (hot or cold) & really read it. You also might want to get my 7 Vital teps to Hiring a Contractor e-book that you can get for FREE by just signing up for my mailing list.
I’m also thinking reading my hubby’s article on refinishing would be good too.
Let’s make it easier this time! And if you run across words in the any that I have missed, let me know & I’ll add them to the bungalow wood floor restoration glossary. I spent 45 years of my life educating people about historic wood floors so I want to get it right!

Acclimation
Allowing wood to adjust to the humidity in your home before installing & then again before sanding. This is important because wood expands & contracts based on the amount of moisture in the air.
Ambering
A red/yellowish color change in a floor from certain finishes. Your existing floor has ambered over the years. When your floor gets sanded, it will be a much lighter color.

Baseboard
A molding designed to be attached to the wall to cover the edge of a floor.
Blind nailing
Nailing at a 45 degree angle into the tongue so that the nail is not seen on the top of the floor.
Borders
Simple or intricate designs which frame & customize a flooring installation.
Buckling
Extreme warping of a wood floor from moisture, where some of the boards are actually lifting up off of the subfloor.
Burl
A rounded woody swelling on a tree trunk. The grain of the wood milled from such a knot is patterned & unusual.

Chatter marks
Patterned markings left on a floor by improper handling of a drum sander.
Crowning
A convex or raised appearance of individual strips, with the center raised above the edges.
Cupping
A concave or dished appearance of individual strips, with the edges raised above the center. Cupping is always caused by a moisture imbalance and is often the sign of a water intrusion or wet crawl space issue.
Cure
There’s dry & there’s cured, which is when a finish has reached its fullest hardness potential. Different types of finishes dry & cure at different rates.

Dimensional stability
Wood is a natural product & reacts to changes in humidity and temperature-warping, expanding, shrinking. Different species of wood react & change in differing degrees.
Domestic woods
These woods are harvested from trees that are native to & grown in the United States.
Drum sander (AKA big machine)
A type of sander used to smooth the floor, using replaceable abrasive sandpaper sheets to the surface of wood flooring to prepare it for finishing & sometimes staining.
Dustless sanding
Today’s technology features machines that have an integrated dust collection system. Most companies promote 99% efficiency. Many of our former customers reported 100% satisfaction.

Edger
A powerful, large, orbital hand (It spins around & around, flat against a surface) sander that allows you to sand the edges of floors, right up to baseboards and walls.
Engineered flooring
A wood flooring product that is made of layers of wood pressed together, with the grains running in different directions. Do not
Exotic woods
Woods that are from trees native to, & grown in countries other than the U.S.
Expansion
Wood is a product of nature & is affected by changes in the environment. It expands when it is exposed to water or humidity.
Expansion spacing
A space is left at the baseboard to allow for the floor to expand, which occurs with moisture. The space is covered by the base shoe molding.

Filler
Material which fills cracks or nail holes in a floor. It is tinted the color of the floor.
Finish
Protective coating applied to a wood floor.

Gloss level (Also known as sheen level)
The amount of light reflected by a particular finish. Your choices are satin or matte, semi gloss and high gloss.
Grade
The appearance of wood is judged (graded) by the number of visible knots & other natural markings.

Hardness
Refers to the strength of the hardwood species, based on a scale which measures the amount of force it takes to drive a .444 inch steel ball into a plank of wood .222 inches.
Hardplate
Use of equipment that will give you the flattest floor. It will remove high spots, such as chatter marks, without taking out soft grain.
Hardwood
A botanical group of trees that has broad leaves as opposed to needles. The wood of these trees is normally harder than needle bearing trees. Common hardwoods found in bungalow floors are oak, maple, mahogany.
Heart pine
Wood from the center of old-growth long leaf pine that is darker, denser & somewhat harder that newly harvested wood. Heart pine is much valued amongst bungalow owners.
Heartwood
Slightly harder & darker, non-living wood at the center of a tree at its center.

Intercoat abrasion
You want to ensure that the finish will be well-bonded to the floor’s surface. In order to achieve this bond, each coat applied must be lightly abraded after it is completely dry- so dry that the finish will form a powder when it is abraded.

Job finished
Floors that are sanded, stained & finished in your home.
Joists
Framing members, often a 2″ x 8″ pieces of lumber, which are usually spaced every 16″ to 24″ & support the sub-floor & flooring. Joists usually ‘sit’ on a sill beam (the structural beam that lays on top of your piers) or, toward the center of your house, right on the piers. In older homes, the flooring is often laid directly over these joists, with no subfloor.

Lacing in
The practice of replacing boards that are discolored or damaged, while leaving the remaining floor. The new boards are of the same wood (ideally reclaimed) & same width as the exiting boards.

Mill
To cut wood into a desired shape, e.g., strip or plank flooring, etc.
Moisture meter
A special device for testing moisture content in wood floors. Moisture issues should be detected & addressed before sanding your floors.
Moldings
Pieces of wood milled to install in a floor, giving it a finished look.

Nosing
A hardwood molding used to cover the outside corner of a step.
NWFA
An acronym for the National Wood Flooring Association which sets the standards for, & provides education & training for the industry.

Old-growth wood
Lumber that has been cut from trees that grew in America before the settlers came. Some of these trees were hundreds of years old when they were harvested. This is the wood we treasure in our old houses.

Parquet
A wood tile composed of individual slats assembled together, forming a pattern.
Penetrating oil sealers
These oil-based sealers are spread across the floor, allowing them to penetrate the surface, offering a stain and a finish to protect it. Excess is removed with a sponge or cloth. They offer differing levels of protection.
Photo sensitivity
Refers to the likelihood a wood floor’s color will change as it is exposed to light. The existing floors in your bungalow have spent 100 years doing this!
Plank
Wood flooring boards 3” & wider designed to be installed in parallel rows. In random width plank, the boards vary in width from 3” to 8”.
In very old floors, these planks can be just boards, nailed side-by-side. Newer floors have a tongue pattern cut into 1 side & a groove on the other side.
Plain sawn
The usual way of cutting a log. It gives a random mix of grain patterns.
Polyurethane
Type of finish for hardwood that does not require waxing.
Prefinished
Factory-finished flooring that requires only installation.\n\n[/cs_content_seo][cs_element_text _id=”43″ ][cs_content_seo]Quarter Round
A type of trim used between vertical walls and the floor.

Quartersawn
Wood which has a grain that runs parallel to the length of the board. (It is sometimes called “vertical grain”.) In oak the boards have ray-like markings running diagonally across them.

Sapwood
Wood near the outside of a tree. It is usually lighter in color than heartwood.
Screen and Coat
(Also referred to as “Recoat”.) A light scuff sanding of the existing urethane finish, followed by application of a coat (or coats) of urethane.
Sealer
Any finishing material that seals the wood.
Shellac
A resin substance secreted by female lac bugs. Used to form a cocoon, the resin comes from India and Thailand. Processed as dry flakes, it can be added to denatured alcohol to create a liquid. This liquid is then used as a food glaze or floor finish. It’s a natural option which is highly resistant to stain and odor. It provides a high gloss finish.
Solid flooring
Made from boards which are single pieces of wood from top to bottom.
Splintering
Can occur at the side of the boards when a floor is at the end of its useful life, or otherwise damaged.
Staining
The act of changing the color of wood without disturbing the texture or markings, through the application of transparent, pigmented liquids.
Strip flooring
Solid or engineered boards, “1 & 1/2” – “2 & ¼” wide, installed in parallel rows.
Subfloor
A foundation for a floor in a building. It can be concrete, plywood, or in older homes, pine planking.

Tongue & groove
In strip, plank and parquet flooring, a tongue is cut on one edge & a groove cut on the opposite edge. As the flooring is installed, the tongue of each strip or unit is interlocked with the groove of the adjacent strip or unit.
Top nailing (face nailing)
The old plank floors were nailed from the top of the planks while tongue & groove floors are nailed into the grooves so that the nails are hidden.
Trim
The finish moldings, such as baseboards or base shoe.

Urethane
Most common finish for wood flooring, available in various gloss levels

Vapor retarder
A material, such as foil, plastic film or specially coated paper, with a high resistance to vapor movement, used to control condensation or prevent migration of moisture.

Wear layer
The sandable wood surface above the tongue and groove. On 3/4″ solid wood floors, the wear layer is typically 6 millimeters (0.23622 inch). This is why you want to take good care of your floors!
Hopefully this bungalow wood floors restoration glossary helps you make sense of what you are seeing in your flooring proposal. If you still have questions, feel free to send them them to me & if I can’t answer them, I can pretty much guarantee that my brilliant husband can.
 STAY IN THE BUNGALOW KNOW!!!
Sign up for our newsletter & receive our FREE E-book, 7 VITAL Things to Do Before You Hire a Contractor.
by bungalow101 | Jun 14, 2022 | Wood floors
by Dennis Prieur, a guy who has seen hundreds of historic bungalow subfloors as well as those in other styles of other historic houses, 40 year veteran of the wood flooring industry. A Popular speaker at Historic Homes Workshop he has supported me in my preservation activities from writing the checks to drying the tears & celebrating the victories. An all around wonderful person.
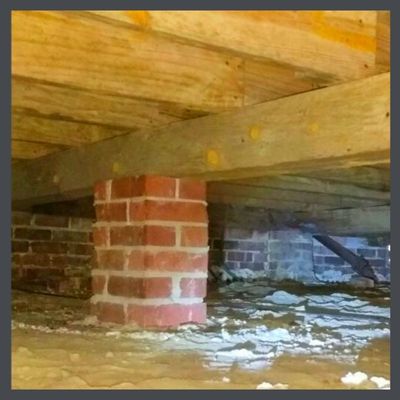
 Let’s go from the bottom up. Your house is built over a crawlspace. You have a series of masonry piers lifting your bungalow off the ground. On top of those you have sill beams which are “timber-sized” rough lumber: 3” X 6”, 3” X 8”, or 4” X 6”, 4” X 8”, and on top of those you have the flooring joists which span the open space, between the beams. All together, they carry the weight of your house, your furniture, your bathtub & appliances, your family, your grand piano, your 200 lb. mastiff & your weight set.
Over that, maybe your historic bungalow has a subfloor and maybe it doesn’t. A cost-cutting measure by builders, more modest homes tend to lack subfloors while the grander bungalows generally have them. So, your floors may be installed directly over those joists. You may notice that you can see the ground through the cracks in your floor. That’s a big clue that you have no subfloor!
If you are willing to go under your house with a flashlight, you will find out quickly. The floorboards you see under the house will be running the same direction as those that you see inside the home, because they are the same boards.
CHARACTERISTICS OF A HISTORIC BUNGALOW SUBFLOOR
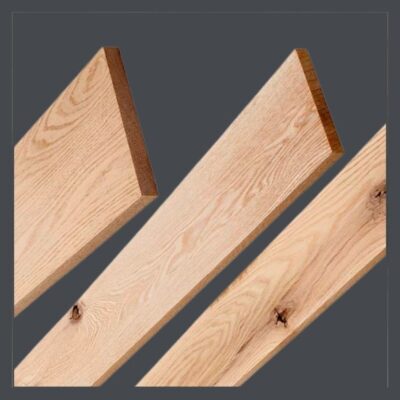 Subfloors are made of ¾” boards, between 5”- & 8”, usually installed diagonally to provide further support. They are of a lower quality/grade wood which could have a great number of knots & other blemishes that make it less aesthetically desirable. This is a great article about grading wood from the National Wood Flooring Association. In the West, sub-floors are generally Douglas Fir or possibly Redwood and in the East, indigenous Pines, all of which are softwoods.
Subfloors boards are not tongue and groove. They were laid side-by-side and top-nailed to the joists normally with gaps of at least ¼” between each board. This means that if they have gaps, (which they probably do) you are going to have a breezy floor and you will see the heads of those nails.
In earlier floors, this is how the main floors were constructed. Often, houses were built from the trees growing on the property. Then in 1852, a machine called the side-matcher was invented which allowed tongues and grooves to be cut into the sides of the boards so that they could be installed closely together. This invention provided the added benefit of allowing nails to be put in at the sides so that they didn’t show on the top.
What this means is that, sure, you can finish your historic bungalow subfloor as a real, finish floor, but it is a low grade wood & won’t have the beautiful graining of the finish woods & will show more knots & other imperfections. It probably will have more gaps, & you’re going to have to deal with the nail heads. So what can you do if your historic bungalow wood floor is only a subfloor? Well, you can put in linoleum or tile over it if it’s a kitchen, laundry or bathroom area, or you could always paint it. If you choose to put wood over it, that subfloor will provide you with a stable substrate and keep your toesies warm!
I want to mention one, relatively rare, subfloor issue I have seen quite a few times as a hardwood flooring contractor. Sometimes a bungalow was built with softwood tongue and groove finish floors, usually Douglas Fir or Heart Pine. Then, as an upgrade, thinner hardwood flooring was installed over these softwood tongue and groove floors. In California this hardwood was usually ⅜” thick by 2” wide, and in Florida where I worked later, ½” thick by 2” wide. All homes where I have seen this done had the original softwood tongue and groove floors laid directly over the joists, making the softwood tongue and groove flooring into a subfloor, with the addition of the hardwood layer.
WIDTHS AND THICKNESSES OF ORIGINAL TONGUE & GROOVE FLOORS
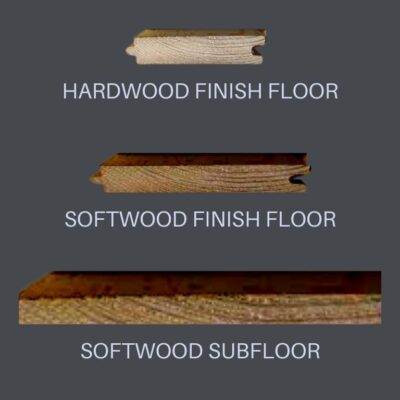 This is based on my 40 years’ experience in seeing and restoring both hardwood and softwood floors. I will add, as a caveat, that flooring sizes and thicknesses prior to about 1935 varied extensively by geographical area. Species used for the finished wood floor also varied, both by area and by cost of the home being built. I am not personally familiar with historic wood floors in New England or the Midwest. I have been told by Midwest contractors, that older homes often had local hardwoods used for their finished floors, since softwood was less available in these states with native hardwood forests. Narrow wood floors, usually ¾” thick and 2¼” wide become the fashion after the invention of the side-matcher in 1885. Prior to this, and also prior to the advent of steam-powered, then electrified sawmills, most homes had wide plank floors, usually at least 1” thick, nailed over the floor joists without a subfloor. These wide plank floors were subject to shrinkage, and developed gaps between the boards. Home builders and home buyers wanted these new-fangled, narrow tongue and groove floors, to differentiate their homes from what had been built before.
SOFTWOOD BUNGALOW FLOORS
Softwood tongue and groove floors were generally ¾” thick by 3¼” wide. Since softwood floors were all locally milled in the states where the homes were built, shipping costs were not a factor, so I have never seen a softwood floor in anything but a ¾” thickness. Milled from species indigenous to the local area, they were considered less prestigious than hardwood floors.
& THE HARDWOODS
By the 1890s, in areas I’ve worked in, the most common size for hardwood floors was ¾” thick by 2¼” wide- a full inch more narrow than softwood. Most hardwood floors were milled and then shipped from the Eastern US area. Shipping was very expensive, and boards were cut thinner to lower costs, so most homes in far-away California, had ¾” thick and later ½” thick hardwood floors, all 2” wide. However, the largest homes had the thicker ¾” by 2¼” wide floors, since cost wasn’t an issue.
Many homes in Northern California had ⁵⁄₁₆” by 2” hardwood floors milled without any T & G. This were top nailed, normally with 2 small finish nails per board every 18”-24”. I am clueless as to why this was!
MOST COMMON SPECIES USED FOR BUNGALOW FINISH FLOORS
 The most common hardwood flooring was White Oak, followed by Maple. Other woods, such as Honduran Mahogany, Hickory, Walnut, Birch, or Beech, were used on occasion. Very fancy homes often had White Oak floors with inlaid multi-species borders.
Douglas Fir was the predominate softwood floor in the Western US areas, and Heart Pine in the East, for both finish & subfloors. I‘ve been told that Eastern white pine was often used in New England, where it was native.
I have never seen any of these hardwoods being used as a historic bungalow (or any other period) subfloor. So, if you’re seeing these, you’re not looking at a sub-floor. It’s a finish floor. Yay!!!
TIP: IF YOU HAVE WOOD FLOORS IN YOUR HOUSE, READ ALL THE ARTICLES IN OUR FLOORING SECTION HERE.
 STAY IN THE BUNGALOW KNOW!!!
Sign up for our newsletter & receive our FREE E-book, 7 VITAL Things to Do Before You Hire a Contractor.
by bungalow101 | May 28, 2022 | Wood floors
by Dennis Prieur, 40 year veteran of the wood flooring industry, writes about how to decide when to refinish the wood floors in your bungalow.
 Dennis was a 25 year member of the National Wood Flooring Association where he sent his craftsmen for certification & was himself an NWFA Certified Sales Consultant. Popular speaker at Historic Homes Workshop. Supporter of my preservation activities from writing the checks to drying the tears & celebrating the victories. All around wonderful person.
The first floor I ever refinished was in 1981. It was in a bungalow near downtown Phoenix. I went to the library and read books about how to refinish floors. The floor was maple, notoriously difficult to stain, but I didn’t know any of this and just sanded away with the equipment rented from Home Depot, using the stain and finishes I got from the paint store. I have a background in chemistry, which helped, but otherwise, I was just wingin’ it!
Since then, I have refinished or supervised the refinishing well over 1,000 historic floors. My aim was always to preserve and protect historic materials, beyond making pretty floors. The old growth forests are long gone and their beautiful wood will never be available again.
So here’s the important question- Do your wood floors really need refinishing?
THIS ARTICLE IS FULL OF TECHNICAL TERMS. PLEASE USE OUR GLOSSARY IF YOU RUN INTO ANY WORDS THAT ARE NEW OR UNFAMILIAR TO YOU.
The first thing I’d like to do is to help you establish if your floors should be sand and refinished, if they can be sanded, or if they should just be cleaned and left as-is. I will also discuss recoating as an option for floors in relatively good condition, or where further sanding is not possible.
MAYBE, MAYBE NOT!
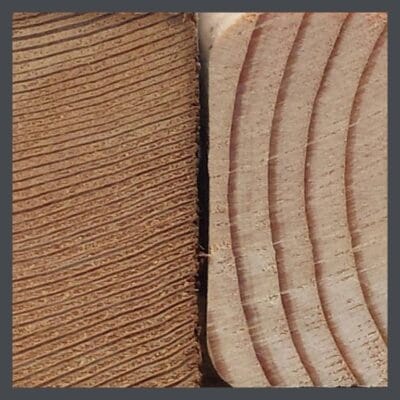 The original wood of bungalow floors is what is termed, old-growth wood. This wood is from the ancient forests that were here when our country was first settled. The forests were clear-cut to near extinction by the beginning of the 20th Century. Old-growth wood is denser, tends to be darker and is much richer in appearance than the wood that is harvested today. It is to be treasure and preserved.
Consequently, old-growth wood floors need to be sanded down to raw wood and refinished only when they are heavily worn, and the wear includes one of two factors. The first, is dents or deep gouges into the wood. If you aren’t sure, get on your knees and run a fingernail into the dent. If it catches, and seems more than 1/32”, it is a scratch into the wood and will only be removed by sanding the wood floors. Scratches that stay in the finish layer are generally 1/64” or less. A floor with this lesser type of surface scratches and abrasions, or where the sheen has worn off, can be recoated (described below) without a full sanding. The other factor, requiring a floor to be sanded, is where the finish has worn off in some or many areas and dirt is worn into the grain of the wood. Wood is a soft and porous material, so leaving it unprotected causes your bungalow wood floor to degrade with traffic.
A wood color change requires a full floor re-sanding (with one possible exception discussed in the recoating section below). However, wood floors in your bungalow (and houses built earlier) were traditionally finished to a natural wood color with no stain. Although it is possible to change the color and stain older floors, please consider that this color change will change the character of your home, and move you away from an original look. Additionally, it will shorten the life of your floor, buzzing away that beautiful, irreplaceable, old-growth wood.
One time where a color change is often required, with older wood floors, is where there is significant wood discoloring due to water stains and pet urine stains. Water and urine stains are usually quite dark. The discolored boards need to be removed and replaced, if you want a natural color refinish. If there are just a few discolored areas, you may choose to live with these age marks. Bleaching isn’t a good solution. It lightens most stains, but doesn’t bring the wood back to the look of the rest of the floor. Also, bleach- no matter how carefully applied- will wick and spread past the discolored wood and lighten un-discolored boards. You end up with 3 shades- the look of the undamaged wood, the lightened boards that were discolored, and a thin band of bleached wood that separates these areas. Additionally, the boards’ integrity is already compromised by the damaging water and more so by pet stains which are usually quite acidic. Bleach or even hydrogen peroxide can further degrade the boards decreasing their strength. This is not such an issue when there’s a nice subfloor underneath, but you want to protect the boards of a floor that is laid directly over joists so that they remain strong & safe.
PATCHING YOUR BUNGALOW WOOD FLOOR
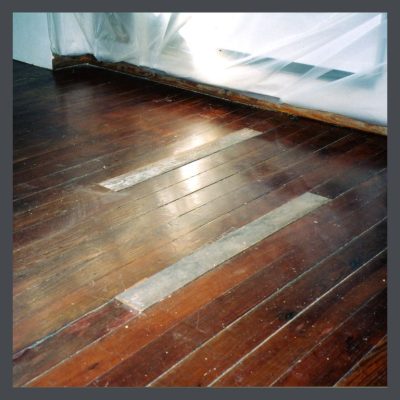 Boards can be replaced so the patching is almost invisible. Ideally, this is done with salvaged, matching, old-growth wood flooring boards. This is best left to a professional who knows how to match wood color and grain. Red oak used to patch a white oak floor stands out badly. Newly harvested white oak used to patch a 100 year old floor also stands out and will be much lighter in color and usually coarser in grain. I commonly see the wrong wood species used to patch floors, and even boards of a wider or narrower width. All floor repairs should be done with tongue and groove flooring materials. When we patch an old white oak floor, and don’t have old salvaged flooring, we select and use only tight, straight grained pieces and stain them after installation for a better match to the historic wood floor.
The most important point is that on a floor with no subfloor, the new pieces need to be placed so that their ends nail to the joists. We have discovered boards or sections of boards hanging in air, waiting for the exactly placed heavy step or the new piano to cause them to fail. Old joists are usually at least 1 & ¾” wide. We end the repair halfway over a joist on both sides so it is supported well.
INSPECTING A BUNGALOW WOOD FLOOR
Here is what I do when I inspect a wood floor that a homeowner wants to refinish. I first notice whether the floors were installed directly over the floor joists, or over a subfloor that is nailed onto the joists. The easiest way to tell this from the floor surface is to look for the butt ends of boards. A floor nailed to the joists will generally have all board butt ends over the floor joists. Joists are normally 16” apart, but can be 2’ or even wider on very old floors. If you look across a floor and see that the butt joints line up in these spaced intervals, there is no subfloor. A wood floor over a wood subfloor will have randomly staggered butt ends, since all boards are laid over a layer of solid wood which creates stability.
Another way to tell whether you have a subfloor, is to go into the crawl space under your house and look up. A wood subfloor under your wood subfloor is normally laid at a 45 degree angle to the wood floor, but can occasionally be at a 180 degree angle. While under the house, see the direction of the floor boards nailed on the joists. If they are the same as the surface wood floor, and are the same width, you are seeing the bottom of the wood floor that has been installed directly on the joists. Subfloor boards were normally around 5 & ½” wide or occasionally wider. Finished wood flooring in older homes was most often 3” or less in width. Another way to tell, from the surface, is that a floor laid over the joists with no subfloor, almost always has much more movement and sag than a floor nailed to a separate subfloor. You also might notice cracks through which you can see daylight!
IS MY WOOD FLOOR TOO THIN TO SAND?
Next, I want to see how much wood remains from the surface of a board, down to the tongue and groove. Newly installed wood floors had around ¼” of wood to the tongue. A wood floor needs at least 1/8” between the surface and the top of the tongue to be sanded. (Some wood flooring professionals often can and will resand a floor that is slightly under 1/8”, but you will have to live with some defects.)
One way I determine this depth is to look for boards with gaps on the sides, wider than the thickness of a credit card. On my hands and knees, I slide a credit card down and measure with my thumbnail about how far down the card goes before it hits the tongue. I check several boards in different areas to get an average depth to the tongue. (If you get a depth over ¼” you may have a section that has no tongue and your card will go down to hit the sub floor.) Oak and other hardwood floors normally have a tongue and groove on all sides of the flooring boards, however, many older softwood floors (like pine or fir) do not have tongue and grooves on the butt joints, just on the two long sides.
It’s best to measure on the long edges of the boards. I will check butt ends if I find no other wide gaps. but know that if my card goes down almost ¾” that there is no tongue here and that there is no way to tell if the floor can be sanded from this spot.
If the thin section of wood above the tongue is thinner than 1/8”, it will often start to crack and split off when sanded, leaving a ¼” wide gap and exposing the tongue. These gaps can be filled if there is a subfloor, but this won’t look great and the filler usually won’t stay in well. If you have a floor laid over the floors with no subfloor, a floor is potentially dangerous when sanded too thin, and your foot may go through the boards.
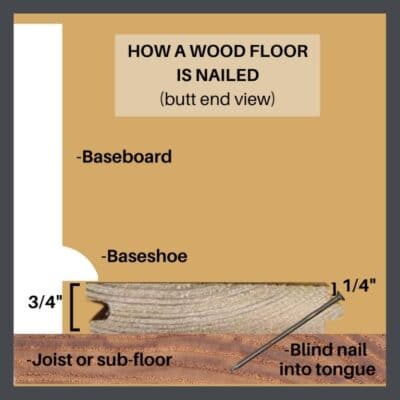 The second method to check wood thickness to determine if the floors can be re-sanded, is to look for exposed nails in the joint between two boards. All wood floors had a tongue and groove on the length of the boards and were generally “blind nailed” by positioning the nail at a slant and nailing on top of the tongue to secure it to the joist or the subfloor. (See diagram.)
When a floor has been sanded many times and there is 1/8” or less from the board surface to the top of the tongue, you will see some exposed nail heads between two boards. These nail holes must be between two boards for this to be a valid test of wood thickness. Here’s why- many older wood floors may have been top nailed to “handle” squeaks or loose boards. Also, in certain areas of the Western United States, old wood floors had no tongue and groove. They were top nailed. These nails are never at the edges of the boards, and you will see a regular, repeating pattern, if you have these floors.
If you do have some nails showing between the boards, a wood flooring professional may still determine your floor can be sanded. Sometimes, these nails can be set down and filled, which will be visible in the finished floor. If small finish nails were used to lay the floor, it looks better to leave them and just sand the floors. You will see these exposed nail heads, but the floors will still look great. I have sanded many floors where homeowners had previously been told they could not be sanded again, to great result. If I find that the floor is borderline to resand (less than 1/8” wood remaining above the tongue and groove) I discuss the options. Usually a refinish can be done that will make the floors look amazing, even if some age related blemishes exist. However, some floors cannot be resanded. I always let a homeowner know what I think can be done, and what he can expect to achieve.
RECOATING YOUR BUNGALOW WOOD FLOOR
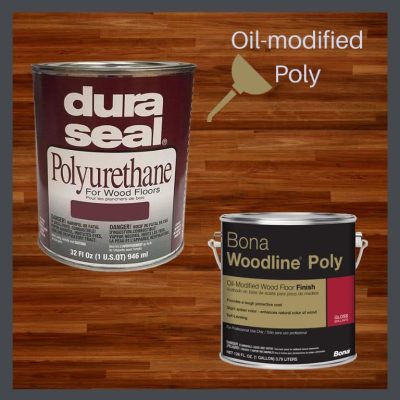 This is a good option for any wood floor that isn’t too badly worn. A recoat allows the finish coats to be renewed for a great improvement in appearance. It works well for a floor that is too thin to be resanded but can be aesthetically improved and be better protected by a recoat. One to two coats are all that is ever needed.
The wood floor must be properly prepared before any coats are done. This is normally done using a light duty stripper designed to remove wax, oils, and other household cleaning products that may have been applied to the floor. Follow the recommendations of your selected finish manufacturer for how to do this, and what product to use. If this step is omitted, the finish often will adhere poorly to the old finish, and either peel off or scratch easily. Once you have a peeling recoat, a full resanding is normally the only solution.
After any cleaning and prep work are done, the floors are normally lightly sanded using a floor buffer and a sanding screen, clog-resistant nylon discs in 80-120 grit. Always follow the grain and direction of the floorboards. The floor is then vacuumed and tacked down well, and is ready for your recoat.
Apply the 1-2 coats per manufacturer instructions for the finish you are using. Also, follow dry time and abrasion instructions if a second coat is planned, and to determine when you can walk on and use the floors.
A recoat doesn’t remove anything in the wood, so you will see any dents, deep scratches, and discoloration on the floor after the recoat is done. If your floor is too thin to sand, a recoat will always improve the appearance, but may not be satisfactory for a badly worn floor that could have been sanded.
CHANGING THE COLOR WITHOUT RE-SANDING
An American Company, Basic Coatings, has developed a product called HyperTone stain. These are water-based floor finishes with tint added, in 14 different colors. They are designed to be used as undercoats followed by 2 coats of their Professional Street Shoe water-based finish. Tricky to use, they can give a blotchy look, but when done correctly, change the color of a floor and look great. Their main drawback is that they will cover up some of the grain and color variation of your original bungalow floors, which is why I recommend these only for a floor that is too thin to resand. But what I most recommend is to leave your floors stain free.
OTHER OPTIONS
Bob Yapp of Belevedere School offers other options. I’m going to let him tell you about them. Bob is a giant in the world of historic preservation & if you want to learn how to restore your own floors, he will teach you!
REFINISHING YOUR BUNGALOW FLOORS: SUMMARY
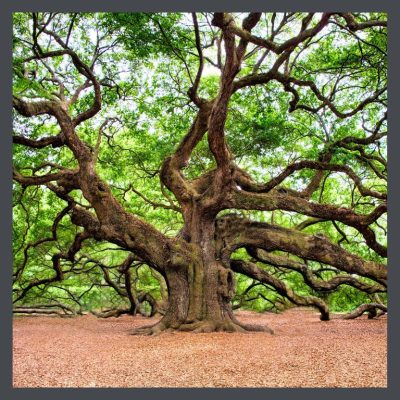 Original wood floors were milled from trees from our old-growth forests. They have a luminous and lively appearance that is not present in wood that is farmed, harvested and milled today. The old trees were often hundreds of years old when they were cut. Grown naturally, they may show as many as 10 times the number of growth rings per inch. In addition to being more beautiful, this wood is more dense and more pest and decay resistant and also shows greater stability, meaning that tt is less likely to warp.
The purpose of finish is to preserve the wood, a soft and porous material underneath. We urge you to forgo sanding if your floor has a good, protective coat on it. If it is showing little wear, we encourage recoating rather than re-finishing. Once your floor is ground down to the tongue and groove, it is effectively over, especially if you have no subfloor to support weight on the thin boards.
A floor that is properly cared for will last several hundred years. The old growth forest will never come again. The supply of wood from them is finite. Let’s protect what we have.
TIP: READ OUR ARTICLE ABOUT WOOD FLOORING FINISH CHOICES HERE.
 STAY IN THE BUNGALOW KNOW!!!
Sign up for our newsletter & receive our FREE E-book, 7 VITAL Things to Do Before You Hire a Contractor.
by bungalow101 | May 28, 2022 | Other areas, Wood floors
by Dennis Prieur (usually known as Hubby) & Carol Goodwin, of the Goodwin Heart Pine Company
 Heart pine floors in bungalows is one of the most appreciated features of our charming homes here in the South, where they are deservedly revered. They gleam a warm welcome as you come in the door, bringing an element of the natural world into the built environment. But what is “heart pine?”
Carol Goodwin of Goodwin Company has been working with heart pine since 1976. They pride themselves with being an eco-friendly company, rescuing logs or using only wood that has been sustainably harvested throughout the Southeast.
Goodwin Heart Pine is famous for its recovery & milling of pine logs from the bottoms of the rivers on which they were floated to the mills over 100 years ago. If you should need extensive patching of your floor, or wish to add an area, they can provide the material for you that will match the existing.wood in your house. This is a terrific video about how they recover the logs.
Carol is a lover and student of history and a supporter of historic preservation. One of my favorite projects of theirs was an adaptive re-use of a barn built in the 1930’s for which they provided over 2,000 square feet of reclaimed wood.
HEART PINE FLOORS IN BUNGALOWS
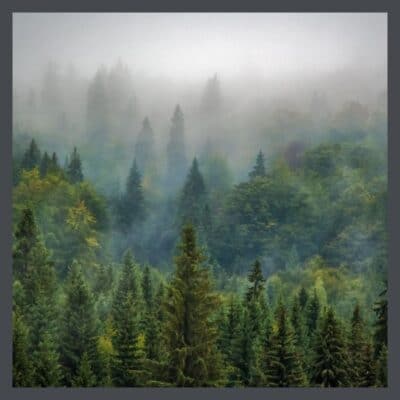 The “heart” of the pine tree is the solid, inside core of the tree. It contains no sap, the watery fluid that circulates through the tree, carrying nutrients to the leaves and various tissues. Heartwood is wood that has died with age. As the tree grows, more heartwood is formed. The heartwood becomes more resistant to decay and termites as a result of genetically programmed chemical changes in the wood, causing the clogging of the nutrient tubes with resin and pitch. If you were to cut a cross section of a tree, you would see heartwood as a darker colored circle, usually following the annual rings in shape.
True heart pine floors in your bungalow are only from the long leaf pine, also known as long needle, long straw, southern yellow, hard, pitch, heart pine and Georgia pine, among other names. The natural range of longleaf pine extends from southeastern Virginia to east Texas in a belt approximately 150 miles wide adjacent to the coasts of the Atlantic Ocean and the Gulf of Mexico. It dips as far south as central Florida and widens northward into west central Georgia and east central Alabama. This type of pine is called “heart” because when it reaches maturity the tree is mostly heartwood, taking 200 years for a tree to become 2/3 heartwood.
Long leaf heart pine contains almost twice the resin content of other types of pine and has much higher structural strength. It was used for the tall masts of sailing ships and was referred to as “The Kings Pine” when this country was owned by England.
HEART PINE- OUR COUNTRY’S BACKBONE
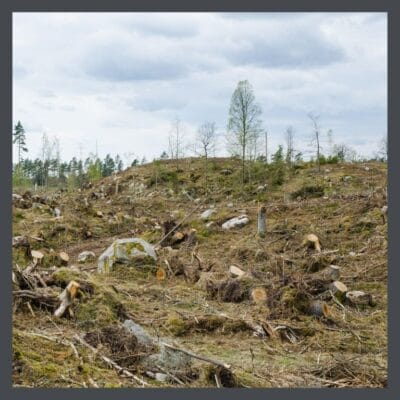 Heart pine is generally considered to be timber from first generation trees, trees that were standing when the first settlers landed in this country in the 1600s. Many of these trees had been standing for over 300 years! There were approximately 80,000,000 acres of these trees. This wood was the primary building material for our bungalows and factories here in the South and was shipped to the Northeast and Europe as well. It was abundant, hard, straight, and long and its timbers offered excellent resistance to decay.
The economy of the Southeast centered on the export of longleaf pine products. After the Revolutionary War, intense cutting of the virgin longleaf pine timber began on the Atlantic seaboard and moved inland, then southward, increasing with the development of the railroad system in the late 1800’s.
By 1930 virtually all of the virgin longleaf pine forest succumbed to overcutting. Less than 1,000 acres of virgin timber remains today, with the longleaf pine ecosystem covering less than 3.3 million acres, a greater than 96% loss. The pine forests of the South have been cut several times over and this newly harvested wood exhibits very few of the qualities that made heart pine the wood of choice up until the early 20th century.
Read more about old growth forests here.
GROWING OLD GRACEFULLY
The heart pine floors of our bungalows are a mix of pine heart and sap woods. The heart is a deeper red in color, with the sapwood being lighter. Some of the boards are a mix of these two woods producing a stripy effect.
Sadly, some of our bungalow heart pine floors have been chewed by termites, and are at the ends of their lives. However, many have generations of usefulness left in them with some patching (think spare wood in closets, or a quick call to Carol!) and a gentle refinishing. We happen to think that they look beautiful when showing the patina of age, like any other precious antique. When possible, we prefer just to re-coat them with a new layer of finish which protects the wood from wear. A well maintained floor can be enjoyed for at least another 100 years!
 STAY IN THE BUNGALOW KNOW!!!
Sign up for our newsletter & receive our FREE E-book, 7 VITAL Things to Do Before You Hire a Contractor.

 There are several species of wood flooring most commonly found in historic bungalows. I have seen others but the species below are the ones to consider first when you do not know what your floor is.
 White Oak (Quercus alba)
 Red Oak (Quercus rubra)
 Maple (Acer saccharum)
 Mahogany (Swietenia macrophylla)
 Douglas Fir (Pseudotsuga menziesii)
 Heart Pine (Pinus palustris)
 STAY IN THE BUNGALOW KNOW!!!


 Subfloors are made of ¾” boards, between 5”- & 8”, usually installed diagonally to provide further support. They are of a lower quality/grade wood which could have a great number of knots & other blemishes that make it less aesthetically desirable. This is a great article about grading wood from the
  This is based on my 40 years’ experience in seeing and restoring both hardwood and softwood floors. I will add, as a caveat, that flooring sizes and thicknesses prior to about 1935 varied extensively by geographical area. Species used for the finished wood floor also varied, both by area and by cost of the home being built. I am not personally familiar with historic wood floors in New England or the Midwest. I have been told by Midwest contractors, that older homes often had local hardwoods used for their finished floors, since softwood was less available in these states with native hardwood forests. Narrow wood floors, usually ¾” thick and 2¼” wide become the fashion after the invention of the side-matcher in 1885. Prior to this, and also prior to the advent of steam-powered, then electrified sawmills, most homes had wide plank floors, usually at least 1” thick, nailed over the floor joists without a subfloor. These wide plank floors were subject to shrinkage, and developed gaps between the boards. Home builders and home buyers wanted these new-fangled, narrow tongue and groove floors, to differentiate their homes from what had been built before.
 Dennis was a 25 year member of the National Wood Flooring Association where he sent his craftsmen for certification & was himself an NWFA Certified Sales Consultant. Popular speaker at Historic Homes Workshop. Supporter of my preservation activities from writing the checks to drying the tears & celebrating the victories. All around wonderful person.
 The original wood of bungalow floors is what is termed,
  Boards can be replaced so the patching is almost invisible. Ideally, this is done with salvaged, matching, old-growth wood flooring boards. This is best left to a professional who knows how to match wood color and grain. Red oak used to patch a white oak floor stands out badly. Newly harvested white oak used to patch a 100 year old floor also stands out and will be much lighter in color and usually coarser in grain. I commonly see the wrong wood species used to patch floors, and even boards of a wider or narrower width. All floor repairs should be done with tongue and groove flooring materials. When we patch an old white oak floor, and don’t have old salvaged flooring, we select and use only tight, straight grained pieces and stain them after installation for a better match to the historic wood floor.
 The second method to check wood thickness to determine if the floors can be re-sanded, is to look for exposed nails in the joint between two boards. All wood floors had a tongue and groove on the length of the boards and were generally “blind nailed” by positioning the nail at a slant and nailing on top of the tongue to secure it to the joist or the subfloor. (See diagram.)
 This is a good option for any wood floor that isn’t too badly worn. A recoat allows the finish coats to be renewed for a great improvement in appearance. It works well for a floor that is too thin to be resanded but can be aesthetically improved and be better protected by a recoat. One to two coats are all that is ever needed.
 Original wood floors were milled from trees from our
 Heart pine floors in bungalows is one of the most appreciated features of our charming homes here in the South, where they are deservedly revered. They gleam a warm welcome as you come in the door, bringing an element of the natural world into the built environment. But what is “heart pine?”
 The “heart” of the pine tree is the solid,
  Heart pine is generally considered to be timber from first generation trees, trees that were standing when the first settlers landed in this country in the 1600s. Many of these trees had been standing for over 300 years! There were approximately 80,000,000 acres of these trees. This wood was the primary building material for our bungalows and factories here in the South and was shipped to the Northeast and Europe as well. It was abundant, hard, straight, and long and its timbers offered excellent resistance to decay.