by bungalow101 | May 17, 2022 | Doors & windows
 Doo, doo, doo, lookin’ out my custom made, tiger oak, square pegged, brass mesh, bungalow screen door.
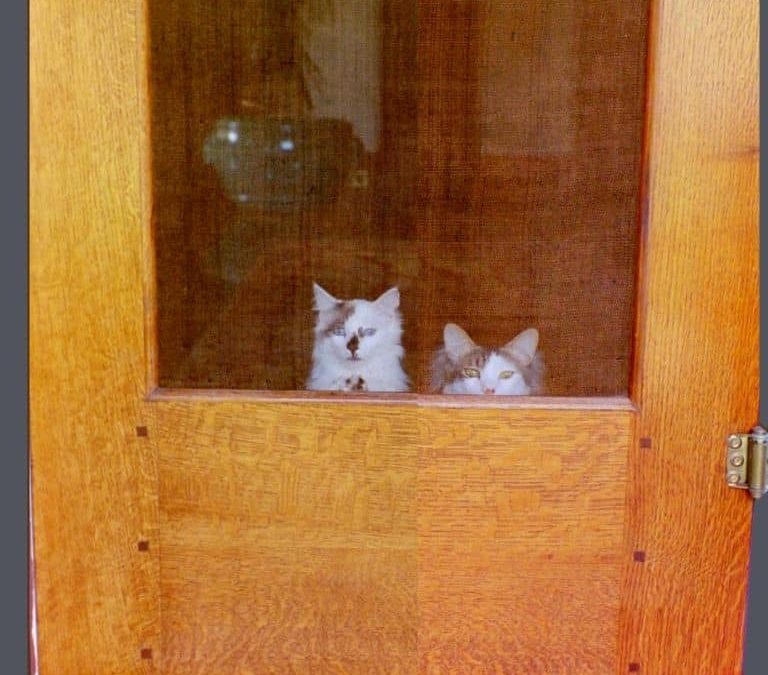
Meet Mahjong the Amazing Wonder Kitten (furry face on the left) & his bro, Bukhai Thunder, on the right. When you have pussycats, it is a good idea to have a screen door so that they can experience nature without experiencing nature. We had ours at the Hare House custom made out of quartersawn white oak. We hand-picked the wood & chose where it would be placed. The bottom rail is 2 planks, heavily figured in a lose pattern. The top is 1 plank of the same heavy, large figuring. The side rails are less heavily figured. I do not like an object that has too much figuring. I feel like it doesn’t give you the opportunity to focus & can end up looking like porcupine with bedhead.
Our bungalow screen door is joined by mortise & tennon but we added decorative plugs of walnut, a darker wood. The mesh is brass, a traditional material. The screen is applied to a rabbet in the front of the door. We finished it with a oil-based poly, probably a floor finish because that’s what we do! We chose not to stain it because this type of finish ambers over time & we knew that it would get much darker.
 Bungalow doors & screen doors are most often made of a higher grade wood, generally oak, & clear-coated, but sometimes both are painted. You want them to have the same finish.
My Tampa house had a Victorian looking door when I bought it & we replaced it with a pine door that I zhuzhed up with way too many colors. I then got a salvaged screen door that had already been painted, & chose for it also, one of the way too many colors on the door, as well as adding some pieces to stabilize it. It was not as heavy as my oak screen door, & was already 100 years old. The poor door was always a bit wobbly & I was a little concerned the one time I told someone, “Don’t let the screen door hit you on the a$$,” but it was really appropriate at the time. I expect the chunky oak at the Hare House one will hang in there for another 100 years.
For the oak, we chose heavy, reproduction brass hinges & pull. For a lock, I used a simple hook & eye inside. I used a vintage reproduction doorknob on the painted pine screen door, but the oak is rather chunky & the knobs tend to be rather delicate, both in look & in function. The good thing about the knobs is that they do have a locking mechanism & if you make friends with your hardware specialist, she will teach you how to keep them operational.
The hinges have a spring in them that you can calibrate to customize the strength of the door swing so that they will be easy to open, & will self-close without whacking you. You have to fool around with them for a bit to figure out the swing pressure. And then calibrate the second one so that you don’t have a wobbly door.
It is not difficult to build a beautiful screen door. My YouTube channel has many videos about the care & feeding of bungalows. You (or your carpenter/handyman) can learn how to make an authentic screen door here.
THE BEST PART OF A BUNGALOW SCREEN DOOR- THE CAT!
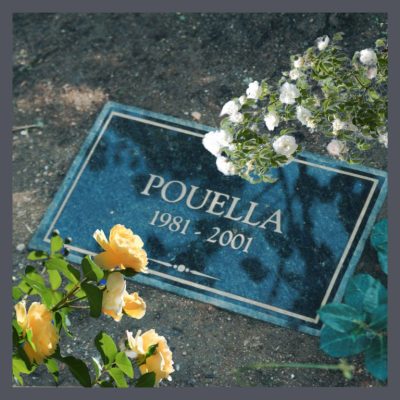 My elderly Pouella moved into the Hare House with us, got to see the beginning of the third millennium on the lap of a dear friend devoted to kitties, & is now buried in the garden under the David Austen roses with a little kitty-cat plaque. She had been sliding downhill fast & I asked her to please hang on until Home Tour so that I could help pull off this important neighborhood event. The day of Home Tour came. She could not rise from her little nest on the floor. She very clearly said, “Ok, Mom. I made it to Home Tour day. Now, can I go?” We zipped her over to the vet & her beloved Daddy, my wonderful husband held her as she drifted away.
At Home Tour everyone asked about her. Not wanting to ruin the committee’s day, I told them all that she was just fine. Home Tour saved me. I got to spend the day with my dearest friends at my favorite activity & the joy of the event buoyed me for going home to no Pouella.
After a period of mourning, during which I moved numbly about my house all day, crying much of the night, one day I woke up, strangely free of the grief that had held me. New kitten day had miraculously dawned! I called my friend Joanne who at Pou’s memorial service, had offered to come with me to choose the newbie and she was at my door in about 3 minutes. (One of the beauties of neighborhood activism- all your friends live real close!)
THE NEW BUNGALOW KITTY
 We trotted into the Pasadena Humane society & there he was- 2 lbs. of wild man- my bouncing, squeaking (He never did develop a proper meow.) cage rattling, blue-eyed boy, who had arrived that morning from foster care. The facility was closing soon, so I couldn’t adopt him that day. We stayed playing with him until sternly asked to leave. I was emphatically told that it was first come, first served, so I should be sure to come early.
They opened at 9 the next morning. I had been there with my carrier since 7. When the first volunteer arrived at 8:59, I ran at her yelling, “See, I’m here first. He’s mine!!!!”
He truly was. I brought him home to the Hare House & locked us in the study, the smallest room in the house, so he could get accustomed to his new surroundings. This tiny bundle of fur sniffed the entire floor- rugs, chair legs, fireplace, bookcase, with his tiny super-vacuum nostrils. Satisfied, he hopped up on the desk, speed dialed a couple folks, & sent a fax. Then he looked at me, hopped down & sat by the door, craning his little neck to look up at the doorknob, squeaking. And squeaking. And squeaking.
Later that day, tired from exploring the whole house, he purred on my bosom. I told him, “Thank you for mending my broken heart.”
He answered, “Thank you for mending mine. I missed my mother.”
He had been in foster care for several weeks getting enough weight on him to be adopted. One of the great mysteries of my life is how the foster mom could have given him up.
I guess it was so that I could wake up one morning, from blocks away, hear his tiny squeaks for “Mom!” causing my grief to melt away, & fall in love with this amazing individual who enchants everyone he meets.
He inspires me every day with his joyous spirit, unflagging persistence & creative intelligence. And when we moved to a new house in Florida, he got a new bungalow screen door- one with a shorter bottom rail so he could see over it without having to stand up like a prairie dog. “Thanks, Mom.”
TIP: READ ABOUT BUKHAI THE BIGHEARTED BUNGALOW CAT HERE.
 STAY IN THE BUNGALOW KNOW!!!
Sign up for our newsletter & receive our FREE E-book, 7 VITAL Things to Do Before You Hire a Contractor.

by bungalow101 | May 17, 2022 | Doing it the right way
by Matthew Steger
 With 20 years of inspecting bungalows under his belt, Owner/ ASHI Certified Inspector at WIN Home Inspection (Lancaster, PA) follows the American Society of Home Inspectors (ASHI) Standard of Practice, the nationally recognized GOLD standard for home inspectors.
Well respected in his field, Matthew teaches “Home Inspection 101” at LCAR (Lancaster County Association of Realtors) for Realtor continuing education.
Whether buying or already owning a bungalow, or any house built pre-1950, there are many things to keep in mind in terms of maintenance. Of course, if buying any home, whether it’s brand new or 250 years old, it is critical to get it professionally inspected. The inspector will spend about 3 hours going inside and out, top to bottom visually inspecting the home’s components and testing the systems to ensure that they are in working order and safe to use.
I’ve been inspecting homes since 2002 and, just when I think I’ve ‘seen it all’, something new seems to pop up. How well a home has been maintained over the years seems to be the key factor in what we find when inspecting it. I’ve inspected homes from the 1700s that are in better condition than ones built in 2000. Of course, a bungalow built in 1910 and still standing, shows resilience in its construction, such as its foundation. Even more interesting is when you realize that many areas only instituted building codes more recently. In PA, for example, we didn’t have a state-wide building code for homes until 2004!
Keep in mind, though, that home inspectors don’t only inspect bungalows that are being bought and sold. We also inspect homes for homeowners with no plans on moving but want a professional evaluation on the key components so they know what systems are in need of maintenance, areas that may be unsafe, or simply wondering how to help keep the home’s operating efficiency high. We recommend that all homeowners consider having a professional home inspection performed periodically. The things that we often find can more than enough pay for the inspection in terms of damage that may be caught now before things get worse in your cozy bungalow, even lives saved.
LOOKING AT THE SYSTEMS IN A BUNGALOW HOME INSPECTION
The main key components when looking at older homes are things like the electrical system, plumbing system, structural system, and the HVAC system.
BUNGALOW ELECTRICAL
 Your bungalow, like all homes built before approximately 1940, would have typically been wired with knob and tube (K&T) wiring. It was an ungrounded wiring type that relied on 2 conductors meeting only at light fixtures, receptacles, wall switches, etc. It was also cloth-covered and splices were often only soldered and electrical taped. This type of wiring was also meant to be air-cooled meaning it relied on the air around it to not overheat. There should be no thermal insulation around knob and tube wiring, otherwise, it can potentially overheat.
If you think of what homes had in them, say, in 1920, and then compare to a home in 2022, there are night-and-day differences that will turn up in a bungalow home inspection. Homes in 1920 had basic appliances and most rooms had only 1 or 2 receptacles. Kitchen appliances were also minimal. Electrical services to homes in that era were often only 30 or 60 Amp which was sufficient for the electrical needs of those homes. Flash forward to 2022 and look at the modern use of homes. Multiple TVs, central heating and cooling, computers, many kitchen appliances, etc. Since the 1970s, 200 Amp service has been pretty much the normal for modern homes. Also, modern wire types, such as NM cable (also referred to by one of the product trade names, Romex) is standard which is a grounded, fully-sheathed wire type. In my home inspection travels I tend to find lots of homeowner (DIY) electrical work which can lead to a fire or someone getting electrocuted.
Wiring doesn’t get better with age and splices in older wiring tend to not be up to today’s safety standards. This is generally why many home insurance companies will no longer insure homes with knob and tube wiring. There is an increased fire risk. As part of a home inspection, the inspector will test the receptacles, permanent lighting, breaker panel, etc. and will note the presence of live knob and tube wiring, if visible. Most of these older homes, however, have been upgraded over the decades with modern wiring and modern breaker panels and fixtures. A lot of the time, I think, this was done to due ever-increasing electrical needs in these homes over the years. Also, most homes originally wired with fuses have been upgraded to more modern circuit breakers. Again, many insurance companies will no longer insure homes with fuses since they are more likely to present a fire hazard since the homeowner is more likely to install an improperly-rated fuse if prior fuses keep blowing.
BUNGALOW PLUMBING
 Copper plumbing has been in use going back before the 1940s although other types with shorter design lives were also common. Lead and galvanized steel pipe were not uncommon in a bungalow home inspection. Lead, of course, can leech into the water supply and lead to neurological issues over time. Galvanized steel pipe rusts from the inside out leading to low flow over time. Galvanized steel pipe was generally last used in the 1950s and has an approx. 40 year design life. Leaking or rusting at plumbing connections and fixtures is not uncommon in older homes.
Drain pipes in older homes tended to be clay or cast iron. Galvanized steel drain pipes were also common. The underground sewer line between the home and the street is often original still in these older homes. I offer SewerScan inspections which is a video-recorded inspection of the underground sewer pipe to see what’s going on in there. I sometimes find breakages, blockages, tree roots, etc. Most homeowners assume the city sewer authority is responsible for the maintenance of these underground sewer pipes, but it is actually the property owner who must maintain and repair, when needed, these sewer lines. Some bungalows have been upgraded over the years with more modern plumbing materials, but that is not always the case. DIY plumbing tends to be somewhat common.
Just because you don’t see a tree in the front yard doesn’t mean a tree wasn’t taken down in the past and the tree roots are still there underground, searching for water. Tree roots can often detect water in nearby sewer lines and, in some cases, will grow into the sewer pipe leading to a blockage.
BUNGALOW STRUCTURAL
 As mentioned above, homes from the early turn of the century that are still standing today is a testament to how they were built. Lumber from that era wasn’t kiln-dried like today’s lumber is. Balloon framing was common. A common thing, however, is that we rarely find walls and floors in older homes that are straight. Sometimes that is due to settlement over the years and sometimes we can sometimes guess that the floor or wall may not have been straight to begin with. Remember, these homes were often built to no building code so this is acrucial part of your bungalow home inspection.
In older homes, however, finding wood destroying insect (WDI) damage is more likely. Some of which is purely due to time.. the home has been there longer so it’s been exposed to potential WDI infestations a lot longer than a 20 year old home. Also, due to the lack of kiln-dried wood, insects that may have been in the wood prior to construction (such as beetles) often would survive and be introduced into the home to further infest in many cases. Also, many basements in older homes had dirt floors (compared to concrete today) so things like wooden supports and basement staircases were often in direct dirt contact which leads to rot and increases the chance of insect damage over time. Most of these older homes had their original dirt floors cemented at some point, however.
BUNGALOW HVAC
Heating and cooling systems have the shortest life span of any of the above mentioned systems so it is very rare that an original heating system in a home built in 1920, for example, would even exist anymore. In my home inspection travels of 2 decades, I have found maybe 10 heating systems (furnaces or boilers) that likely were installed pre-1950. They just wear out and fail over time not to mention the operating efficiencies that those older systems likely had (less than 30%) compared to modern systems (90+%). Finding parts to repair these older systems is often impossible. Also, homes were often not insulated up to the 1950s as energy was cheap, compared to today. By the 1970s, energy prices rose considerably and building codes required minimal insulation in attics, basements, walls, and crawl spaces. Properly installed insulation as well as higher efficiency heating systems have made homes more comfortable and more more efficient. Many turn-of-the-century homes were still using wood or coal up into the 1940s. Today, natural gas, electric, and fuel oil are the predominant heating fuel types.
Home cooling was around in the 1940s but didn’t really become the norm until the 1980s, at least in my neck of the woods (PA). In southern climates, it was earlier than that.
Heating and cooling systems should be professionally-installed and professionally-serviced on an annual basis. Basic home maintenance tasks such as regularly changing your air filter (if you have a furnace or heat pump) is a must. Regular maintenance and annual servicing of your HVAC system helps ensure it is safe to use, running as efficiently as possibly, and more likely to last a long time.
YOUR BUNGALOW HOME INSPECTION IS THE SUM OF ITS SYSTEMS
When I inspect, I consider each one and if you can think of each one of them separately, you’ll be more comfortable with your whole house.
 Matthew Steger
Owner/ASHI Certified Inspector
A final word, because we know all know that I like having the last one- check out my article on how to restore a house correctly. It mentions several points that will help preserve your bungalow & help it inspect well when you decide to sell it.
STAY IN THE BUNGALOW KNOW!!!
Sign up for our newsletter & receive our FREE E-book, 7 VITAL Things to Do Before You Hire a Contractor.
by bungalow101 | May 17, 2022 | Kitchens
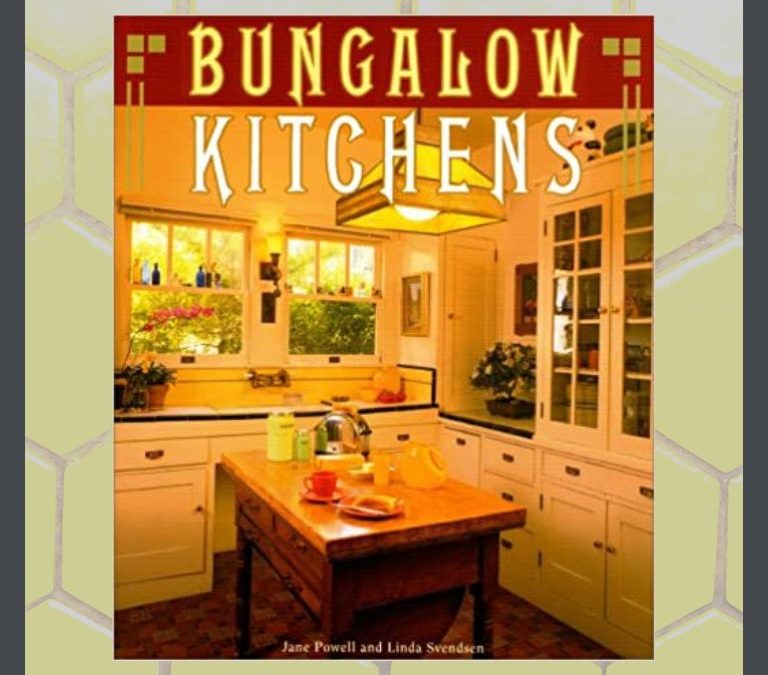
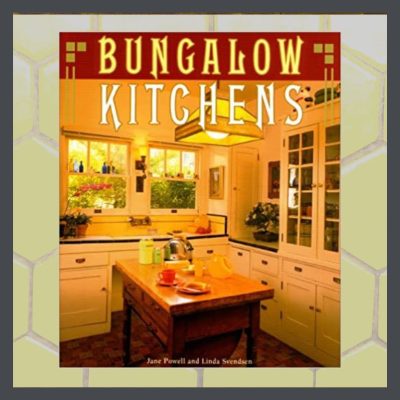 I had tried innumerable times to figure out a decent floor plan but was completely stymied. I knew that BUNGALOW KITCHENS, by the lovely & brilliant author, Jane Powell, held all the answers, but I had read it 18 times (Well, a few of those times I just drooled over the pictures.) but I had failed to find them. So, a preservation advocating neighborhood activist, I invited Jane to address my local association on the subject of said kitchens & Darling Husband fetched her from the airport.
She had just arrived in Tampa after having flown for 10 hours from Oakland. It was almost midnight (though admittedly only 9 PM Oakland time) & I was giving her a snack in my kitchen. I had been planning my kitchen restoration for 5 years. I hadn’t managed it in my L.A. house & was planning to give it another go in Tampa. (See how that worked out here!) My kitchen was awful. It was a mishmash of 50’s cabinets, a black marble countertop, fake stone tile flooring, Miami metal windows, a 60’s wall oven & a who-knows-when cooktop. I had allowed the previous homeowner to take the Home Depot pendant lights that hung over one section of the counter & had empty wires hanging down. The kitchen has 3 doors- from the dining room, to the back porch & a pantry that had probably been a butler’s pantry, but was now the world’s ickiest laundry room/pantry. I was puzzled by their positioning.
JANE – QUEEN OF BUNGALOW KITCHENS
 So in walks Jane, who standing, eating a carton of strawberry yogurt, whirls on her heel & starts laying out my kitchen. It took her about 14 seconds to figure it out & 5 seconds of that was poking a strawberry seed out from between her teeth. After she said it, it seemed so obvious! How could I have considered anything else?
We spent the next 3 days driving around Tampa to the consulting appointments I had set up for her. In kitchen after kitchen, she worked her magic suggesting layouts, fixtures, colors, everything but menus. Like myself, people were dazzled by her simple, yet genius solutions.
Jane, sadly is now gone, but, she left Bungalow Kitchens behind so if you’re smarter than I am (Many people are.) by reading & studying the book, you can quite easily create a bungalow kitchen of your own. In fact, somehow one of my friends got overlooked & after Jane left Tampa, I planned her kitchen for her, a la Jane, & it turned out great!
THE BUNGALOW KITCHENS MANUAL BY JANE POWELL
 The book is formatted in a similar manner to BUNGALOW BATHROOMS. In it, Jane explains how she learned about bungalow kitchens. “I learned a lot from doing it myself; I learned a lot more from my mistakes.” The best thing about this book is that if you study it & apply what Jane knew, you might not have to make those mistakes.
What I am offering here is just an overview of BUNGALOW KITCHENS by Jane Powell. My version comes across as pretty dry, but the book itself is beautiful & extremely entertaining.
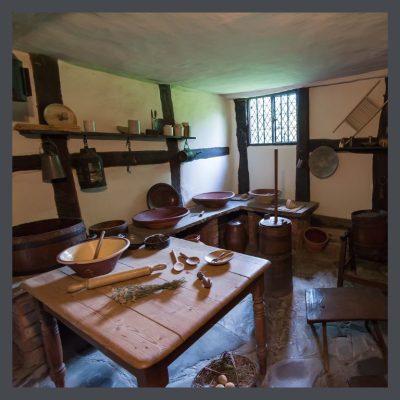
Jane starts off with the History of the Modern Kitchen, hearkening back to Colonial days,describing it as being primarily the domain of women. Moving forward a couple centuries, she quotes Stickley. “In planning a house it should come in for the first thought instead of the last & its use as a dining room as well as a kitchen should be carefully considered.” She also mentions that at this time, almost all architects were men who likely did not cook, or probably even pick up a dirty dish, what did “considered” actually mean?
Last I noticed, thinkin’ & cookin’ involve different muscle groups.
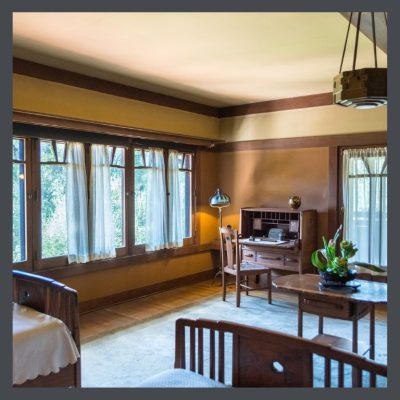 The book includes a whole section on Greene & Greene in which the kitchens feature the design elements so that we know so well, cloud-lift relief, the unpainted wood, complex, decorative joinery all of which have the same problem-very tricky to clean. You can’t see food, fingerprints or other smudges on it. Granted, the homes that had such kitchens, designed by the Brothers Greene & others, were staffed with servants whose job it was 12 hours a day, to handle any ick, but that’s not your usual kitchen. I know it’s not mine!
I’m going to step in here with an observation of my own. G&G are very well known, & their kitchens are often erroneously construed to be examples of how a bungalow kitchen ought to be. But the houses that they built were very grand & their grand kitchen design was harmonious with the design, scale & materials in the rest of the houses. Most bungalows lack this grandeur in design & scale. Additionally, our kitchens were built with paint-grade materials, not the gorgeous, perfect, hand-selected wood used by the Brothers, & our more modest kitchens were, you guessed it- PAINTED.
WHAT’S IN THE BOOK?
The knowledgeable & eloquent Jane Powell (Yeah, I’m a fan. Super fan, really.) gives us everything, including the kitchen sink. I’m just going to zip through a list of topics because touching even a bit on each one would be a ridiculous chore.
So here it is:
- Electricity & lighting
- Sinks
- Drainboards
- Dishwashing, sanitation & cleaning tools
- Countertop materials
- Cabinets & cabinet doors
- Drawers
- Hinges & hardware
- Plumbing
- Ventilation
- Stoves & refrigerators
Take a breath. A deep one.
- Cabinet details- Jane includes many diagrams of cabinets here detailing the parts & structure of cabinets.
- Flour bins
- Handles, knobs & pulls- Jane shows diagrams of different styles of hinges, knobs & pulls & fasteners that would be appropriate choices in a bungalow kitchen. She explains, “Hardware is like jewelry for the kitchen: the interplay of doors, drawers, hinges & knobs is an important part of the design.”
- Countertop materials: wood, ceramic tile, linoleum, stone & metal
- Flooring
- Walls & ceilings\n\n
- Appliances
- Stoves from Victorian to ‘50’s
- Iceboxes to refrigerators
- Hiding the microwave
- Hiding the refrigerator
- Layout & Design
- The work triangle
- Determining the original layout
- Adding modern conveniences
- Matching new features with the old
- Starting from scratch
And another breath. We’re almost there.
- Assessing Your Needs and Dealing with Professionals
- The stress & mess of it all
- Architects
- Contractors & subcontractors- tile setters, painters, flooring pro’s, carpenters, cabinet makers, electricians & plumbers
- Interior Designers & building inspectors
- Salvage yards
- Home centers, hardware stores & lumberyards
- Catalogs
- Doing it yourself
- Resources
- Bibliography
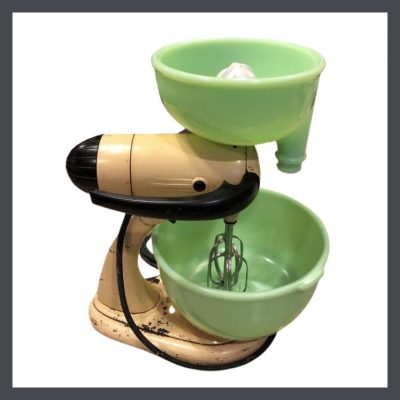 Linda’s photos illustrate numerous beautiful kitchens & their individual elements. She shows many different color combinations & cabinet configurations in a nice array of both original & newly created retro. You can also see some very cool dishware, potholders & small appliances here. I collect (hoard?) all this stuff so it was a major treat for me!
You can visit Jane’s website & read more about her here.
I encourage you to read the overviews of all of her books.
P.S. I have the permission of the family to speak about Jane & her books & to use the images of her, some of which were provided by them. And here I talk about my own special relationship with this extraordinary woman.
The book is out of print, but available on Kindle. You’ll need to search online until you can find a copy. There’s usually one out there somewhere.
READ ALL JANE’S BOOKS ABOUT BUNGALOWS!
 BUNGALOW BATHROOMS
Everything you need to know to restore or create a beautiful & functional bungalow bathroom.
BUNGALOW DETAILS: EXTERIOR
What makes a bungalow.
BUNGALOW DETAILS: INTERIOR
Your inspiration for a beautiful home.
BUNGALOW: THE ULTIMATE ARTS & CRAFTS HOME
All things bungalow.
& last but not least
LINOLEUM
It’s not vinyl!
STAY IN THE BUNGALOW KNOW!!!
Sign up for our newsletter & receive our FREE E-book, 7 VITAL Things to Do Before You Hire a Contractor.

by bungalow101 | May 17, 2022 | Other areas
 My cat, named after an anime sumo wrestler character in honor of the Asian influence of the Arts & Crafts Movement on the bungalow & his chunk-ster legs (the largest kitten in his litter) – my little Bukhai Thunder, AKA Bukhai Bunny-Bear, came to me as a fluffy, trembling ball. He was from a litter of 8. He & his littermates & mama had been rescued from a dumpster. Same old story- full of fleas & starving. Mama was an elegant & proud mother but the kittens had developed poorly nourished & were having a rough time.
I found him in a store-front shelter in the bungalow neighborhood of Eagle Rock where a sainted woman paid some huge amount of rent to display cats for adoption, which she cared for on her ranch. She bundled everybody in the morning & drove them in to town & found homes for them & then took the still unadopted ones home with her at night.
She truly gave St. Francis a run for his money in the sainthood department. My kitty who had preceded Bukhai, Pouella, was easily offended, fierce & strong. My vet was terrified of her. She had very fine long hair & I struggled keeping the mats off her. So, I asked the woman if she would groom her for me for a donation (a hefty one. I knew what I was asking.) I dropped her off at the storefront & returned when I received the call that she was ready. Pouella looked amazing, but I noticed that she had spots of blood on her. I was quite alarmed at this thinking that Pou had been wounded & mentioned it to the groomer who then showed me her extremely clawed hands & arms. It was the groomer’s blood, that she had willingly shed to make my kitty fluffy. Her halo shone with a glow that was almost blinding.
 I brought Bukhai home to the Hare House. The poor babe was afraid of everything. I opened the carrier & he scooted into the fireplace in the Reverend Hare’s little study & cowered under the grate, shaking. I made him a snug retreat there with a little soft bed where he could burrow, a tiny litter box & that’s where he was fed. Every day I scooped him out & stuffed him down my shirt & sat with him all covered up for a couple hours, petting him gently through the fabric & talking softly. Then I put him back in the fireplace.
After 3 weeks, he ventured cautiously out on his own & settled down to life at the Hare House. Mahjong the Amazing Wonder Kitten had started life as a fully gorgeous 2 lb., blue-eyed kitty who just blossomed into an elegant, luxurious cat but Bukhai took a long time to grow into himself. His big eyes were beautiful as he gazed at me in adoration, but his ears were far too large & he had a tuft of fur that stuck up like a cowlick over one of them. (You can see it here!)
When he hit adolescence, his fur became very oily & dandruffy & stuck to his body, making those too large ears seem even bigger & the funny tuft even more prominent. But as he became an adult, he too became a handsome animal. His snow white fur trimmed with grey & black stripes became fluffy & the ears stopped growing so the body could catch up. His feet remained rather large & floppy for his size, but we decided that it was an endearing feature that made my little boy all the sweeter.
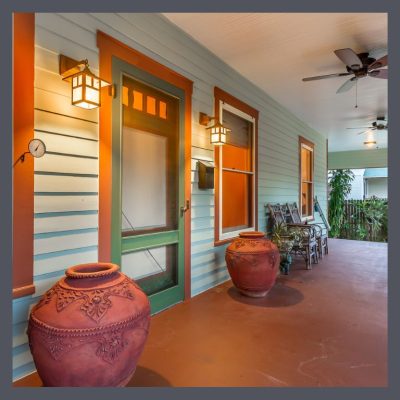
 Bukhai was never very brave. Or even a little bit brave. Mahjong loved to go out into the garden & play jungle cat. He lurked & pounced & was difficult to coax back inside. Bukhai, on the other hand, preferred to stay on the porch, close to the door, but after a couple months, started getting relaxed about being out in the big world. Until the neighbor across the street started sweeping said street with a metal rake. Scritch, scritch. Bukhai flew to the closed door & ran up the screen where he clung until Daddy peeled him off, claw by claw, & tucked him back safely in the house from where he never again emerged.
When Buk was fully grown, my assistant brought over the new kitten she had adopted from the storefront. Kitten bounced out of the carrier, curious & ready to play. Bukhai ran to the door which I had closed to contain the new kitten, & turned, peering over his shoulder clearly terrified by the tiny bit of fluff squeaking & hopping about the room, his eyes as wide as saucers looking at this monster that we had allowed in his safe home. Mommy quickly came to his rescue & soothed him with a nice, long chin rub. Mahjong considered the new arrival to be but an hors d’oeurve but to Buk, the interloper was a monster straight out of a kitty nightmare.
Bukhai was the most loving cat I have ever known. He adored his mommy & loved to sit with me, gazing into my eyes while I petted him & spoke to him softly. We were besotted with one another. Unlike Mahj who wanted to kiss every girl at the party, Bukhai was fearful of all of my friends but three- my sister-in-law who is a friend to all animals, Helen, a neighbor, whom he recognized as a gentle soul & Theresa, another cat saint who visited & comforted him in his last unhappy weeks.
He’s in Heaven now, being the same angel-kitty he was here on earth.
IN MEMORIUM, A NEW CAT FRIEND IN THE BUNGALOW
 Tids.
Tids.
When Bukhai was about 8, a new kitten, Miss Tiddleywinks was brought home. I kept them apart because she was so dang loud & so active. Bukhai was clearly worried. When she was about ¾ grown, she decided that she lo-o-o-oved her daddy, didn’t like me at all (referring to me disdainfully as, “That lady,” wounding me at every opportunity) & took Bukhai under her wing. She licked him, she cuddled him & talked to him like she was his mama. Bukhai blossomed under her care. He had not been a boy who found much joy in life but gradually over the months, his eyes became brighter, his step more lively & he became a happy cat.
This animal who considered me a rival for my husband’s affection, bloodied me & several of my friends (who had responded to my warnings with, “Oh, I’m a cat person. It will be fine.”) more than once, pee’d on the furniture & pooped on the rug, was a saint & will ever be so regarded in my heart.
Moral of the story #1- Adopt a kitty, or 2, or 3. They will enrich your life.
Moral #2- Spay & neuter your pets.
STAY IN THE BUNGALOW KNOW!!!
Sign up for our newsletter & receive our FREE E-book, 7 VITAL Things to Do Before You Hire a Contractor.
by bungalow101 | May 17, 2022 | Bathrooms
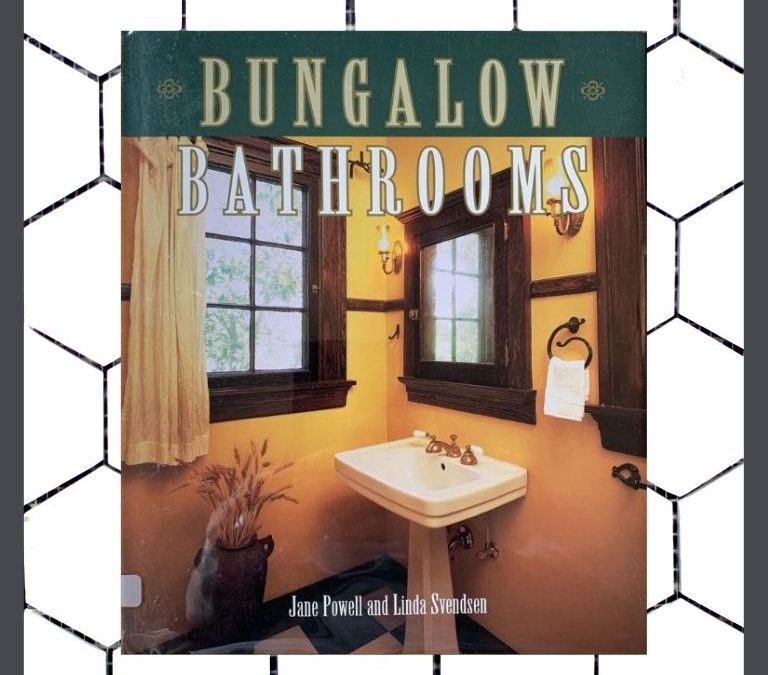
by Jane Powell, author & Linda Svendsen, photographer
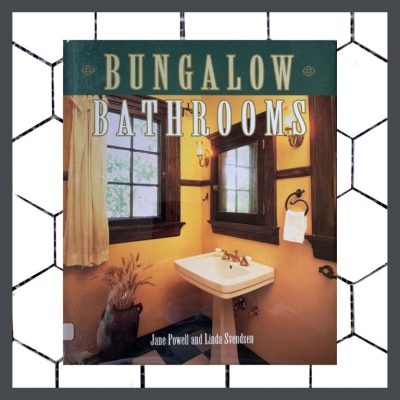 “The hands-on source book for creating or restoring a stylish Arts & Crafts/bungalow bathroom.”
If you really want to know about bungalow bathrooms, you need to get ahold of Jane Powell’s Bungalow Bathrooms. It is full of well-researched facts about bathrooms as well as an abundance of images of historic bathrooms, restored & newly created retro bathrooms. A variety of beautiful hardware, fixtures & multi-colored tile gleam from the pages.
It is getting more difficult to find, so I suggest doing an online search for it, or checking with your local library.
Jane was a dedicated scholar & hands-on restoration expert. She was a thorough & meticulous researcher, motivated by her passion for bungalow & their preservation. She was dubbed, “The bad girl of bungalows,” because of her firm stance on accurate restoration & apposition to the demolishing of historic structures. She spoke at events all over the country & I met her when she came to speak at a neighborhood event I produced. We got along great!
There is no fact that exists about historic bathrooms that she doesn’t cover. So, this article by me is going to tell you what you can find in her book- not Cliff’s notes, but more like an outline so that you will understand how much you need to read the dang book. Additionally, the book is comfort food for the eyes. Jane has a deep & thorough understanding of design so the book is laid out impeccably.
I personally created or restored 5 bathrooms with the help of this book. It is not only the encyclopedia of bathrooms with more data than you could even imagine, but also the owner’s manual. Jane was a hands-on preservationist & in none of her books is this more apparent than in Bungalow Bathrooms. It is a labor of heart, head & hands.
THE FASCINATING CONTENTS OF BUNGALOW BATHROOMS
 The book starts out with the history of the modern bathroom. She sends us back to Knossos, a city in ancient Crete, 1700 B.C. The book opens with her statement. “The evolution of the modern bathroom is neither linear nor orderly. Some ancient civilizations had bathrooms that were far more modern than the average bathroom of the mid-nineteen century.”
This is where her research & writing most interest me. Building design & decor do not stand alone but are influenced by the science, technology & culture & resources & politics of the time. I am always intrigued by building design & decor because these things influence the science, technology & culture & resources & politics of the time. In them we see life today, & if we are astute, life tomorrow.
She takes us from Crete through the Roman Baths, the Dark Ages, Henry III’s palace privies (for the hoi polloi it was chamber pots dumped into the streets) to the appearance of showers in the 16th Century. She treats us to a poem written in by Jonathan Swift 1729 about, well, pooping & then informs us that the bidet was invented in 1710.
We are introduced to the more modern flush toilet with its high tank sending water down to propel waste.
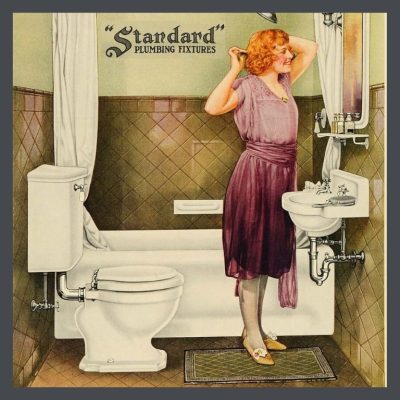
She explains that most of the bathing in the 19th Century had to do not with cleanliness, but with health, & it was not until the end of the century that bathing & cleanliness became connected.Her information is peppered with great illustrations making it easy to travel back in time to understand these discoveries. She includes a great number of old advertising pieces so you can see how the old fixtures & old bathrooms really looked.Jane continues on to describe the evolution of plumbing & by 1900, the bathroom starts looking like the rooms we recognize.
PICTURE PERFECT BUNGALOW BATHROOMS
 As with all of Jane’s books, the photographs by noted architecture photographer Linda Svendsen, are abundant & beautiful. They show us a vast range of bathrooms from the pristine white of the early 1900’s through the wild- colored examples in the 1920’s- 30’s. We see complete rooms & bits & pieces of rooms, all described in detail, along with a ridiculous amount of fascinating trivia.
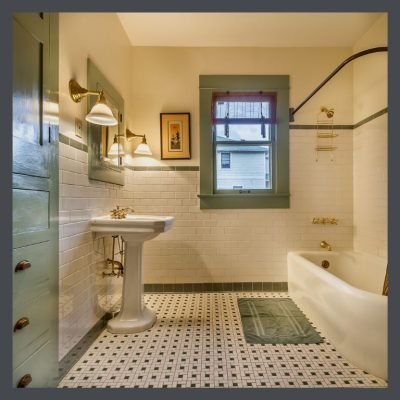
This is not one of Linda’s images, It is of one of the 5 bathrooms I restored/created with the help of this book. When I did the restoration in this house, my 1925 bungalow in Tampa, Daltile made this pinwheel pattern only in black & white. I picked out the black centers & my poor tile installer stuck in all the green ones. In 2 bathrooms! Most of my fingernails have grown back.
Did you know that “Toilet paper made its first appearance in 1857, when Joseph C. Gayetty introduced, ‘Gayetty’s Medicated Paper- a perfectly pure article for the toilet & for the prevention of piles?’ ” Betcha didn’t. In each section she gives tips for Obsessive Restoration (Me, me, me!) & also offers a Compromise Solution. Her suggestions are very detailed & well expressed. She also includes a resource list, some of which might be out of date because the book was published in 2001. (Not to worry, I’m working on a resource list.)
TABLE OF CONTENTS (With my notes about them.)
- Introduction
- History of the Modern Bathroom
- Nuts and Bolts
- Pipes & drains
- Electrical & lighting
- Ventilation
- Radiators & wall heaters
- Eye Appeal
Fixtures- sinks, tubs & showers & toilets & bidets
- Interesting towel racks, cup & t.p. holders & shelves
There’s also a diagram that shows different types of cabinet latches, hinges, pulls & tile edging
- Countertops
- Cabinets & knobs
- Walls & ceilings
- Doors & windows
- Tile- some amazing tile!
- Layout & Design
- Determining the original layout
- Installing a new bathroom
More beautiful tile!
- Assessing Your Needs and Dealing with Professionals
Architects
Contractors & subcontractors- tile setters, painters, flooring pro’s, carpenters, cabinet makers, electricians & plumbers
Interior Designers & building inspectors
- Resources
- Bibliography
I have purchased several copies of each of Jane’s books. As the local preservation maniac in 2 bungalow neighborhoods, I loaned them to many people & had to replace them multiple times. Bungalow Bathrooms is the only one that I have that is signed. I bought it at the first event I ever produced for Jane, not knowing how dear she would become to me. (If anybody out there has one of my signed books, which she sent to all the people whose homes were in her books, I’d love to have them back. I’ll give you one of my replacement copies. You aren’t Suzanne & Dennis so it will be just as good!)
READ ALL JANE’S BOOKS ABOUT BUNGALOWS!
BUNGALOW KITCHENS
Restoring the heart of the home.
BUNGALOW DETAILS: EXTERIOR
What makes a bungalow.
BUNGALOW DETAILS: INTERIOR
Your inspiration for a beautiful home.
BUNGALOW: THE ULTIMATE ARTS & CRAFTS HOME
All things bungalow.
& last but not least
LINOLEUM
It’s not vinyl!
STAY IN THE BUNGALOW KNOW!!!
Sign up for our newsletter & receive our FREE E-book, 7 VITAL Things to Do Before You Hire a Contractor.