by bungalow101 | Jun 19, 2022 | Other areas
by Jane Powell, author & Linda Svendsen, photographer
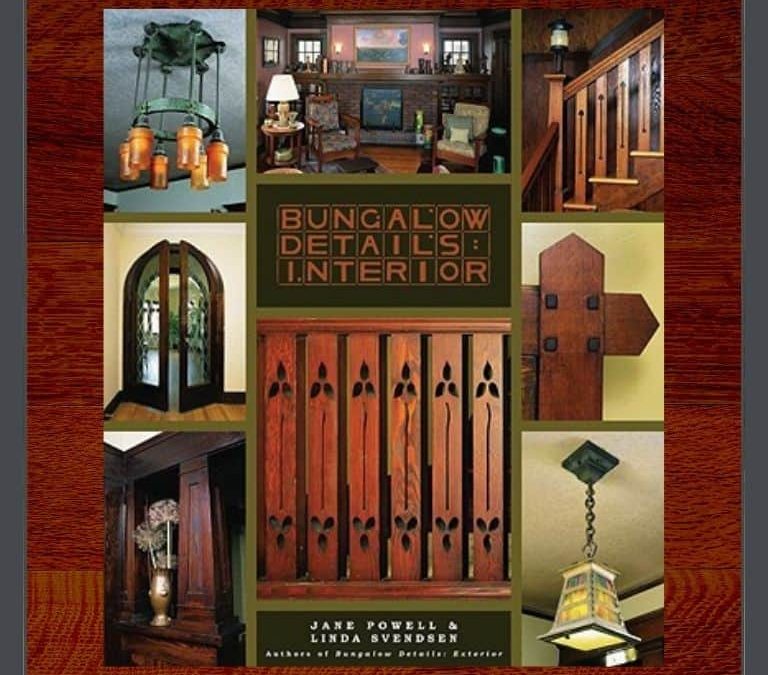
 In BUNGALOW DETAILS: INTERIOR, author Jane Powell covers every nook & cranny of America’s favorite house.
FOREWARD
“It is the great excellence of a writer to put into his book as much as his book will hold.” – Samuel Johnson
Written 2 years after BUNGALOW: The Ultimate Arts & Crafts Home, this book, though less chunky is still described by Jane as “the longest I have ever written.” The book is crammed with information & text is tiny, but I still recommend giving it a good read. You can rest your eyes by looking at the soothing pictures & occasionally taking a ginger tea break. But, I assure you that after absorbing the contents of this book, you will be an expert, an authority, verily a master on the subject & will be able to amaze your friends with your knowledge. It will also teach you how to live in a bungalow.
As in KITCHENS & BATHROOMS, in every restoration facet she offers compromise solutions.
And, back to the book contents, Jane devotes a whole page to asbestos & strongly recommends testing. I second. Restoring old houses is not for sissies.
CHAPTER ONE: WHAT IS A BUNGALOW?
Here she defines is as a “Know one when you see one kind of things,” but goes on to define it as:
A bungalow is a one-or one-&-a-half story house of simple design& expressed structure, built from local or natural materials, with a low sloping roof, overhanging eaves, & a prominent porch, built during the Arts & Crafts period in America (approximately 1900-1930). But offers the disclaimer, that the definition is pretty broad & you just need to look at enough of them until you know.
Should you be desperate to know now, a check out preservation expert Jo-Anne Peck’s article WHAT THE HECK IS A BUNGALOW, ANYWAY, here.
CHAPTER TWO: ROOM TO MOVE
Here she discusses layout & tours us through the rooms of several bungalows, allowing us to see some classic bungalow features in several homes.
CHAPTER THREE: SHORT STORY
Yeah, it’s a pun. Jane’s talking about roofs & attics here including pests found in them. She also discusses insulation (or the lack thereof) & ventilation.
CHAPTER FOUR: CEILING GROOVY
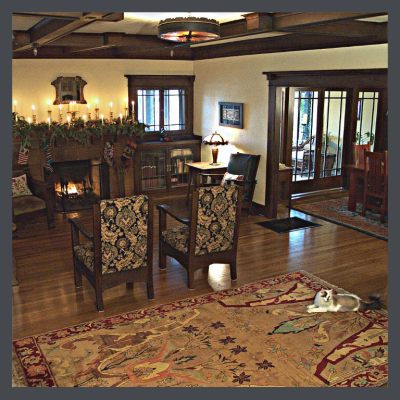 You can’t see me. I am shaking my head. But I am somewhat (It’s a very small picture.) calmed by the image I see of the beautiful box beam ceilings in the living room of the Hare House, my 1920 Craftsman in L.A., on page 56.
Jane describes ceiling cracks, their causes & not surprisingly, recommends against covering them with gold-veined mirror tiles. My ceilings in the Hare House were coated with “popcorn.” Yes, even between the box beams in this room & in every other room in the house. It wasn’t terribly difficult to remove, in fact, after we had sprayed a chunky section of the back bedroom ceiling, the whole thing fell down. Whumph! The sound & the dust were like a nuclear explosion. All the popcorn, all the plaster, down to the lathe, it was on the floor in one piece. A cracked piece, for sure, but it was all there. Amazingly, nobody was standing under it.
She devotes a whole page to asbestos & strongly recommends testing. I second.
CHAPTER FIVE: WALL MART
Whoo, boy! This is a chunky chapter so I think I’ll just list what is covered in it, with little commentary.
- Joinery & nails
- Balloon framing
- Brick & stone
- Paint types & colors
- Stencils
- Wallpaper
- Paneling & trim
- Built-ins
- Wood stains & finishes
As always, the book is well-illustrated with beautiful examples of every topic & sub-topic. And, she ends with her sensible obsessive & compromise solutions
CHAPTER SIX: OPENING LINES
The chapter opens with Jane saying, “Bungalow designers did their best to open the houses to the outdoors with generous numbers of windows & doors. The interplay between indoors & out made even a small bungalow larger than it really was. There was also a belief that fresh air & sunshine would kill germs, prevent disease & promote good health.”
She gives us a brief window history lesson, including some information about glass.
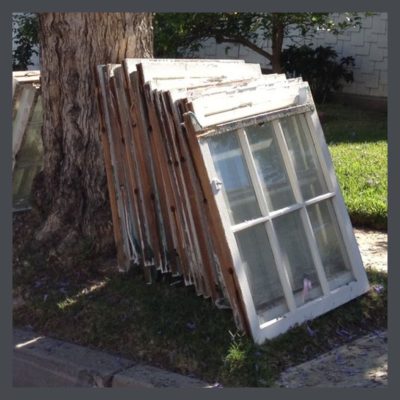 The best part is her dissertation on why replacing wood windows is a travesty. She lays out 4 pages, in tiny type, enumerating all the lie$ that are told to encourage people to rip out their wonderful old windows & install, new, hideous ones that you can replace in 15 years when they fail because they cannot be repaired. In her OBSESSIVE/COMPROMISE section, she says that she refuses to compromise.
As I sit here writing, tears are dripping down my face, missing this funny, fierce woman. I have written so much about her, but it is in this section that her firey spirit truly shines. I can only pray that my little blog will help her message live on.
A blow & a sniff later & I’m ready to carry on. She gives complete instructions for repairing a wood window, suggesting tools & materials. Then she treats us to vintage ad images for windows parts & signs off with a section on window treatments.
I offer window suggestions in my own article, here.
CHAPTER SEVEN: ENTRY LEVEL
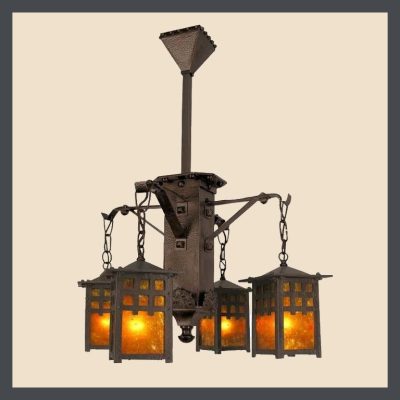 Not surprisingly, this chapter is about doors, types of doors, (interior & exterior) door construction, & door hardware-with the same great photos of beautiful door pulls & knobs & escutcheons. She has a number of cool, vintage ads, including one “For homes of refinement.”
As she says, “The front door was meant to impress,” I have been impressed by more than one front door. I have to admit that the door of the Hare House is my all-time favorite & I was very torn by my choice to build a screen door so that my children could look out onto the world but be protected. (Between the skunks & coyotes, Eagle Rock was not a safe place for kitties.) We found the most figured pieces of quartersaw oak that you could imagine & with my copper screening & pegged joints, I was happy!
She also devotes several pages to lighting, treating us to some terrific examples of Arts & Crafts pendants & sconces.
In her section, CAN DON’T, she is adamant about the inappropriateness of can lighting. Once again, I concur, especially because the lighting of the time is so charming!!
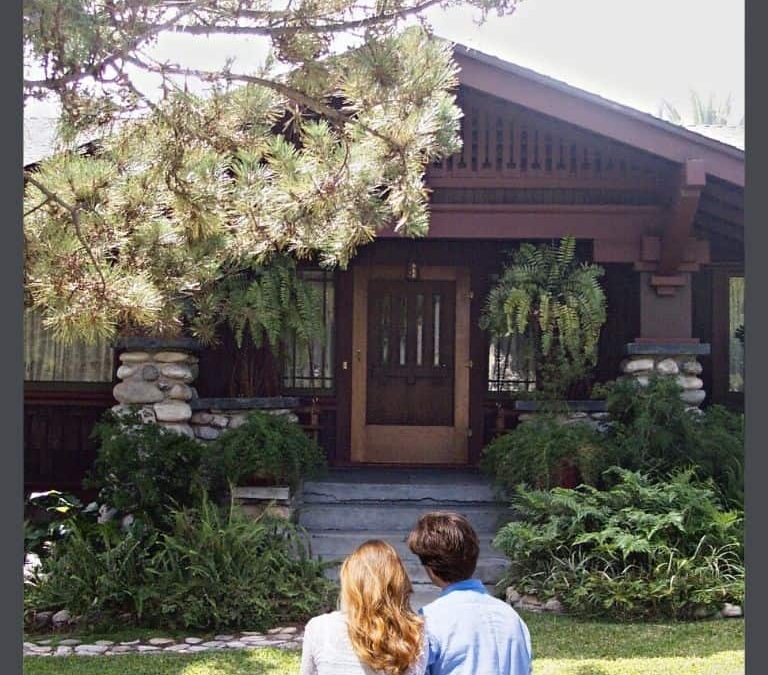
I hope that this wonderful image will help you recover from the last one of the windows, abandoned, like poor relations, under the tree.
CHAPTER EIGHT: HEARTH OF THE MATTER
According to Jane, “Fire fulfills a deep & primal role in the human psyche…” Why else would there be 110 videos on YouTube of crackling fireplaces?
Anyway, we see some amazing fireplaces here- clinker brick, 2-tone brick, river-roof, cast concrete, granite & Grueby & Batchelder tiles. Not surprisingly she spends 14 pages delving into the history & construction of the fireplace.
Next is the subject of built-ins & once more, we are treated to beautiful images of sideboards, nooks, Murphy beds & stairways, plus vintage hardware ads & illustrations.
CHAPTER NINE: SUPPORT GROUP
Jane wraps it up with a discussion of floors, subfloors & joists as well as rugs & vacuum cleaners to keep all the dirt sucked up. She talks about furnaces & heating systems & we see some ads for new fangled contraptions that will keep you toasty. She shows us some really cool old water heaters & waxes enthusiastic about fuse boxes & electrical receptacles.
Last Call is about telephones with her closing statement being, “Besides, a bungalow is the best house in the world.”
READ ALL JANE’S BOOKS ABOUT BUNGALOWS!
 BUNGALOW KITCHENS
Restoring the heart of the home.
 BUNGALOW BATHROOMS
Everything you need to know to restore or create a beautiful & functional bungalow bathroom.
 BUNGALOW DETAILS: EXTERIOR
What makes a bungalow.
 BUNGALOW: THE ULTIMATE ARTS & CRAFTS HOME
All things bungalow.
& last but not least
 LINOLEUM
It’s not vinyl!

STAY IN THE BUNGALOW KNOW!!!
Sign up for our newsletter & receive our FREE E-book, 7 VITAL Things to Do Before You Hire a Contractor.
by bungalow101 | Jun 16, 2022 | Other areas
 A cautionary bungalow window treatments tale.
Once Upon a Time, the Hare House was on the market. I had just finished the bathroom, glad to have a few more weeks in which to enjoy it, kicking myself for not having done it sooner so I would have had a few years.
I spent a day bustling about, getting everything perfect, (including planting a border of annuals, wearing a headlamp, from 10 PM to midnight.) Jane Powell & Linda Svendsen were coming to visit & photograph the house for the book, BUNGALOW: The Ultimate Arts & Crafts Home. During the shoot, I had flung various pieces of furniture, window coverings & décor all around again to comply with Linda’s suggestions. And then, one more exhausted fling for the staging of the open house the next day.
This was, of course, during our neighborhood association’s Home Tour preparation, the grueling last month of pulling together all the loose ends that liked to spring up. Whee-ee-ee!
Soon after the open house we were under contract, but still taking offers. The FOR SALE sign was still outside & the flier box was almost daily restocked with fliers telling the story of Reverend & Grace Hare. This beautiful home, on which I had lavished such care, drew people from all over Los Angeles. Over 100 people had attended the open house, many staying for hours, & Realtors brought long parades of buyers.
Then the packing began. I was beyond exhausted. One afternoon I could do nothing more. I peeled off my sweaty clothes & hit the cool sheets of my brass bed. But was the front door secured? I got up & staggered out to make a quick check on the lock of my beautiful door with its lovely, un-curtained, leaded glass window. A couple, flier in hand, stood at the end of my walkway, peering right at me. I dropped to the floor, hoping that they would believe that I was but a Rubenesque apparition.
ALL ABOUT BUNGALOW WINDOW TREATMENTS
I am writing this as one who prizes old wood windows, loves the various lite patterns of the period & is transported by looking at the world through old, wavy glass. This is about window treatments for old windows that enhances them rather than hiding them.
Well, we already know one re-e-e-eally good reason to cover windows, but there are several others. Different types of window treatments allow you to regulate the amount of light shining into each room, & also to change the light throughout the course of the day. Layered treatments can diffuse light or block it altogether as well as providing some bit of R value.
The textiles of the Arts & Crafts Movement are exquisite. Utilizing natural materials, such as cotton & linen, as well as ornamentation-embroidery, applique & stenciling- inspired by nature, window coverings enhance your interior as well as softening the angular bulk of much Craftsman furniture. Gustav agrees.
THE FABRICS SUITABLE FOR BUNGALOW WINDOW TREATMENTS
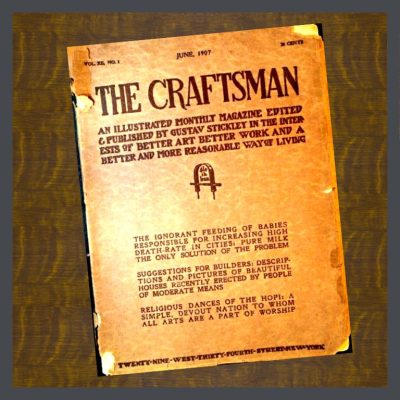
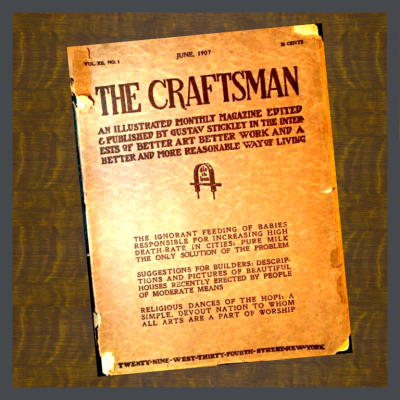 Stickley brought Arts & Crafts over from England & I’m going to say, evolved it into a truly American aesthetic which suited our more casual lifestyle. Here are some direct quotes from Gustav Stickley’s publication, The Craftsman, regarding textiles in general, with specific references to window coverings.
“At first it was very difficult to find just the right kind of fabric to harmonize with the Craftsman furniture and metal work. It was not so much a question of color, although of course a great deal of the effect depended upon perfect color harmony, as it was a question of the texture and character of the fabric.”
He discarded delicate materials & searched for fabrics- “that possessed sturdiness and durability; that were made of materials that possessed a certain rugged and straightforward character of fiber, weave and texture… not be coarse or crude… “
He decreed the appropriateness of “certain fabrics that harmonize as completely as leather with the general Craftsman scheme. These are mostly woven of flax left in the natural color or given some one of the nature hues. There are also certain roughly- woven, dull-finished silks well as linen, …and for window curtains we use nets and crepes (crinkled texture giving a wrinkled appearance) of the same general character.”
THE COLORS
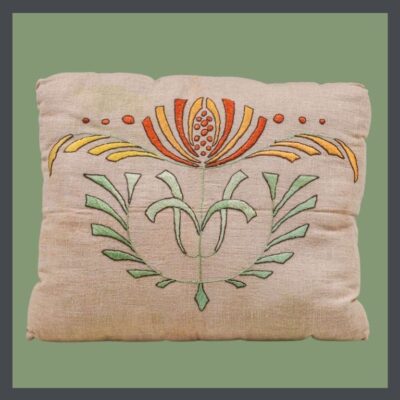 Stickley goes on to state, “A material that we use more than almost any other for portieres, (curtain dividing rooms which helped conserve heat) pillows, chair cushions, — indeed in all places were stout wearing quality and a certain pleasant unobtrusiveness are required — is a canvas woven of loosely twisted threads of jute (a very long plant fiber that feels coarse and rough, and is very strong) and flax (a plant, the stem of which is used for making thread, rope, and cloth, and its seeds are used for making linseed oil) and dyed in the piece, — a method which gives an unevenness in color that amounts almost to a two-toned effect because of the way in which the different threads take the dye.
This unevenness is increased by the roughness of the texture, which is not unlike that of a firmly woven burlap. The colors of the canvas are delightful. For example, there are three tones of wood brown — one almost exactly the color of old weather-beaten oak, another that shows a sunny yellowish tone; and a third that comes close to a dark russet. The greens are the foliage hues, — one dark and brownish like rusty pine needles, another a deep leaf-green; the third an intense green like damp grass in the shade; and a fourth a very gray-green with a bluish tinge like the eucalyptus leaf. Our usual method of decorating this canvas is the application of some bold and simple design in which the solid parts are of linen applique in some contrasting shade and the connecting lines are done in heavy outline stitch or couching; (a technique in which stitches are used to tack down a piece of thread, yarn, etc. to create a unique look and texture. The material being couched doesn’t penetrate the fabric but sits on top of it.) with linen floss (a slightly glossy, 6-strand thread that is a loosely twisted.)
The article about the colors of the Arts & Crafts Movement might help you make some choices too.
We get a further color clues when, speaking of dyed sheepskin, Stickley says, “…we finished in all the subtle shades of brown, biscuit, yellow, gray, green, and fawn…”
THE PREFERRED DESIGN FOR BUNGALOW WINDOW TREATMENTS
“Simplicity is characteristic of all the Craftsman needlework, which is bold and plain to a degree. We use applique in a great many forms, especially for large pieces such as portiere, couch covers, pillows and the larger table covers. For scarfs, window curtains and table furnishings of all kinds we are apt to use the simple darning stitch, as this gives a delightful sparkle to any mass of color.”
“The whole scheme demands a more robust sort of beauty, — something that primarily exists from use and that fulfills every requirement. The charm that it possesses arises from the completeness with which it answers all these demands and the honesty which allows its natural quality to show.”
Pretty much textbook A&C design theory. Not surprising since Stickley wrote the book!
WHAT ABOUT LACE?
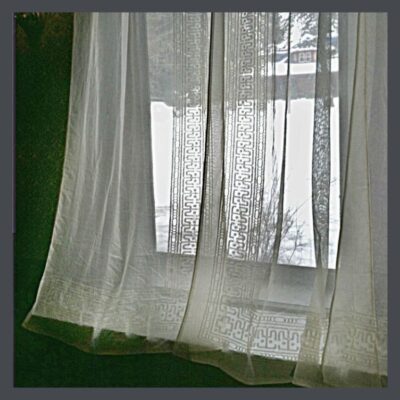 Any Victorian house worth admiring has lace curtains, but lace was used in windows long before Queen Victoria’s reign. They provide privacy as well as admitting light & can be woven into a myriad of patterns from fussy to the more substantial patterns of the Arts & Crafts Movement.
This is the modern interpretation of Gustav Stickley’s version of lace. It certainly follows the lines of his furnishings, being very geometric & extremely simple in design. Made of an open weave, light cotton, I’m thinking that this is what Stickley is speaking of when he mentions the use of net as a material.
Sears catalogues & other advertising materials show only the froofy lace patterns that one would associate with Victoriana. And I have to say that I am not opposed to this type of lace in a bedroom. Not everyone purchased new furniture for the bungalows. My bedroom in the Hare House had a chunky brass bed & Victorian furnuture with simple lines. Reverand Hare had a reputation for helping congregations pay off their church building mortgages in full- quite a celebratory occasion topped off by the burning of the note. So I’m thinking that it was more his nature to make do with the old rather than to buy new for the private areas.
But wait! There’s more!
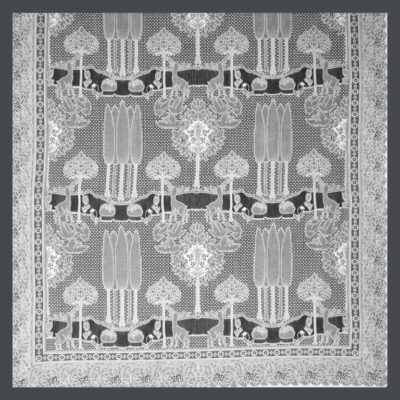 For the Hare House, I chose a rather obscure A&C lace. Having been built by a professional man, the leaded glass built-ins, the box beams & the wainscoting seemed to want something formal & I decided early on that I would go in the direction of the more ornate English A&C, rather than the simple, casual American Craftsman style. Truth be told, I have been an Anglophile since my teen years- Twiggy, Carnaby Street, the Beatles- & I had a huge crush on William Morris.
So, for my living room, I chose C.F.A. Voysey’s The Stag, first produced in Scotland in the early 1900’s. I loved the Hare House. We were soul mates. But of all the bits & pieces that made up the house, I think that I loved these curtains the very most.
SHOW & TELL
I think that rather than continuing on, I’ll send you on to Part 2 which is a list of resources for window coverings-curtains, roller shades, valences, café curtains- & period window hardware. They should all be good choices for you. I also have over 100 window treatment images on my Pinterest page so you can see the work of these very skillful fabric artists & others.
 STAY IN THE BUNGALOW KNOW!!!
Sign up for our newsletter & receive our FREE E-book, 7 VITAL Things to Do Before You Hire a Contractor.
by bungalow101 | Jun 16, 2022 | Doing it the right way, The History
by Jane Powell, author & Linda Svendsen, photographer
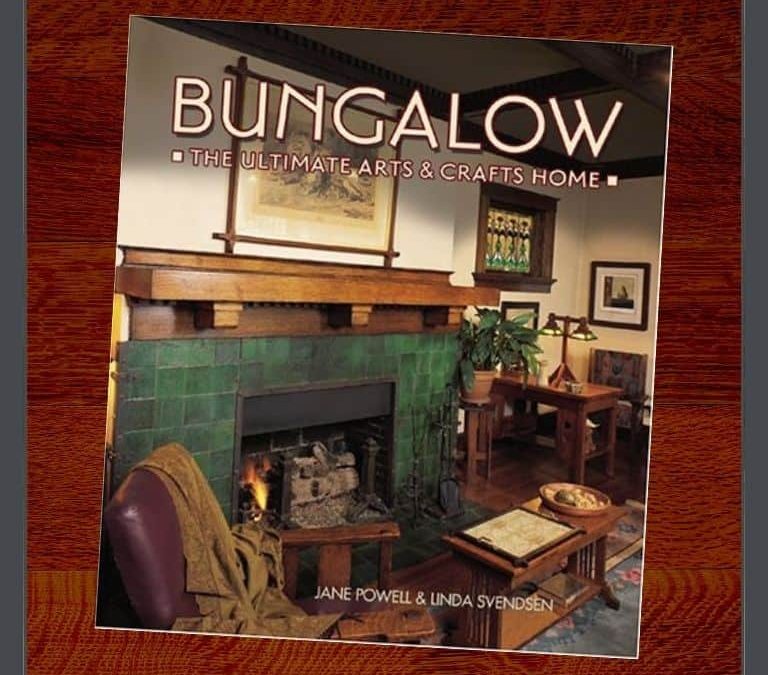
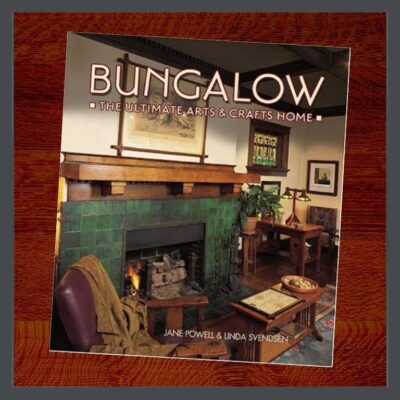 This book, BUNGALOW: THE ULTIMATE ARTS & CRAFTS HOME, was Jane’s most impressive work & it is majestic, with 285 large, glossy pages. She referred to it as “The Big Book of Bungalows” & I’m not certain that she was enthralled with the publisher’s final choice of title.
Hewn & Hammered’s review of the book opined, “The book is written with humor and warmth, never taking its subject matter too seriously, which is a welcome alternative to many other books in the genre that treat these buildings as museum exhibits before their original purpose (and, in most cases, only purpose) as homes.”
A quote from an Amazon reader: “This is my first contact with Powell/Svendsen’s books, and while it is indeed coffee table size (it needs to be large to accommodate the beautiful photography) it is so charming and readable that, without so intending, I READ it (in one sitting, yet). We have several other books of gorgeous bungalows, many with the same houses as subjects, with accompanying commentary equivalent to dry stale cornflakes; this one is crumpets and cream. Like others documenting bungalow style architecture, this book is not intended as a construction or instruction manual, but as inspiration. For admirers of bungalow style and for those seeking a picture to replace the thousand words BUNGALOW: THE ULTIMATE ARTS & CRAFTS HOME is an easy choice.”
While her other books are much more instructional, there is much factual information to be gained from reading this book. Jane is an amusing teacher so you don’t notice at all that you are sitting in class.
FOREWORD TO BUNGALOW: THE ULTIMATE ARTS & CRAFTS HOME
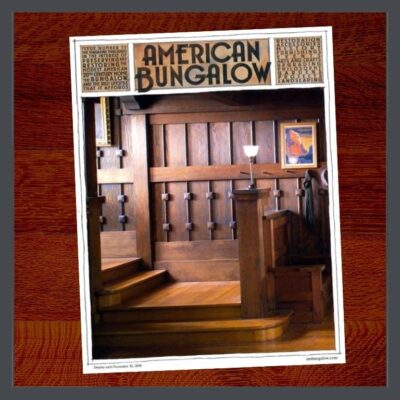 Jane introduces the book with some beautiful shots of bungalows by Linda Svendsen, including the impressive staircase of Jane’s bungamansion, the Sunset House in Oakland. Walking up these stairs, so sexy that they made the cover of American Bungalow, photographed by Alex Vertikoff, is an awesome experience. I wish this word had not been appropriated to mean, “like, totally cool” because the huge Doug Fir staircase is truly, “extremely impressive or daunting; inspiring great admiration, apprehension, or fear.” The workmanship is masterful, the dark wood lovely, & when you walk up these stairs, you are cocooned in the world of the wealthy 100 years ago. (Jane mentions, the builder was the owner of a lumber company so he got the wood wholesale, but still.)
As Jane says about it, “… this book deals with the philosophy, history, & influences that led to the bungalow as we know it in North America. Don’t worry, it’s not very scholarly. Most it’s a celebration of bungalows & everything on them & in them, & the Arts & Crafts movement they represent. I think that you will enjoy the ride.”
And by “ride” she meant a purple PT Cruiser. Mine was red.
CHAPTER ONE: THE COLOR OF WIND
 This chapter addresses, what is a bungalow? Well, it originated in India, & ended up in California inspired by a socialist design movement in Britain in the late 1800’s. Explaining that architecture isn’t simple, she answers this question by encouraging us to “Think outside the chicken” -by reading her book & viewing the images, we will just come to KNOW. It worked for me & whenever I feel wobbly, I come back to this book to get straightened out.
Going Native
A full description of the original bangala & the modifications made by the Europeans.
Getting Away From It All
The Industrial Revolution in Britain brought nostalgia for an idealized agrarian past.
The Seeds of Change
The Arts & Crafts Movement sprouts from the reverence for nature & ideas about design, & social & political reform.
CHAPTER TWO: IN FULL FLOWER
We learn about William Morris, the father of the Arts & Crafts Movement. There is a lovely quote about Morris which describes his many artistic passions & ends with, ..”& then he’ll do I don’t know what, but every minute will be alive.”
In my world, there is no greater compliment.
Pages of beautiful photos bring the copy to life as you learn to “Think outside the chicken” & begin to understand the soul of the bungalow.
Art for Art’s Sake
In this section Jane describes the Aesthetic Movement, which paralleled the A & C Movement, had the same roots & the same folks involved, but lacked the political & social philosophies of the latter.
I must admit to a great attraction to this design style. I see so much of the Arts & Crafts philosophy in the Aesthetic Movement & I really like their take on it. I especially like how its contrast of intricate small patterns inspired by nature complements the chunkier, more simple design of Arts & Crafts sharing the same inspiration.
In the Hare House, my Aesthetic collection adorned the dining room plate rails. In Tampa, I re-created the original divider shelves to display them.
The Bohemian Life
Jane is still in England, writing about the bungalows at the seaside that have acquired a bohemian reputation, representing a more simple life.
She stresses the fact that most of the Arts & Crafts houses were not bungalows, but looked to medieval designs for inspiration. It took Stickley to bring Arts& Crafts to America for it to assume it’s, uh, American form.
CHAPTER THREE: SMILING LAWNS & TASTEFUL COTTAGES
The Centennial Exhibition, held in 1876 spurred motivation for developing art & architecture that display American pride, though many bungalows clearly show European & Asian influence & you will see many images of this.
Global Inspiration, Indigenous Style
With the log cabin as inspiration, the bungalow was often more rustic. Jane continues on to describe the American flavor &unique local features found in bungalows across the country- with more of Linda’s lush photos.
CHAPTER FOUR: POPCORN & CAPITALISM
 Ah! California, where the bungalow reached its full potential. She visits Northern & Southern California & it is here where we see my house in Eagle Rock.
The Ideal Home
In this section she writes more about plan books & other publications as well as kit houses. The building boom of the 20’s was spurred by the street car, then the automobile.
Freedom of Assembly
More pre-cut buildings from a greater number of companies continued the bungalow boom. I must stress again that the images tell much of the story! You are seriously missing out by not having this book! Clinker bricks, limestone columns green-stained shingles & granite piers, Oh my!!!!!!!
Icon & Irony
More amazing photos & a look at how the A & C Revival has outlasted the original Movement. Hey, I’m glad that Stickley is getting the admiration & recognition that he did not receive in his later years. And while it’s on my mind, let me suggest that you watch this incredible documentary Gustav Stickley: American Craftsman.
CHAPTER FIVE: ON THE STREET
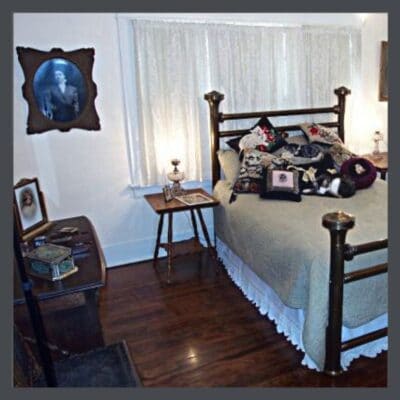 This is the longest chapter of BUNGALOW: THE ULTIMATE ARTS & CRAFTS HOME & I don’t want to wear you out, so I’ll cover it in one section.
The porch, part of the Arts & Crafts ideal of the melding of nature with the indoors. The entry welcomes guests to enter & sit before the hearth. We see some beautiful fireplaces here of tile & of brick in various patterns. She goes to on talk about dining rooms showing an abundance of beautiful built-ins & rich wainscoting, including mine, the Hare House, on page 202. I had received the Roseville candleholders as a gift from the president of my neighborhood association who had fought valiantly with me against Walgreens. Being a bunny maniac, I paired it with the faux Roseville bunny vase which contains the most beautiful flower arrangement that I had ever done. In the heat of getting ready for the shoot, I had neglected to put water in the vase & the flowers barely made it through the day!
She has a couple chunky sections on kitchens & baths, though her Kitchens & Bathrooms book cover the subject more fully. The section on bedrooms has a full-page spread of my bedroom on page 238, despite Jane’s grousing about the room’s Victorianess. The man who built my house, the Reverend Alfred Hare was known as a church leader who would leave each congregation with a fully paid mortgage for their building, so I couldn’t really see him as a man who would fork out good money to replace a perfectly good brass bed. (And Jane herself was a great fan of the backstory.)
In the photo you can see my collection of embroidered cat pillows, (with my little Bukhai whose sweet story you can read here, snoozing on the soft comfie bed) my grandmother’s picture on the wall, my mother & uncle’s pictures on the dresser & my grandmother’s confection tin in which she kept her clean hankies. And the hankies were in there too!
After I moved to Florida, a new friend, whom I had met at an event I had produced for Jane, was getting the tour of my Tampa bungalow. When we entered my bedroom she became very confused saying, “It’s déjà vu. I have been in this room before. It’s déjà vu!” I feared that we were going to need to bring out the smelling salts! It took me a moment to realize that she had seen the original room in the book which she had purchased at the event. Being a kitty fan, she had loved & remembered the cat pillows.
CHAPTER SIX: STEWARDSHIP
Here’s where Jane & I shared a soul. And, I guess it’s why I want you to read her books. So, read ‘em, & also head on over to the section on my blog, PRESERVATION GROUPS. It is a work in progress & you are so-o-o welcome to let me know about others to add.
Jane’s rallying cry was, “DO SOMETHING ABOUT IT!” & as a staunch preservationist, I stand with her on this.
CHAPTER SEVEN: THE IMPORTANCE OF BEAUTY
This chapter is Jane’s Random Musings.
Q. What did the Buddhist say to the hot dog vendor?
A. “Make me one with everything.”
BUNGALOW: THE ULTIMATE ARTS & CRAFTS HOME-IT’S ALL ABOUT MOI
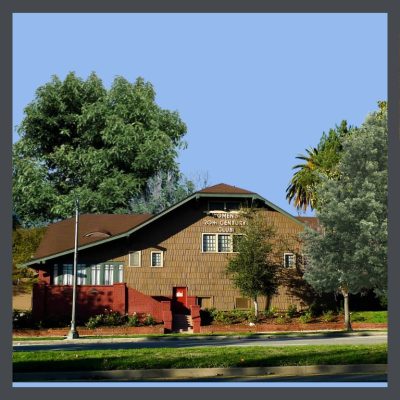 The Big Book, (Jane’s name for it) AKA, BUNGALOW: THE ULTIMATE ARTS & CRAFTS HOME, is my favorite because it contains so many images of the house I lovingly restored & left behind in California after my crushing defeat in my fight to save a neighborhood building. Jane & Linda & I spent the day shooting which was fun & exhausting. I waited with great anticipation for the book to be published so I could see my house as well as the other houses in the neighborhood which Jane & Linda had shot several months earlier- dodging the Halloween decorations that had adorned many facades. I was pleased to see my house so well represented & amused by some of the accompanying copy.
The exterior of my house is pictured on page 107, with another from my neighborhood. The Arts & Crafts clubhouse of the Woman’s Club to which I belonged is on page 100. The sisters of the man who built my house raised the money to erect the clubhouse by performing the skits & songs that they wrote. 100 years later I had the privilege of walking in a fashion show to raise money to restore & preserve that same building.
My sunroom is pictured on page 161 with a Moroccan table which was recently pitched after out attempt to rid it of termites. (I live in Florida now! If you have any clue as to how I might be able to get another one of these, Please let me know.) My living room is on page 181. I sold the couch & matching chair when we left Eagle Rock because it was painfully uncomfortable. We had to take it apart to get it out the door & there was a dead, fossilized rat in it. That wasn’t in any of the books!
To buy this book, you’re going to have to search for it in the various on-line booksellers. KITCHENS is available in Kindle but the rest can require some sleuthing. My fingers are crossed that the rest will be Kindled soon.
READ ALL JANE’S BOOKS ABOUT BUNGALOWS!
 BUNGALOW KITCHENS
Restoring the heart of the home.
 BUNGALOW BATHROOMS
Everything you need to know to restore or create a beautiful & functional bungalow bathroom.
 BUNGALOW DETAILS: EXTERIOR
What makes a bungalow.
 BUNGALOW DETAILS: INTERIOR
Your inspiration for a beautiful home.
& last but not least
 LINOLEUM
It’s not vinyl!

STAY IN THE BUNGALOW KNOW!!!
Sign up for our newsletter & receive our FREE E-book, 7 VITAL Things to Do Before You Hire a Contractor.
by bungalow101 | Jun 15, 2022 | Doors & windows, Other areas
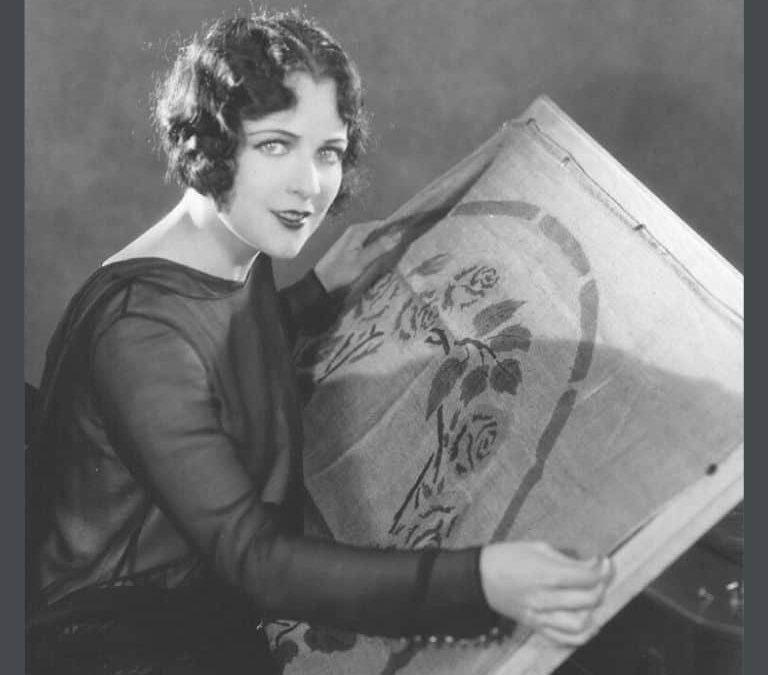
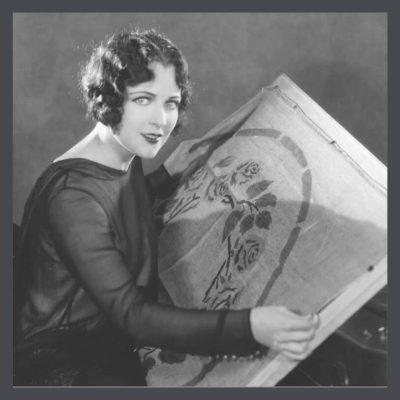 The subject of bungalow window coverings & the resources where they can be found is much debated, but is actually pretty simple. Nobody wants to cover their beautiful window moldings, but blocking the sun is generally desired & blocking passing eyeballs is highly recommended!
Jane Powell used to joke that the Revival has lo-o-ong out-lasted the original Arts & Crafts Movement. Well, yeah, but it has brought us some amazing craftspeople & I must admit that my favorites are those working in textiles. In the right hands, a bit of fabric, a snip of thread or a bit of paint can create astonishing window art.
Textile art is something that you can learn to do yourself. When I was a hippy, way back in the early 70’s, I loved to embroider, learning from books & the artistry of my friends. You can tote your work around with you & no one ever seemed to mind that I’d pick it up mid-conversation. (Of course, we were pretty mellow those days.)
I have included here textile artists, all well-known for their work, who offer window treatments. They also offer complimentary items such as pillows, table runners & upholstery covers. Of course it is not mandatory to have adornment on your curtains because the beautiful fabric & even the lovely hem work will enhance any room in which you use them.
Several of these artists offer stencil & embroidery patterns, & I’ll be including links to others who deal in only those goods, so if you want to create your own embellishment, you can do so. I would love to see what you make, so please send me images of your homes with your lovely new blinds!!
Hardware is also a tricky issue so I have included harware sources below. I’m a bit of a hardware addict, & when I needed to replace some of the hardware in the Hare House, I formed a friendship with my hardware specialist & 20 years & 3 houses years later, we get together when she visits her sister in St. Pete. We can spend hours on the phone talking hardware & I have been nagging her to write a book on doorknobs.
HERE ARE YOUR BUNGALOW WINDOW COVERINGS RESOURCES!
 Ann Wallace For Prairie Textiles/melton Workroom
Ann carries a full line of custom made window treatments-curtains, Roman shades, roller shades- in a variety of appropriate fabrics. She offers either stenciling or embroidery & will help you to choose the best combinations. She has a lovely collection of embroidery choices to best complement your home.
If you want to stencil your own designs, she has the stencils, brushes & the paints. I have always lovely thistles- even once named a kitty Thistle! And, she has all the hardware that you would need to install your wonderful new window treatments. She’ll also make you pillows, runners & bedspreads to match or complement!
 Arts & Crafts Period Textiles
From The Workshop Of Diane Ayers
In addition to her custom, hand-made wares, Diane features antique textiles also which combine beautifully with newly made pieces & can serve as great inspiration. She also carries antique books about the Arts & Crafts period, most on the topic of design.
Diane’s website takes you step-by-step through planning your order, being with lifestyle requirements. She continues with fabric descriptions & choices, embellishment offerings & discusses the need for lining. You can also purchase beautiful & appropriate fabric from her to make your own curtains.
She has some great information & clear illustrations to demonstrate mounting choices & shows mounting hardware in her catalogue.
 From The Studio Of Natalie Richards
Natalie is a Roycroft Renaissance Artisan. This designation is awarded only to those who demonstrate high quality hand-craftsmanship, excellence in design, continuing artistic growth & originality of expression.
On her site, she provides an explanation of the different curtain types/choices that exist. She also describes many fabric types. It’s a good, basic lesson.
Natalie offers curtains in a great assortment of fabrics with a number of finishes. She also has embroidered & stenciled pillows & embroidered table runners as well as kits for these items. In addition, you can purchase fabric from her as well as embroidery supplies.
Morris & Co.
This British company recreates William Morris’ designs in beautiful fabric, wallpaper & paint, in lush colors to complement a more formal home. When I chose fabric for the Hare house, I was not aware of this resource. I liked the fabric I chose, but I would have been much happier with the patterns I saw in my books about Morris.
Unfortunately, their products cannot be purchased online, so you’ll need to use their search feature to locate a retailer near you. Howver, what could be bad about visiting these lush colors & patterns?
Morris’ designs represent the philosophical & aesthetic inspiration for your bungalow. Even if they are not appropriate in your more casual, American Craftsman home, they are an important part of its history with their interpretations being expressed in every feature.
 Cooper Lace
Cooper Lace offers 100% cotton, Scottish-woven sheers & sidelights in a variety of Arts & Crafts patterns. My favorite, of course, because it enhanced the windows of the Hare House, is their Voysey, The Stag, but there are several others which would complement your bungalow, giving you varying degrees of light penetration & privacy. The image is of the Ginkgo Leaf, a revered & oft-repeated image in the Movement.
Alameda Shade Shop
Pull-down blinds are what you want to have in your bedroom. They can be used alone, with a valence, behind lace or other open-weave fabrics.
While there are a great number of Victorians on their site, they do offer a plain hem with a ring pull, in cotton. (Just waiting for you to add your own flair with a custom, stenciled design!) Their room darkening, fire retardant, washable blind is offered in 3 neutral tones. Each blind is custom made to your specifications. They even offer laminations, using your own fabric and which they apply to their blackout fabrics.
If you are in the San Francisco Bay area, they can offer you more choices in their gallery.
 Zwick Window Shade Company
Founded in 1930, Zwick is in its third generation as a family business, manufacturing handmade custom shades in their Chicago workshop.
Each shade is made to your exact specifications. They’ll re-cycle your old rollers to use them for your new shades & give you a discount! From their Build Your Custom Window Shade feature, you can choose the mundane details such as measurements & also the more entertaining ones such as fabric, trim & pulls. And, they include mounting hardware.
BUNGALOW WINDOWS-STENCILS
There are many books available that provide stencil patterns & ideas for patterns should you choose to create your own, as well as vendors that feature ready-cut ones.
 Trimbelle River Studio & Design
Vintage stenciling from the Arts & Crafts Movement
Trimbelle River is a complete resource for stencils. They provide a large & beautiful variety of designs- floral, geometric, very large, as well as supplies such as brushes.
These wonderful folks have partnered with Northeast Contemporary Services, Inc. a group of adults with intellectual and developmental disabilities & promote their stenciled items. You can sign up to be notified for their sales via Trimbelle River’s website.
BUNGALOW WINDOW COVERINGS RESOURCES- HARDWARE
 Rejuvenation Hardware
Rejuvenation offers single mounting sets & also rings in several finishes. They also have metal tiebacks that you can mount to hold back your curtains. These are handy because you’re not going to want to use ornate fabric tie-backs on the simple window dressings.
 Historic Houseparts
This vendor offers- well-everything! In addition to my vintage appliance addiction, I am mesmerized by old hardware & promise you will get lost in this site. That’s why I sent you directly to the curtain hardware section. I’m trying to help.
They carry single & double mounts, rods & a beautiful assortment of glass tie-backs.
I have many textile images on my Pinterest page so you can see the work of these very skillful fabric artists & others.
 STAY IN THE BUNGALOW KNOW!!!
Sign up for our newsletter & receive our FREE E-book, 7 VITAL Things to Do Before You Hire a Contractor.
by bungalow101 | Jun 14, 2022 | Wood floors
by Dennis Prieur, a guy who has seen hundreds of historic bungalow subfloors as well as those in other styles of other historic houses, 40 year veteran of the wood flooring industry. A Popular speaker at Historic Homes Workshop he has supported me in my preservation activities from writing the checks to drying the tears & celebrating the victories. An all around wonderful person.
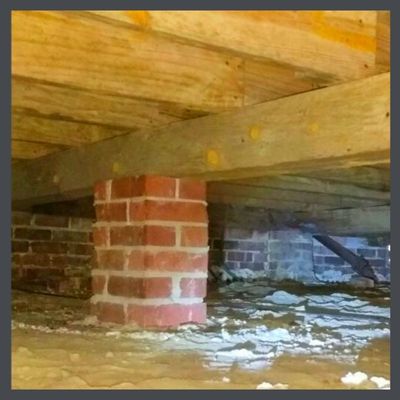
 Let’s go from the bottom up. Your house is built over a crawlspace. You have a series of masonry piers lifting your bungalow off the ground. On top of those you have sill beams which are “timber-sized” rough lumber: 3” X 6”, 3” X 8”, or 4” X 6”, 4” X 8”, and on top of those you have the flooring joists which span the open space, between the beams. All together, they carry the weight of your house, your furniture, your bathtub & appliances, your family, your grand piano, your 200 lb. mastiff & your weight set.
Over that, maybe your historic bungalow has a subfloor and maybe it doesn’t. A cost-cutting measure by builders, more modest homes tend to lack subfloors while the grander bungalows generally have them. So, your floors may be installed directly over those joists. You may notice that you can see the ground through the cracks in your floor. That’s a big clue that you have no subfloor!
If you are willing to go under your house with a flashlight, you will find out quickly. The floorboards you see under the house will be running the same direction as those that you see inside the home, because they are the same boards.
CHARACTERISTICS OF A HISTORIC BUNGALOW SUBFLOOR
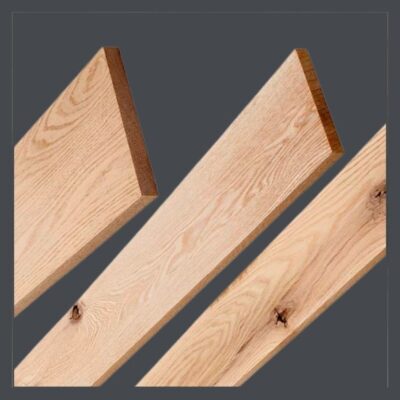 Subfloors are made of ¾” boards, between 5”- & 8”, usually installed diagonally to provide further support. They are of a lower quality/grade wood which could have a great number of knots & other blemishes that make it less aesthetically desirable. This is a great article about grading wood from the National Wood Flooring Association. In the West, sub-floors are generally Douglas Fir or possibly Redwood and in the East, indigenous Pines, all of which are softwoods.
Subfloors boards are not tongue and groove. They were laid side-by-side and top-nailed to the joists normally with gaps of at least ¼” between each board. This means that if they have gaps, (which they probably do) you are going to have a breezy floor and you will see the heads of those nails.
In earlier floors, this is how the main floors were constructed. Often, houses were built from the trees growing on the property. Then in 1852, a machine called the side-matcher was invented which allowed tongues and grooves to be cut into the sides of the boards so that they could be installed closely together. This invention provided the added benefit of allowing nails to be put in at the sides so that they didn’t show on the top.
What this means is that, sure, you can finish your historic bungalow subfloor as a real, finish floor, but it is a low grade wood & won’t have the beautiful graining of the finish woods & will show more knots & other imperfections. It probably will have more gaps, & you’re going to have to deal with the nail heads. So what can you do if your historic bungalow wood floor is only a subfloor? Well, you can put in linoleum or tile over it if it’s a kitchen, laundry or bathroom area, or you could always paint it. If you choose to put wood over it, that subfloor will provide you with a stable substrate and keep your toesies warm!
I want to mention one, relatively rare, subfloor issue I have seen quite a few times as a hardwood flooring contractor. Sometimes a bungalow was built with softwood tongue and groove finish floors, usually Douglas Fir or Heart Pine. Then, as an upgrade, thinner hardwood flooring was installed over these softwood tongue and groove floors. In California this hardwood was usually ⅜” thick by 2” wide, and in Florida where I worked later, ½” thick by 2” wide. All homes where I have seen this done had the original softwood tongue and groove floors laid directly over the joists, making the softwood tongue and groove flooring into a subfloor, with the addition of the hardwood layer.
WIDTHS AND THICKNESSES OF ORIGINAL TONGUE & GROOVE FLOORS
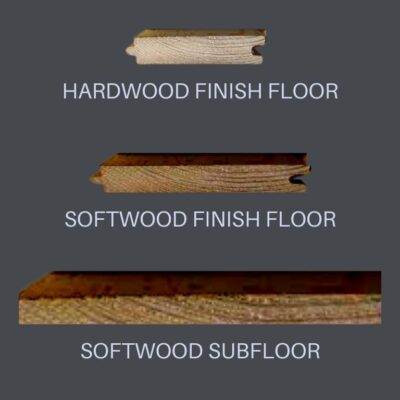 This is based on my 40 years’ experience in seeing and restoring both hardwood and softwood floors. I will add, as a caveat, that flooring sizes and thicknesses prior to about 1935 varied extensively by geographical area. Species used for the finished wood floor also varied, both by area and by cost of the home being built. I am not personally familiar with historic wood floors in New England or the Midwest. I have been told by Midwest contractors, that older homes often had local hardwoods used for their finished floors, since softwood was less available in these states with native hardwood forests. Narrow wood floors, usually ¾” thick and 2¼” wide become the fashion after the invention of the side-matcher in 1885. Prior to this, and also prior to the advent of steam-powered, then electrified sawmills, most homes had wide plank floors, usually at least 1” thick, nailed over the floor joists without a subfloor. These wide plank floors were subject to shrinkage, and developed gaps between the boards. Home builders and home buyers wanted these new-fangled, narrow tongue and groove floors, to differentiate their homes from what had been built before.
SOFTWOOD BUNGALOW FLOORS
Softwood tongue and groove floors were generally ¾” thick by 3¼” wide. Since softwood floors were all locally milled in the states where the homes were built, shipping costs were not a factor, so I have never seen a softwood floor in anything but a ¾” thickness. Milled from species indigenous to the local area, they were considered less prestigious than hardwood floors.
& THE HARDWOODS
By the 1890s, in areas I’ve worked in, the most common size for hardwood floors was ¾” thick by 2¼” wide- a full inch more narrow than softwood. Most hardwood floors were milled and then shipped from the Eastern US area. Shipping was very expensive, and boards were cut thinner to lower costs, so most homes in far-away California, had ¾” thick and later ½” thick hardwood floors, all 2” wide. However, the largest homes had the thicker ¾” by 2¼” wide floors, since cost wasn’t an issue.
Many homes in Northern California had ⁵⁄₁₆” by 2” hardwood floors milled without any T & G. This were top nailed, normally with 2 small finish nails per board every 18”-24”. I am clueless as to why this was!
MOST COMMON SPECIES USED FOR BUNGALOW FINISH FLOORS
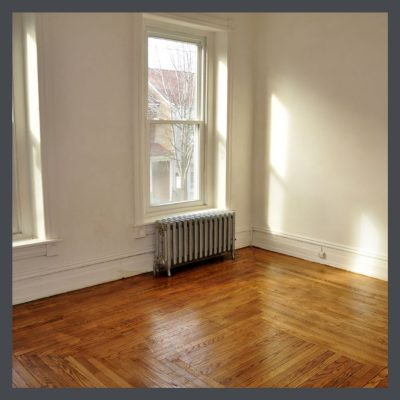 The most common hardwood flooring was White Oak, followed by Maple. Other woods, such as Honduran Mahogany, Hickory, Walnut, Birch, or Beech, were used on occasion. Very fancy homes often had White Oak floors with inlaid multi-species borders.
Douglas Fir was the predominate softwood floor in the Western US areas, and Heart Pine in the East, for both finish & subfloors. I‘ve been told that Eastern white pine was often used in New England, where it was native.
I have never seen any of these hardwoods being used as a historic bungalow (or any other period) subfloor. So, if you’re seeing these, you’re not looking at a sub-floor. It’s a finish floor. Yay!!!
TIP: IF YOU HAVE WOOD FLOORS IN YOUR HOUSE, READ ALL THE ARTICLES IN OUR FLOORING SECTION HERE.
 STAY IN THE BUNGALOW KNOW!!!
Sign up for our newsletter & receive our FREE E-book, 7 VITAL Things to Do Before You Hire a Contractor.
by bungalow101 | May 28, 2022 | Wood floors
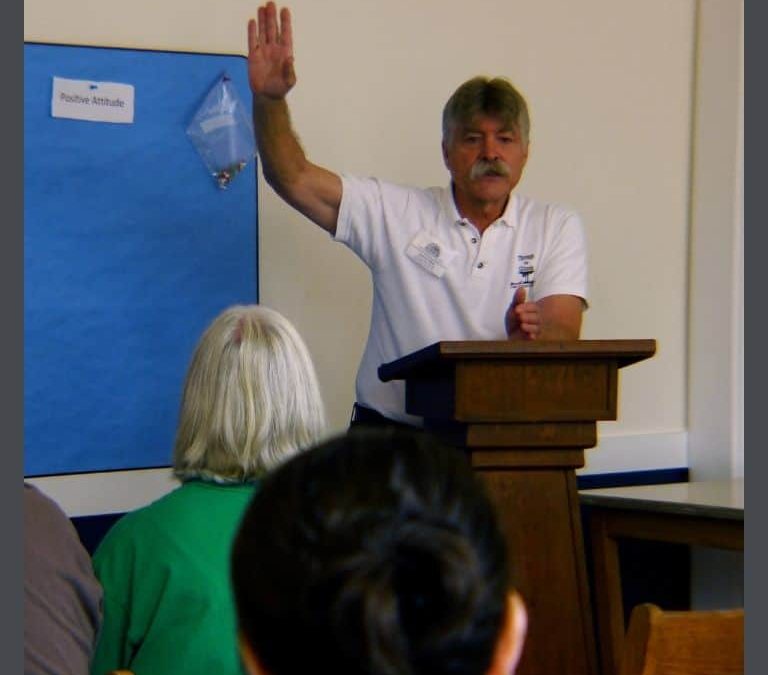
by Dennis Prieur, 40 year veteran of the wood flooring industry, writes about how to decide when to refinish the wood floors in your bungalow.
 Dennis was a 25 year member of the National Wood Flooring Association where he sent his craftsmen for certification & was himself an NWFA Certified Sales Consultant. Popular speaker at Historic Homes Workshop. Supporter of my preservation activities from writing the checks to drying the tears & celebrating the victories. All around wonderful person.
The first floor I ever refinished was in 1981. It was in a bungalow near downtown Phoenix. I went to the library and read books about how to refinish floors. The floor was maple, notoriously difficult to stain, but I didn’t know any of this and just sanded away with the equipment rented from Home Depot, using the stain and finishes I got from the paint store. I have a background in chemistry, which helped, but otherwise, I was just wingin’ it!
Since then, I have refinished or supervised the refinishing well over 1,000 historic floors. My aim was always to preserve and protect historic materials, beyond making pretty floors. The old growth forests are long gone and their beautiful wood will never be available again.
So here’s the important question- Do your wood floors really need refinishing?
THIS ARTICLE IS FULL OF TECHNICAL TERMS. PLEASE USE OUR GLOSSARY IF YOU RUN INTO ANY WORDS THAT ARE NEW OR UNFAMILIAR TO YOU.
The first thing I’d like to do is to help you establish if your floors should be sand and refinished, if they can be sanded, or if they should just be cleaned and left as-is. I will also discuss recoating as an option for floors in relatively good condition, or where further sanding is not possible.
MAYBE, MAYBE NOT!
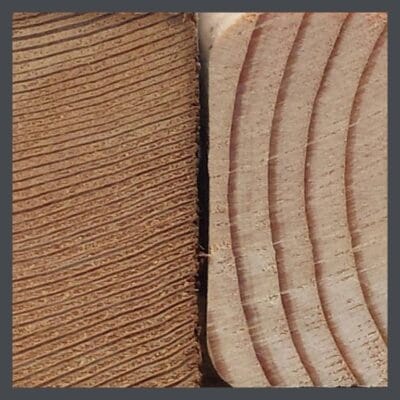 The original wood of bungalow floors is what is termed, old-growth wood. This wood is from the ancient forests that were here when our country was first settled. The forests were clear-cut to near extinction by the beginning of the 20th Century. Old-growth wood is denser, tends to be darker and is much richer in appearance than the wood that is harvested today. It is to be treasure and preserved.
Consequently, old-growth wood floors need to be sanded down to raw wood and refinished only when they are heavily worn, and the wear includes one of two factors. The first, is dents or deep gouges into the wood. If you aren’t sure, get on your knees and run a fingernail into the dent. If it catches, and seems more than 1/32”, it is a scratch into the wood and will only be removed by sanding the wood floors. Scratches that stay in the finish layer are generally 1/64” or less. A floor with this lesser type of surface scratches and abrasions, or where the sheen has worn off, can be recoated (described below) without a full sanding. The other factor, requiring a floor to be sanded, is where the finish has worn off in some or many areas and dirt is worn into the grain of the wood. Wood is a soft and porous material, so leaving it unprotected causes your bungalow wood floor to degrade with traffic.
A wood color change requires a full floor re-sanding (with one possible exception discussed in the recoating section below). However, wood floors in your bungalow (and houses built earlier) were traditionally finished to a natural wood color with no stain. Although it is possible to change the color and stain older floors, please consider that this color change will change the character of your home, and move you away from an original look. Additionally, it will shorten the life of your floor, buzzing away that beautiful, irreplaceable, old-growth wood.
One time where a color change is often required, with older wood floors, is where there is significant wood discoloring due to water stains and pet urine stains. Water and urine stains are usually quite dark. The discolored boards need to be removed and replaced, if you want a natural color refinish. If there are just a few discolored areas, you may choose to live with these age marks. Bleaching isn’t a good solution. It lightens most stains, but doesn’t bring the wood back to the look of the rest of the floor. Also, bleach- no matter how carefully applied- will wick and spread past the discolored wood and lighten un-discolored boards. You end up with 3 shades- the look of the undamaged wood, the lightened boards that were discolored, and a thin band of bleached wood that separates these areas. Additionally, the boards’ integrity is already compromised by the damaging water and more so by pet stains which are usually quite acidic. Bleach or even hydrogen peroxide can further degrade the boards decreasing their strength. This is not such an issue when there’s a nice subfloor underneath, but you want to protect the boards of a floor that is laid directly over joists so that they remain strong & safe.
PATCHING YOUR BUNGALOW WOOD FLOOR
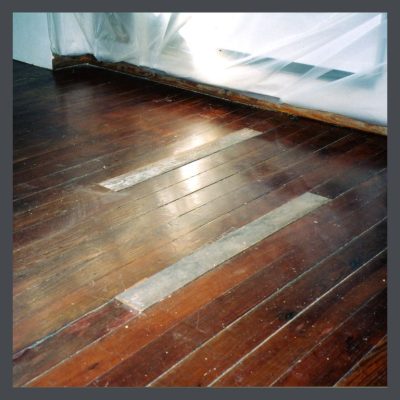 Boards can be replaced so the patching is almost invisible. Ideally, this is done with salvaged, matching, old-growth wood flooring boards. This is best left to a professional who knows how to match wood color and grain. Red oak used to patch a white oak floor stands out badly. Newly harvested white oak used to patch a 100 year old floor also stands out and will be much lighter in color and usually coarser in grain. I commonly see the wrong wood species used to patch floors, and even boards of a wider or narrower width. All floor repairs should be done with tongue and groove flooring materials. When we patch an old white oak floor, and don’t have old salvaged flooring, we select and use only tight, straight grained pieces and stain them after installation for a better match to the historic wood floor.
The most important point is that on a floor with no subfloor, the new pieces need to be placed so that their ends nail to the joists. We have discovered boards or sections of boards hanging in air, waiting for the exactly placed heavy step or the new piano to cause them to fail. Old joists are usually at least 1 & ¾” wide. We end the repair halfway over a joist on both sides so it is supported well.
INSPECTING A BUNGALOW WOOD FLOOR
Here is what I do when I inspect a wood floor that a homeowner wants to refinish. I first notice whether the floors were installed directly over the floor joists, or over a subfloor that is nailed onto the joists. The easiest way to tell this from the floor surface is to look for the butt ends of boards. A floor nailed to the joists will generally have all board butt ends over the floor joists. Joists are normally 16” apart, but can be 2’ or even wider on very old floors. If you look across a floor and see that the butt joints line up in these spaced intervals, there is no subfloor. A wood floor over a wood subfloor will have randomly staggered butt ends, since all boards are laid over a layer of solid wood which creates stability.
Another way to tell whether you have a subfloor, is to go into the crawl space under your house and look up. A wood subfloor under your wood subfloor is normally laid at a 45 degree angle to the wood floor, but can occasionally be at a 180 degree angle. While under the house, see the direction of the floor boards nailed on the joists. If they are the same as the surface wood floor, and are the same width, you are seeing the bottom of the wood floor that has been installed directly on the joists. Subfloor boards were normally around 5 & ½” wide or occasionally wider. Finished wood flooring in older homes was most often 3” or less in width. Another way to tell, from the surface, is that a floor laid over the joists with no subfloor, almost always has much more movement and sag than a floor nailed to a separate subfloor. You also might notice cracks through which you can see daylight!
IS MY WOOD FLOOR TOO THIN TO SAND?
Next, I want to see how much wood remains from the surface of a board, down to the tongue and groove. Newly installed wood floors had around ¼” of wood to the tongue. A wood floor needs at least 1/8” between the surface and the top of the tongue to be sanded. (Some wood flooring professionals often can and will resand a floor that is slightly under 1/8”, but you will have to live with some defects.)
One way I determine this depth is to look for boards with gaps on the sides, wider than the thickness of a credit card. On my hands and knees, I slide a credit card down and measure with my thumbnail about how far down the card goes before it hits the tongue. I check several boards in different areas to get an average depth to the tongue. (If you get a depth over ¼” you may have a section that has no tongue and your card will go down to hit the sub floor.) Oak and other hardwood floors normally have a tongue and groove on all sides of the flooring boards, however, many older softwood floors (like pine or fir) do not have tongue and grooves on the butt joints, just on the two long sides.
It’s best to measure on the long edges of the boards. I will check butt ends if I find no other wide gaps. but know that if my card goes down almost ¾” that there is no tongue here and that there is no way to tell if the floor can be sanded from this spot.
If the thin section of wood above the tongue is thinner than 1/8”, it will often start to crack and split off when sanded, leaving a ¼” wide gap and exposing the tongue. These gaps can be filled if there is a subfloor, but this won’t look great and the filler usually won’t stay in well. If you have a floor laid over the floors with no subfloor, a floor is potentially dangerous when sanded too thin, and your foot may go through the boards.
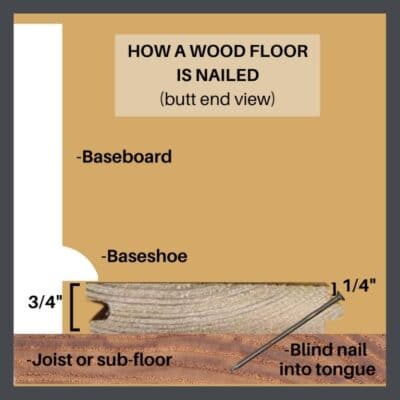 The second method to check wood thickness to determine if the floors can be re-sanded, is to look for exposed nails in the joint between two boards. All wood floors had a tongue and groove on the length of the boards and were generally “blind nailed” by positioning the nail at a slant and nailing on top of the tongue to secure it to the joist or the subfloor. (See diagram.)
When a floor has been sanded many times and there is 1/8” or less from the board surface to the top of the tongue, you will see some exposed nail heads between two boards. These nail holes must be between two boards for this to be a valid test of wood thickness. Here’s why- many older wood floors may have been top nailed to “handle” squeaks or loose boards. Also, in certain areas of the Western United States, old wood floors had no tongue and groove. They were top nailed. These nails are never at the edges of the boards, and you will see a regular, repeating pattern, if you have these floors.
If you do have some nails showing between the boards, a wood flooring professional may still determine your floor can be sanded. Sometimes, these nails can be set down and filled, which will be visible in the finished floor. If small finish nails were used to lay the floor, it looks better to leave them and just sand the floors. You will see these exposed nail heads, but the floors will still look great. I have sanded many floors where homeowners had previously been told they could not be sanded again, to great result. If I find that the floor is borderline to resand (less than 1/8” wood remaining above the tongue and groove) I discuss the options. Usually a refinish can be done that will make the floors look amazing, even if some age related blemishes exist. However, some floors cannot be resanded. I always let a homeowner know what I think can be done, and what he can expect to achieve.
RECOATING YOUR BUNGALOW WOOD FLOOR
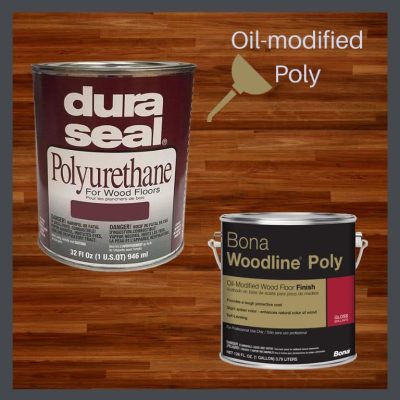 This is a good option for any wood floor that isn’t too badly worn. A recoat allows the finish coats to be renewed for a great improvement in appearance. It works well for a floor that is too thin to be resanded but can be aesthetically improved and be better protected by a recoat. One to two coats are all that is ever needed.
The wood floor must be properly prepared before any coats are done. This is normally done using a light duty stripper designed to remove wax, oils, and other household cleaning products that may have been applied to the floor. Follow the recommendations of your selected finish manufacturer for how to do this, and what product to use. If this step is omitted, the finish often will adhere poorly to the old finish, and either peel off or scratch easily. Once you have a peeling recoat, a full resanding is normally the only solution.
After any cleaning and prep work are done, the floors are normally lightly sanded using a floor buffer and a sanding screen, clog-resistant nylon discs in 80-120 grit. Always follow the grain and direction of the floorboards. The floor is then vacuumed and tacked down well, and is ready for your recoat.
Apply the 1-2 coats per manufacturer instructions for the finish you are using. Also, follow dry time and abrasion instructions if a second coat is planned, and to determine when you can walk on and use the floors.
A recoat doesn’t remove anything in the wood, so you will see any dents, deep scratches, and discoloration on the floor after the recoat is done. If your floor is too thin to sand, a recoat will always improve the appearance, but may not be satisfactory for a badly worn floor that could have been sanded.
CHANGING THE COLOR WITHOUT RE-SANDING
An American Company, Basic Coatings, has developed a product called HyperTone stain. These are water-based floor finishes with tint added, in 14 different colors. They are designed to be used as undercoats followed by 2 coats of their Professional Street Shoe water-based finish. Tricky to use, they can give a blotchy look, but when done correctly, change the color of a floor and look great. Their main drawback is that they will cover up some of the grain and color variation of your original bungalow floors, which is why I recommend these only for a floor that is too thin to resand. But what I most recommend is to leave your floors stain free.
OTHER OPTIONS
Bob Yapp of Belevedere School offers other options. I’m going to let him tell you about them. Bob is a giant in the world of historic preservation & if you want to learn how to restore your own floors, he will teach you!
REFINISHING YOUR BUNGALOW FLOORS: SUMMARY
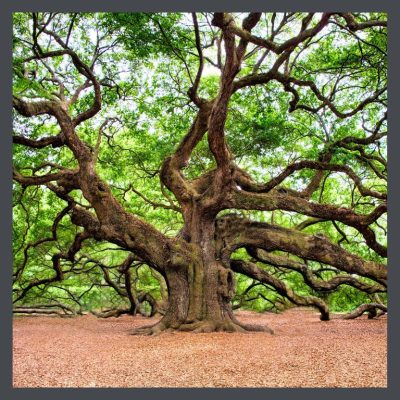 Original wood floors were milled from trees from our old-growth forests. They have a luminous and lively appearance that is not present in wood that is farmed, harvested and milled today. The old trees were often hundreds of years old when they were cut. Grown naturally, they may show as many as 10 times the number of growth rings per inch. In addition to being more beautiful, this wood is more dense and more pest and decay resistant and also shows greater stability, meaning that tt is less likely to warp.
The purpose of finish is to preserve the wood, a soft and porous material underneath. We urge you to forgo sanding if your floor has a good, protective coat on it. If it is showing little wear, we encourage recoating rather than re-finishing. Once your floor is ground down to the tongue and groove, it is effectively over, especially if you have no subfloor to support weight on the thin boards.
A floor that is properly cared for will last several hundred years. The old growth forest will never come again. The supply of wood from them is finite. Let’s protect what we have.
TIP: READ OUR ARTICLE ABOUT WOOD FLOORING FINISH CHOICES HERE.
 STAY IN THE BUNGALOW KNOW!!!
Sign up for our newsletter & receive our FREE E-book, 7 VITAL Things to Do Before You Hire a Contractor.

 In BUNGALOW DETAILS: INTERIOR, author Jane Powell covers every nook & cranny of America’s favorite house.
 You can’t see me. I am shaking my head. But I am somewhat (It’s a very small picture.) calmed by the image I see of the beautiful box beam ceilings in the living room of the Hare House, my 1920 Craftsman in L.A., on page 56.
 The best part is her dissertation on why replacing wood windows is a travesty. She lays out 4 pages, in tiny type, enumerating all the lie$ that are told to encourage people to rip out their wonderful old windows & install, new, hideous ones that you can replace in 15 years when they fail because they cannot be repaired. In her OBSESSIVE/COMPROMISE section, she says that she refuses to compromise.
 Not surprisingly, this chapter is about doors, types of doors, (interior & exterior) door construction, & door hardware-with the same great photos of beautiful door pulls & knobs & escutcheons. She has a number of cool, vintage ads, including one “For homes of refinement.”
![]() BUNGALOW KITCHENS
BUNGALOW KITCHENS![]() BUNGALOW BATHROOMS
BUNGALOW BATHROOMS![]() BUNGALOW DETAILS: EXTERIOR
BUNGALOW DETAILS: EXTERIOR![]() BUNGALOW: THE ULTIMATE ARTS & CRAFTS HOME
BUNGALOW: THE ULTIMATE ARTS & CRAFTS HOME![]() LINOLEUM
LINOLEUM


 A cautionary bungalow window treatments tale.
 Stickley goes on to state, “A material that we use more than almost any other for portieres, (curtain dividing rooms which helped conserve heat) pillows, chair cushions, — indeed in all places were stout wearing quality and a certain pleasant unobtrusiveness are required — is a canvas woven of loosely twisted threads of jute (a very long plant fiber that feels coarse and rough, and is very strong) and flax (a plant, the stem of which is used for making thread, rope, and cloth, and its seeds are used for making linseed oil) and dyed in the piece, — a method which gives an unevenness in color that amounts almost to a two-toned effect because of the way in which the different threads take the dye.
 Any Victorian house worth admiring has lace curtains, but lace was used in windows long before Queen Victoria’s reign. They provide privacy as well as admitting light & can be woven into a myriad of patterns from fussy to the more substantial patterns of the Arts & Crafts Movement.
 For the
 This book, BUNGALOW: THE ULTIMATE ARTS & CRAFTS HOME, was Jane’s most impressive work & it is majestic, with 285 large, glossy pages. She referred to it as “The Big Book of Bungalows” & I’m not certain that she was enthralled with the publisher’s final choice of title.
 Jane introduces the book with some beautiful shots of bungalows by Linda Svendsen, including the impressive staircase of Jane’s bungamansion, the Sunset House in Oakland. Walking up these stairs, so sexy that they made the cover of American Bungalow, photographed by Alex Vertikoff, is an awesome experience. I wish this word had not been appropriated to mean, “like, totally cool” because the huge Doug Fir staircase is truly, “extremely impressive or daunting; inspiring great admiration, apprehension, or fear.” The workmanship is masterful, the dark wood lovely, & when you walk up these stairs, you are cocooned in the world of the wealthy 100 years ago. (Jane mentions, the builder was the owner of a lumber company so he got the wood wholesale, but still.)
 This chapter addresses, what is a bungalow? Well, it originated in India, & ended up in California inspired by a socialist design movement in Britain in the late 1800’s. Explaining that architecture isn’t simple, she answers this question by encouraging us to “Think outside the chicken” -by reading her book & viewing the images, we will just come to KNOW. It worked for me & whenever I feel wobbly, I come back to this book to get straightened out.
 Ah! California, where the bungalow reached its full potential. She visits Northern & Southern California & it is here where we see my house in Eagle Rock.
 This is the longest chapter of BUNGALOW: THE ULTIMATE ARTS & CRAFTS HOME & I don’t want to wear you out, so I’ll cover it in one section.
 The Big Book, (Jane’s name for it) AKA, BUNGALOW: THE ULTIMATE ARTS & CRAFTS HOME, is my favorite because it contains so many images of the house I lovingly restored & left behind in California after my crushing defeat in my fight to save a neighborhood building. Jane & Linda & I spent the day shooting which was fun & exhausting. I waited with great anticipation for the book to be published so I could see my house as well as the other houses in the neighborhood which Jane & Linda had shot several months earlier- dodging the Halloween decorations that had adorned many facades. I was pleased to see my house so well represented & amused by some of the accompanying copy.
 The subject of bungalow window coverings & the resources where they can be found is much debated, but is actually pretty simple. Nobody wants to cover their beautiful window moldings, but blocking the sun is generally desired & blocking passing eyeballs is highly recommended!
 Ann Wallace For Prairie Textiles/melton Workroom
 Arts & Crafts Period Textiles

 Cooper Lace
 Zwick Window Shade Company
 Trimbelle River Studio & Design
 Rejuvenation Hardware
 Historic Houseparts
 Subfloors are made of ¾” boards, between 5”- & 8”, usually installed diagonally to provide further support. They are of a lower quality/grade wood which could have a great number of knots & other blemishes that make it less aesthetically desirable. This is a great article about grading wood from the
  This is based on my 40 years’ experience in seeing and restoring both hardwood and softwood floors. I will add, as a caveat, that flooring sizes and thicknesses prior to about 1935 varied extensively by geographical area. Species used for the finished wood floor also varied, both by area and by cost of the home being built. I am not personally familiar with historic wood floors in New England or the Midwest. I have been told by Midwest contractors, that older homes often had local hardwoods used for their finished floors, since softwood was less available in these states with native hardwood forests. Narrow wood floors, usually ¾” thick and 2¼” wide become the fashion after the invention of the side-matcher in 1885. Prior to this, and also prior to the advent of steam-powered, then electrified sawmills, most homes had wide plank floors, usually at least 1” thick, nailed over the floor joists without a subfloor. These wide plank floors were subject to shrinkage, and developed gaps between the boards. Home builders and home buyers wanted these new-fangled, narrow tongue and groove floors, to differentiate their homes from what had been built before.
 The most common hardwood flooring was White Oak, followed by Maple. Other woods, such as Honduran Mahogany, Hickory, Walnut, Birch, or Beech, were used on occasion. Very fancy homes often had White Oak floors with inlaid multi-species borders.
 Dennis was a 25 year member of the National Wood Flooring Association where he sent his craftsmen for certification & was himself an NWFA Certified Sales Consultant. Popular speaker at Historic Homes Workshop. Supporter of my preservation activities from writing the checks to drying the tears & celebrating the victories. All around wonderful person.
 The original wood of bungalow floors is what is termed,
  Boards can be replaced so the patching is almost invisible. Ideally, this is done with salvaged, matching, old-growth wood flooring boards. This is best left to a professional who knows how to match wood color and grain. Red oak used to patch a white oak floor stands out badly. Newly harvested white oak used to patch a 100 year old floor also stands out and will be much lighter in color and usually coarser in grain. I commonly see the wrong wood species used to patch floors, and even boards of a wider or narrower width. All floor repairs should be done with tongue and groove flooring materials. When we patch an old white oak floor, and don’t have old salvaged flooring, we select and use only tight, straight grained pieces and stain them after installation for a better match to the historic wood floor.
 The second method to check wood thickness to determine if the floors can be re-sanded, is to look for exposed nails in the joint between two boards. All wood floors had a tongue and groove on the length of the boards and were generally “blind nailed” by positioning the nail at a slant and nailing on top of the tongue to secure it to the joist or the subfloor. (See diagram.)
 This is a good option for any wood floor that isn’t too badly worn. A recoat allows the finish coats to be renewed for a great improvement in appearance. It works well for a floor that is too thin to be resanded but can be aesthetically improved and be better protected by a recoat. One to two coats are all that is ever needed.
 Original wood floors were milled from trees from our