This bungalow has more exposed wood foundation lattice than the average house.
“It’s all in the details.”
These are words to live by, or at least to restore and renovate old homes by. It’s the little things that can make an otherwise well-executed renovation miss the mark. You may not know what part bugs you, but you sense they didn’t get it quite right when you look at a historic house. One of those items that often isn’t quite right is the bungalow foundation lattice.
Pier foundations are a common element in historic homes, often used for porches, or, in warmer climates, as the entire house foundation. The piers are an economical way to support the house or porch, but homeowners have always had to infill between the piers in order to keep critters from making their home under there as well. At the same time, the infill works best when it allows adequate airflow under the house or porch, so it is often a material installed interspersed with openings. Sometimes the foundation is infilled with the same material as the piers, such as brick or stone. Other times a different material is used for for bungalow foundation lattice, such as wood or concrete block.
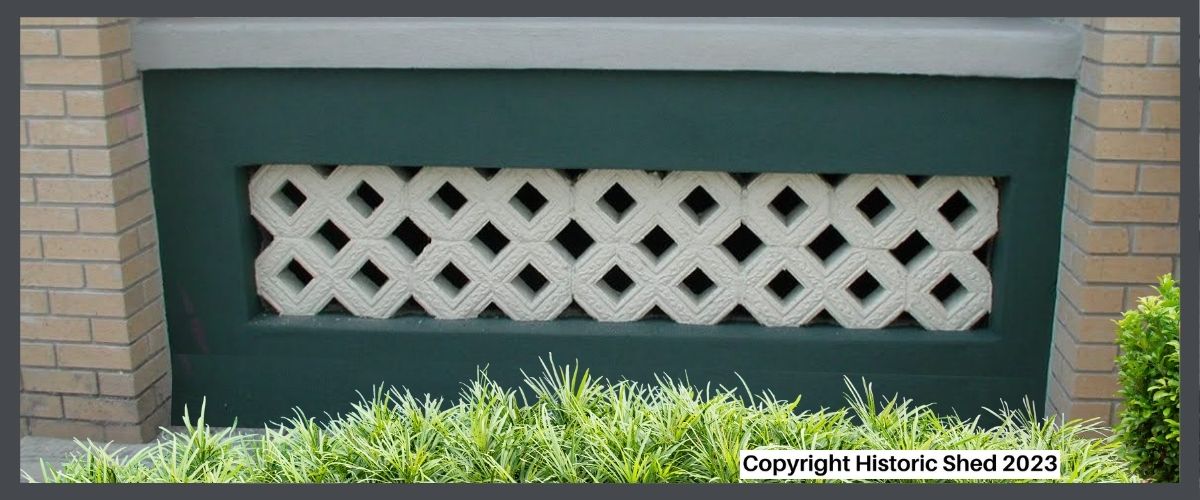
A mixture of stucco over block and open masonry block used to infill between large brick piers for this porch.
If the original lattice is missing, it most likely was originally made of wood. Making wood replacement panels isn’t a highly skilled job carpentry-wise compared to many restoration jobs, but it is time consuming and with today’s wood prices, can cost more than you expect.
Like most old house elements, there are numerous creative and varied ways that infill lattice has been installed over the years, but there are some commonalities that need to be followed for it to look right, regardless of the type of infill used. Here’s my best tips for lattice that is appears appropriate on your historic house.
CHOOSE AUTHENTIC MATERIALS FOR YOUR BUNGALOW FOUNDATION LATTICE
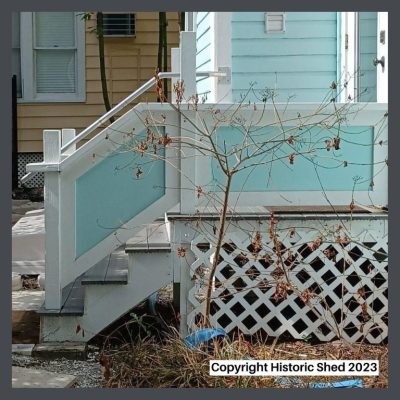
Pretty much everything is wrong with this lattice from material to installation to effectiveness.
It seems obvious to say you should avoid plastic anything on a bungalow, but how many times have you seen bright white plastic lattice used on historic homes? It jumps out in its bright white plastic-ness from across the street, so it is hard to miss. Yes, it’s ready made and inexpensive and easy to work with, but aside from the aesthetics, it gets brittle and breaks with every rock the lawn mower throws at it. And the lattice is spaced with gaps that really don’t keep much out. It’s basically the cartoon version of foundation lattice.
Clearly, the plastic lattice panels are supposed to mimic wood, which is what most missing lattice was made from (masonry infill usually survives the test of time better). Often, there are premade wood options if you don’t want to build lattice from scratch, which are less flat and flexible than the plastic option. And they are pressure treated, as any wood lattice should be for longevity. However, the premade lattice is thinner and spaced further apart than historic precedents, so the ideal replacement panels should be custom made of real 1x pressure treated wood. And either custom or premade lattice panels need to be installed correctly.
PUT YOUR BUNGALOW FOUNDATION LATTICE IN A FRAME
Too often, people install the premade lattice panels directly to the piers, making it ugly and wobbly. Ideally, lattice panels should be set in a wood frame both for stability and to make it easier to attach to the piers. Built correctly, the frame will be in front of the lattice itself, adding some depth to the panel as well.
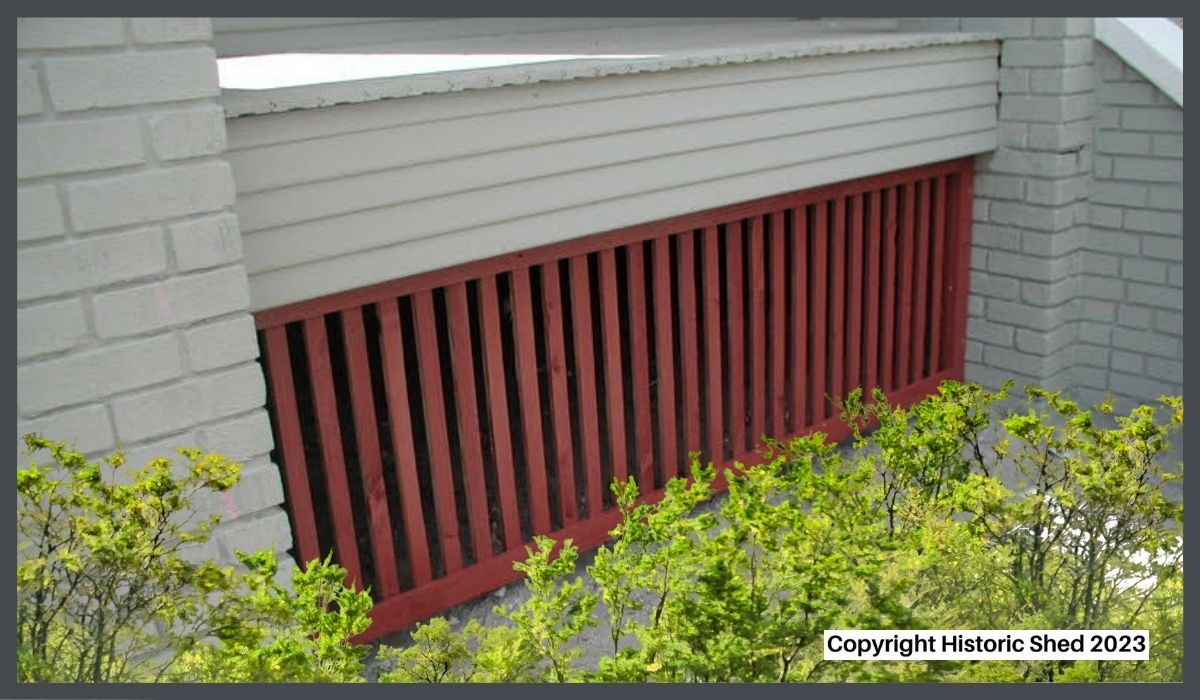
Having the frame on all four sides also allows you to attach screening to the back of the lattice panels easily. Most building codes require a maximum size gap in the foundation openings which is quite small. Attaching screen or welded wire mesh to the back of the lattice allows you to invisibly meet the requirements without impacting the design of the lattice itself.
RECESS THE LATTICE FROM THE PIERS
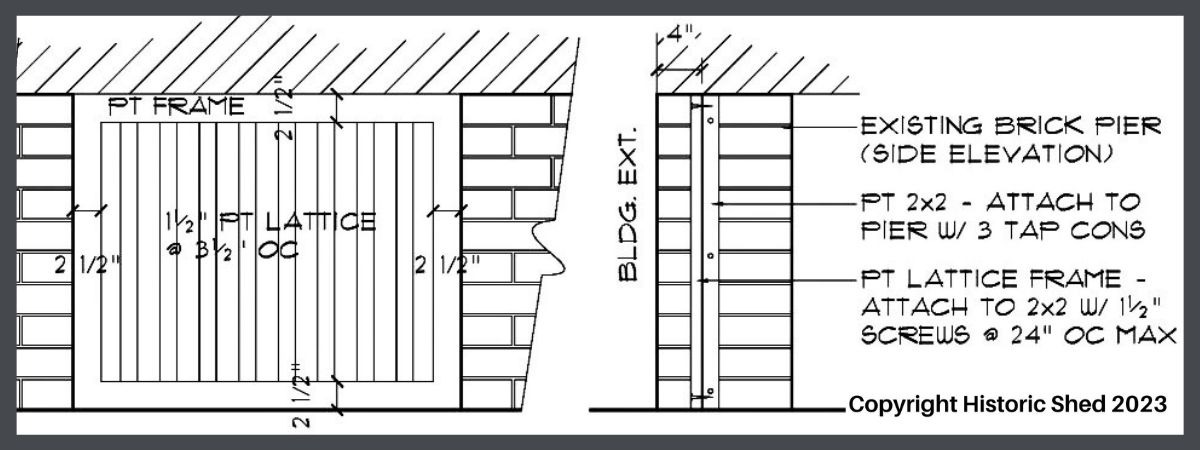
Bungalow lattice installation detail.
When installing wood lattice panels between piers, people are often tempted to attach it to the front of the piers, or even across them completely. Yes, it seems easier, but that is not how it should be done. Rather than trying to attach the panels directly to the piers, instead install 2×2 pressure treated nailers on each pier, set about 4″ from the front face of the pier, then screw the lattice to the nailers. This way, it is easy to remove panels for access under the building at all points without repeatedly drilling into the brick. Here’s a detail below:
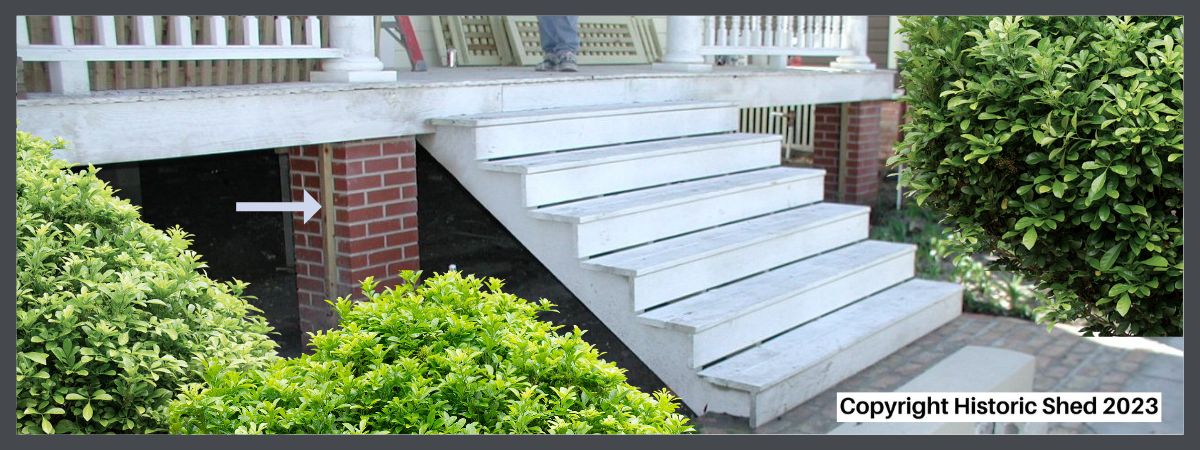
Pressure treated 2″x2″ nailers attached to the piers, ready for lattice installation
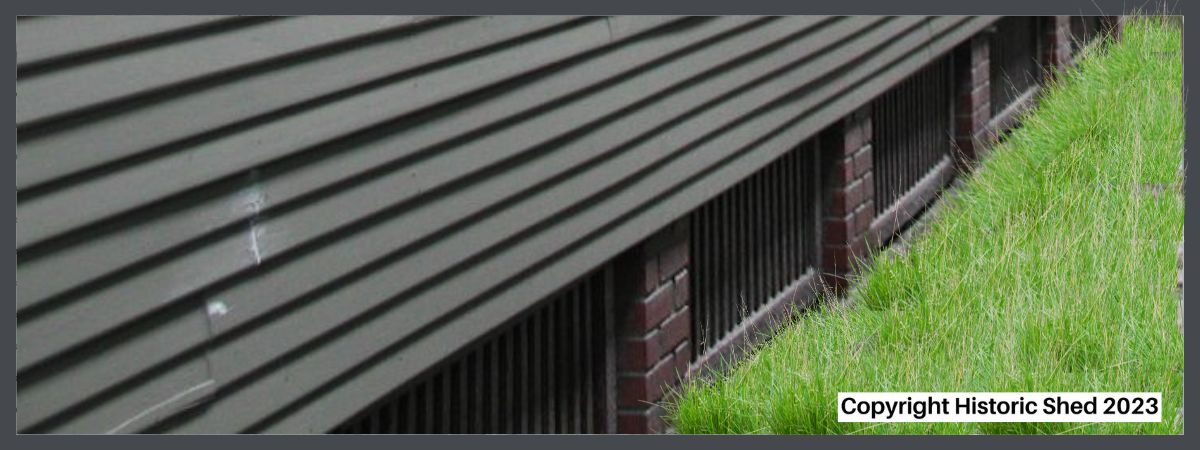
Recessing the lattice panels allows the strength of the piers to show through.
CHOOSE THE RIGHT STYLE OF LATTICE FOR YOUR BUNGALOW
If you either have remnants of the original lattice at your house or historic photos, then it’s easy to know what style replacement lattice panels to build. However, if you are in the same situation we are with our current 1911 house, there is no original lattice left and not a single photo to be found so far. In that case, there are three common lattice configurations that will likely work. In the illustration below, I consider the simple vertical lattice to be easy to build and uses the least wood, so I specify it quite often. The checkerboard design uses twice as much material, but is also simple to build. And it is much stronger for tall openings. I find both styles appropriate for most bungalows in the 1910s and 20s. Similarly, the diagonal panels are strong for tall openings and use more material than the vertical design but are generally more appropriate for homes pre-1910.
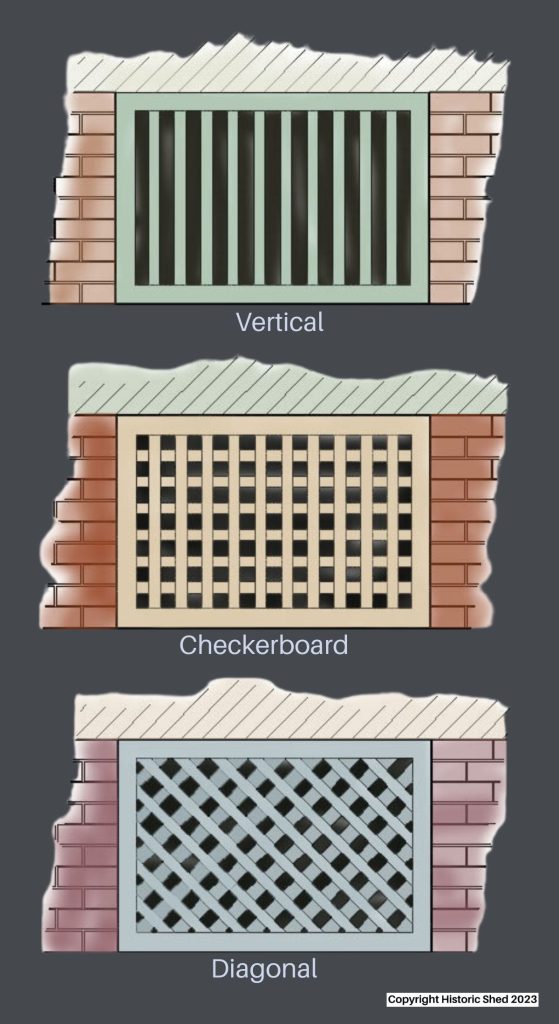
The most common styles of foundation lattice.
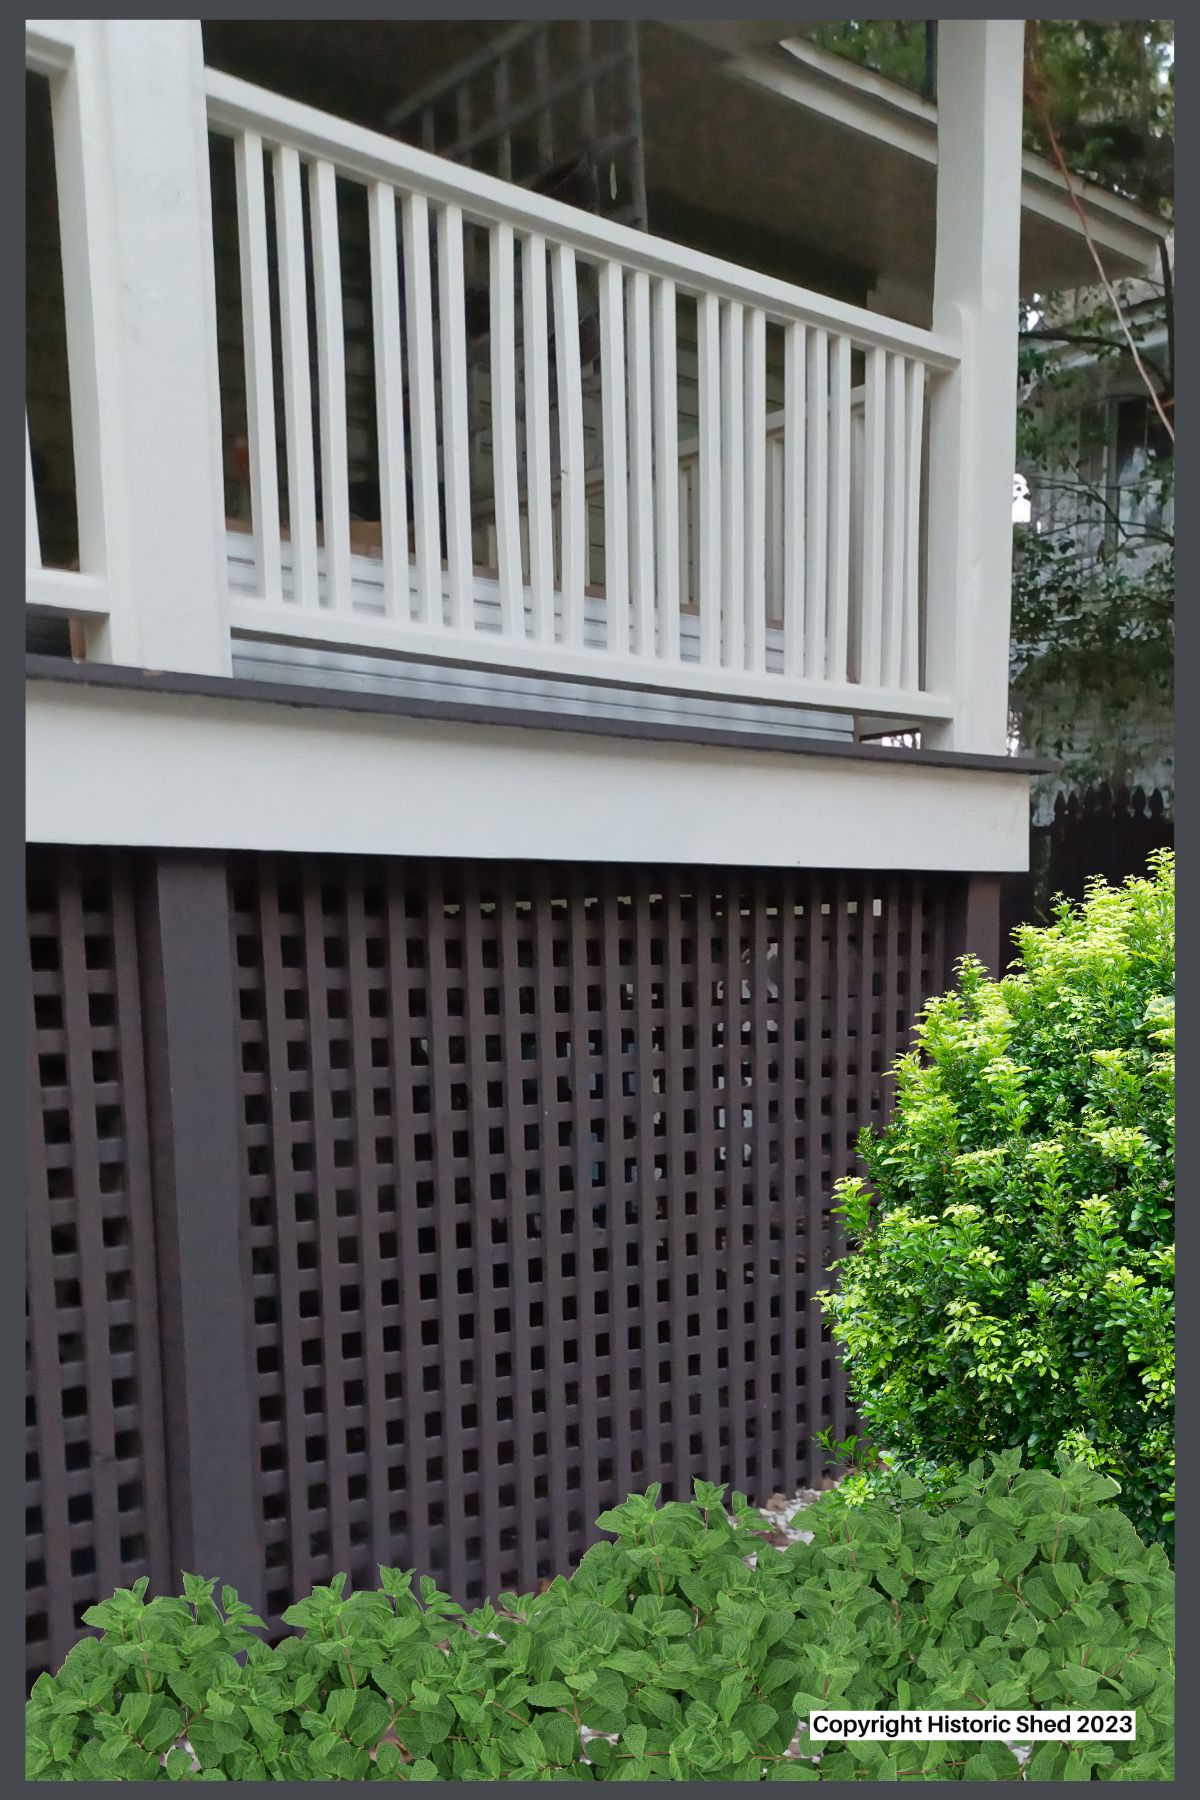
Very tall porch openings are best served with checkerboard lattice panels rather than vertical for strength.
CHOOSE A COLOR FOR YOUR BUNGALOW LATTICE
When choosing bungalow paint colors, I usually recommend as dark color for the porch deck, window screens, and foundation lattice. The dark color on the lattice makes the foundation feel more grounded and (hopefully) shows less dirt. Of course, your house color scheme may work best with a light color.
GET INSPIRED & HAVE SOME FUN!
So hopefully this gives you some ideas beyond white plastic lattice for infilling between your bungalow piers. And if the simple styles shown above aren’t enough for you, there is plenty of precedent for some much more interesting options. Perhaps there are some fun examples of lattice creativity in your historic neighborhood. Here’s a couple I’ve found worthy of photographing to inspire me over the years.
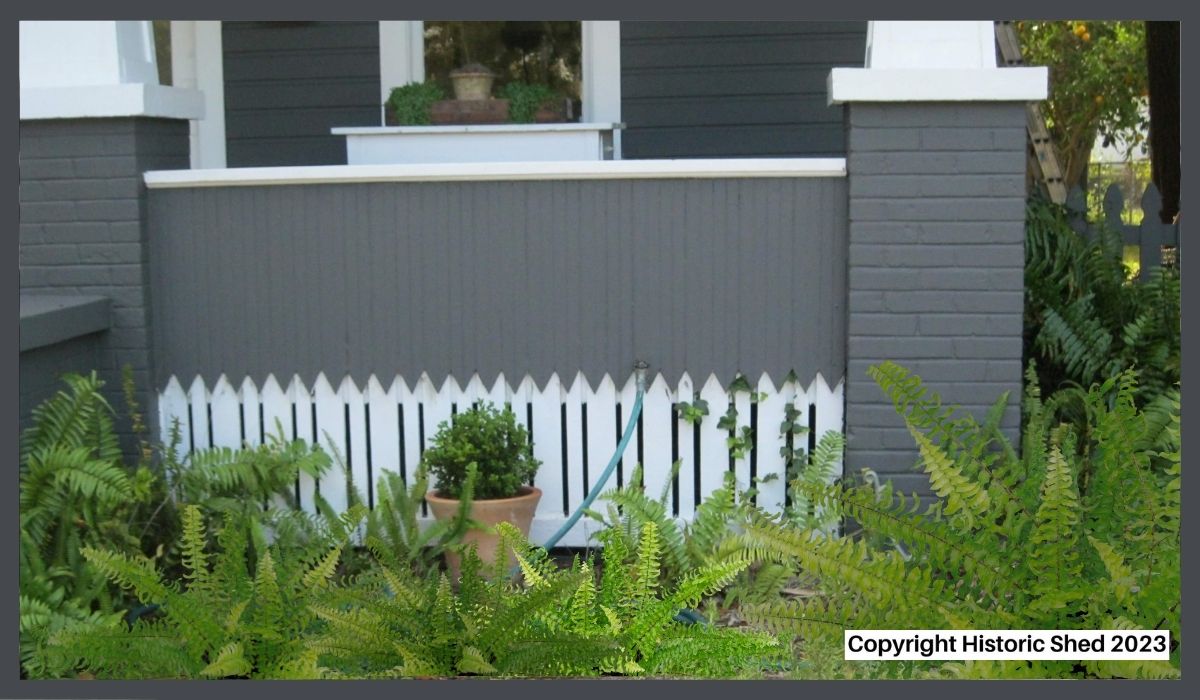
This lattice is recessed behind the porch beadboard which is cut to make it look like a picket fence. I find it a very darling detail!
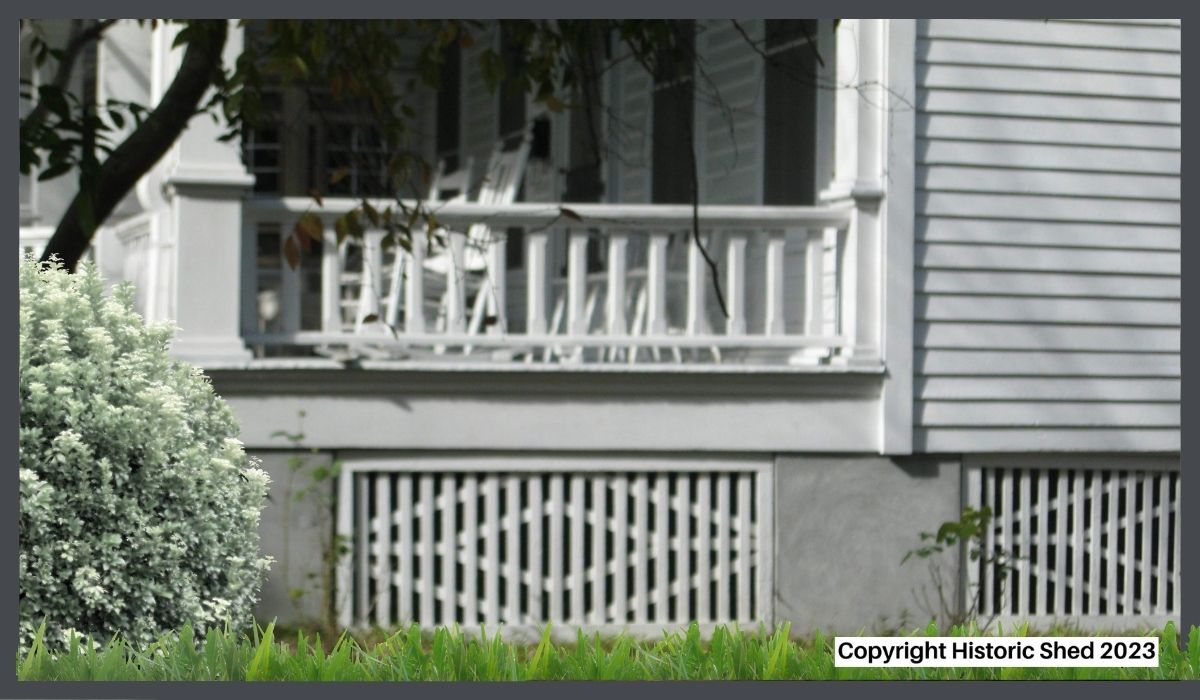
The image isn’t that great but the lattice is so lovely I decided to include it. Just squint a little.
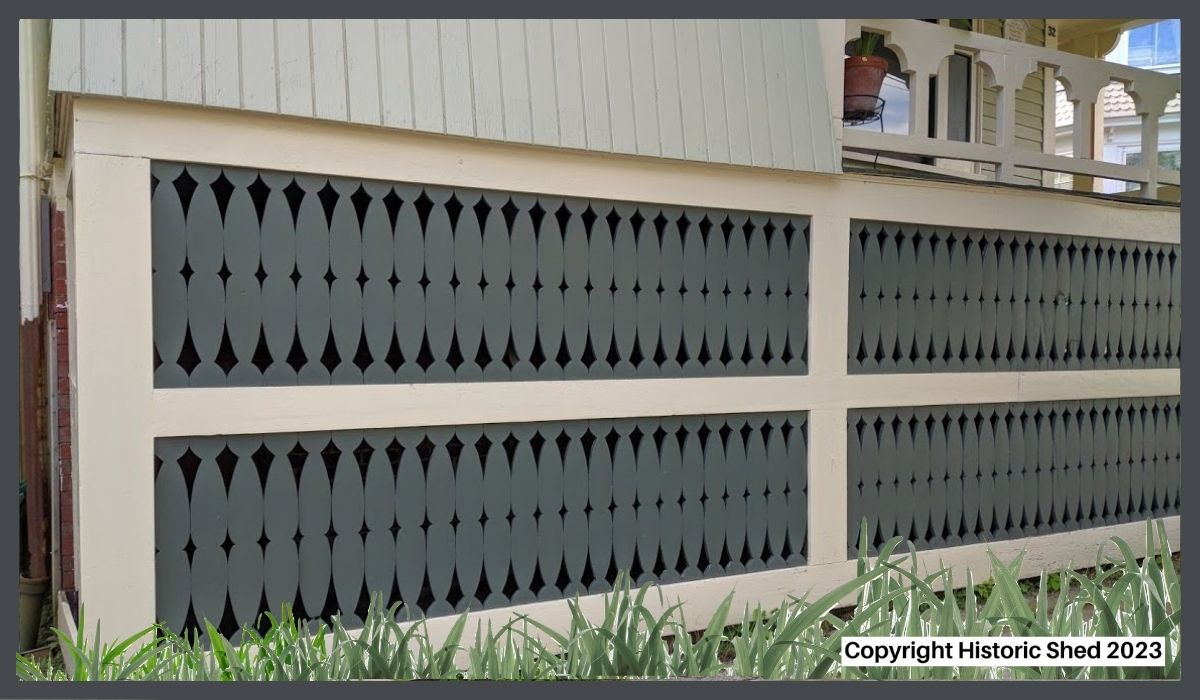
Lattice designed by a true craftsman. And I adore that porch railing, too!
TIP: Read Jo-Anne’s article WHAT’S A BUNGALOW ANYWAY to learn more HERE!
![]()
 This article was written by Jo-Anne Peck of Preservation Resource, Inc. & Historic Shed. Jo-Anne is a historic preservation professional with a degree in Building Science, a Master’s of Fine Arts in Historic Preservation & a licensed Florida Building Contractor with over 25 years experience in preservation. She has kindly provided these photos & this information based on her vast knowledge of bungalows.
 STAY IN THE BUNGALOW KNOW!!!
Sign up for our newsletter & receive our FREE E-book, 7 VITAL Things to Do Before You Hire a Contractor.



0 Comments