by Dennis Prieur, a guy who has seen hundreds of historic bungalow subfloors as well as those in other styles of other historic houses, 40 year veteran of the wood flooring industry. A Popular speaker at Historic Homes Workshop he has supported me in my preservation activities from writing the checks to drying the tears & celebrating the victories. An all around wonderful person.
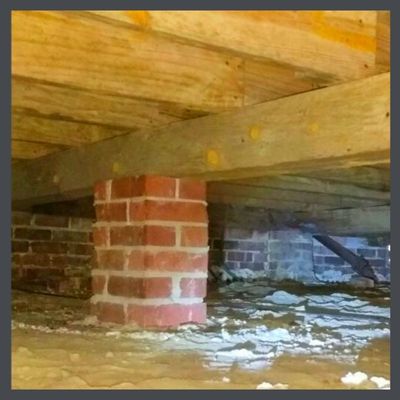
 Let’s go from the bottom up. Your house is built over a crawlspace. You have a series of masonry piers lifting your bungalow off the ground. On top of those you have sill beams which are “timber-sized” rough lumber: 3” X 6”, 3” X 8”, or 4” X 6”, 4” X 8”, and on top of those you have the flooring joists which span the open space, between the beams. All together, they carry the weight of your house, your furniture, your bathtub & appliances, your family, your grand piano, your 200 lb. mastiff & your weight set.
Over that, maybe your historic bungalow has a subfloor and maybe it doesn’t. A cost-cutting measure by builders, more modest homes tend to lack subfloors while the grander bungalows generally have them. So, your floors may be installed directly over those joists. You may notice that you can see the ground through the cracks in your floor. That’s a big clue that you have no subfloor!
If you are willing to go under your house with a flashlight, you will find out quickly. The floorboards you see under the house will be running the same direction as those that you see inside the home, because they are the same boards.
CHARACTERISTICS OF A HISTORIC BUNGALOW SUBFLOOR
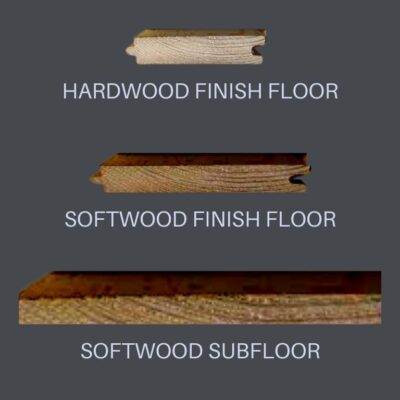
 Subfloors are made of ¾” boards, between 5”- & 8”, usually installed diagonally to provide further support. They are of a lower quality/grade wood which could have a great number of knots & other blemishes that make it less aesthetically desirable. This is a great article about grading wood from the National Wood Flooring Association. In the West, sub-floors are generally Douglas Fir or possibly Redwood and in the East, indigenous Pines, all of which are softwoods.
Subfloors boards are not tongue and groove. They were laid side-by-side and top-nailed to the joists normally with gaps of at least ¼” between each board. This means that if they have gaps, (which they probably do) you are going to have a breezy floor and you will see the heads of those nails.
In earlier floors, this is how the main floors were constructed. Often, houses were built from the trees growing on the property. Then in 1852, a machine called the side-matcher was invented which allowed tongues and grooves to be cut into the sides of the boards so that they could be installed closely together. This invention provided the added benefit of allowing nails to be put in at the sides so that they didn’t show on the top.
What this means is that, sure, you can finish your historic bungalow subfloor as a real, finish floor, but it is a low grade wood & won’t have the beautiful graining of the finish woods & will show more knots & other imperfections. It probably will have more gaps, & you’re going to have to deal with the nail heads. So what can you do if your historic bungalow wood floor is only a subfloor? Well, you can put in linoleum or tile over it if it’s a kitchen, laundry or bathroom area, or you could always paint it. If you choose to put wood over it, that subfloor will provide you with a stable substrate and keep your toesies warm!
I want to mention one, relatively rare, subfloor issue I have seen quite a few times as a hardwood flooring contractor. Sometimes a bungalow was built with softwood tongue and groove finish floors, usually Douglas Fir or Heart Pine. Then, as an upgrade, thinner hardwood flooring was installed over these softwood tongue and groove floors. In California this hardwood was usually ⅜” thick by 2” wide, and in Florida where I worked later, ½” thick by 2” wide. All homes where I have seen this done had the original softwood tongue and groove floors laid directly over the joists, making the softwood tongue and groove flooring into a subfloor, with the addition of the hardwood layer.
WIDTHS AND THICKNESSES OF ORIGINAL TONGUE & GROOVE FLOORS
 This is based on my 40 years’ experience in seeing and restoring both hardwood and softwood floors. I will add, as a caveat, that flooring sizes and thicknesses prior to about 1935 varied extensively by geographical area. Species used for the finished wood floor also varied, both by area and by cost of the home being built. I am not personally familiar with historic wood floors in New England or the Midwest. I have been told by Midwest contractors, that older homes often had local hardwoods used for their finished floors, since softwood was less available in these states with native hardwood forests. Narrow wood floors, usually ¾” thick and 2¼” wide become the fashion after the invention of the side-matcher in 1885. Prior to this, and also prior to the advent of steam-powered, then electrified sawmills, most homes had wide plank floors, usually at least 1” thick, nailed over the floor joists without a subfloor. These wide plank floors were subject to shrinkage, and developed gaps between the boards. Home builders and home buyers wanted these new-fangled, narrow tongue and groove floors, to differentiate their homes from what had been built before.
SOFTWOOD BUNGALOW FLOORS
Softwood tongue and groove floors were generally ¾” thick by 3¼” wide. Since softwood floors were all locally milled in the states where the homes were built, shipping costs were not a factor, so I have never seen a softwood floor in anything but a ¾” thickness. Milled from species indigenous to the local area, they were considered less prestigious than hardwood floors.
& THE HARDWOODS
By the 1890s, in areas I’ve worked in, the most common size for hardwood floors was ¾” thick by 2¼” wide- a full inch more narrow than softwood. Most hardwood floors were milled and then shipped from the Eastern US area. Shipping was very expensive, and boards were cut thinner to lower costs, so most homes in far-away California, had ¾” thick and later ½” thick hardwood floors, all 2” wide. However, the largest homes had the thicker ¾” by 2¼” wide floors, since cost wasn’t an issue.
Many homes in Northern California had ⁵⁄₁₆” by 2” hardwood floors milled without any T & G. This were top nailed, normally with 2 small finish nails per board every 18”-24”. I am clueless as to why this was!
MOST COMMON SPECIES USED FOR BUNGALOW FINISH FLOORS
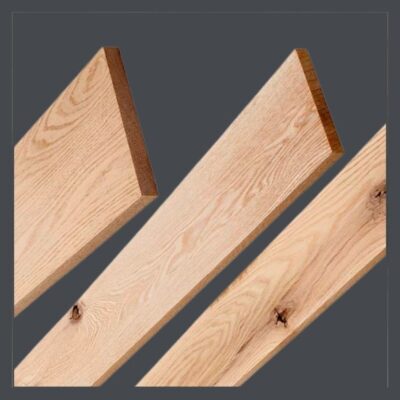
 The most common hardwood flooring was White Oak, followed by Maple. Other woods, such as Honduran Mahogany, Hickory, Walnut, Birch, or Beech, were used on occasion. Very fancy homes often had White Oak floors with inlaid multi-species borders.
Douglas Fir was the predominate softwood floor in the Western US areas, and Heart Pine in the East, for both finish & subfloors. I‘ve been told that Eastern white pine was often used in New England, where it was native.
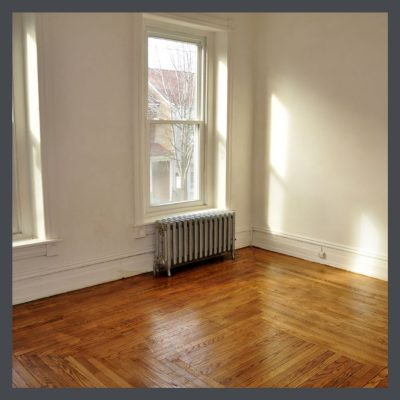
I have never seen any of these hardwoods being used as a historic bungalow (or any other period) subfloor. So, if you’re seeing these, you’re not looking at a sub-floor. It’s a finish floor. Yay!!!
TIP: IF YOU HAVE WOOD FLOORS IN YOUR HOUSE, READ ALL THE ARTICLES IN OUR FLOORING SECTION HERE.
 STAY IN THE BUNGALOW KNOW!!!
Sign up for our newsletter & receive our FREE E-book, 7 VITAL Things to Do Before You Hire a Contractor.


0 Comments